You must configure a database
adaptor to use Magic Link
authentication in Auth.js.
More control over design
You can use Loops’ design editor to create (and
then easily edit) beautiful transactional emails instead of having to code
them with HTML.
Create a transactional email
In Loops, create a new transactional email, which will be sent to your users when they attempt to log in. Here is where you define your email’s subject and sending details like From address and Reply to address. (Click the> button to reveal all the sending options.)
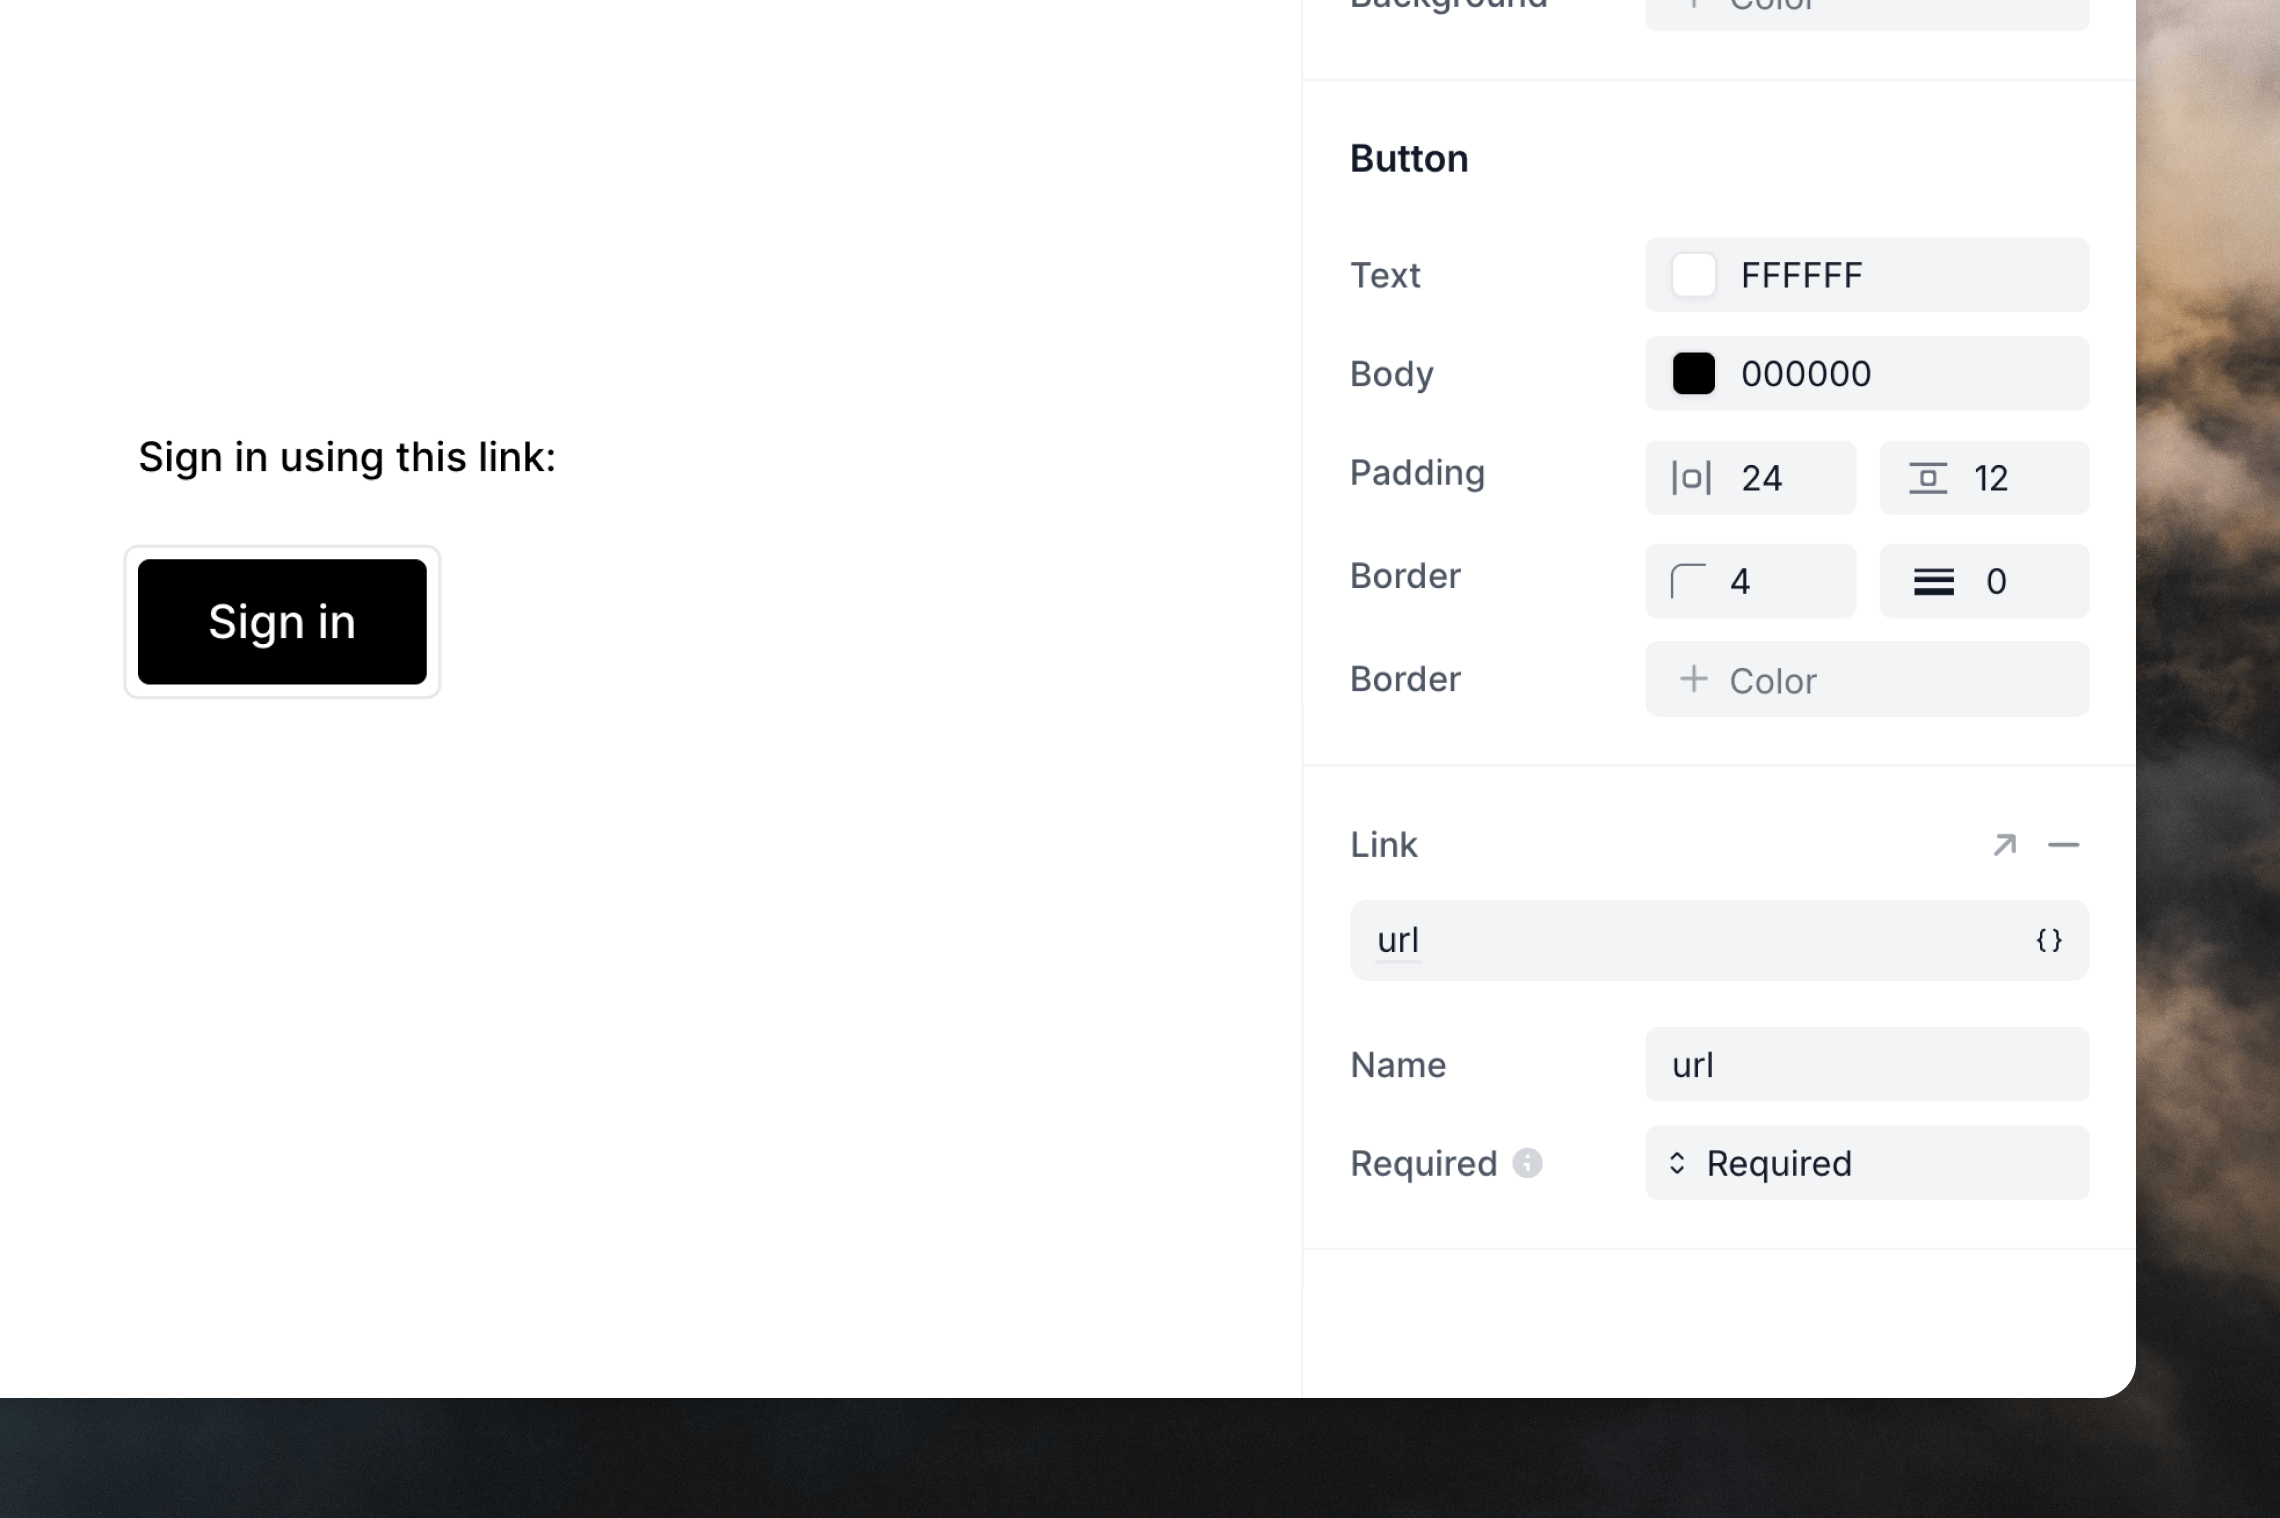
Then you can create your email in the editor. We recommend creating a stylish but basic email for magic links, to help with deliverability. Use the style panel to customize the design.
To add the Auth.js magic link in your email, add a data variable named url. When the email is sent, each user’s magic link will be inserted wherever you add the variable.
You can add data variables as URLs to text, buttons and images. In this example, we’re adding the url data variable into the button’s link field.
Set up Loops in your Auth.js Project
Environment variables
To use the Loops provider in Auth.js, you’ll need to add two environment variables to your project.The first is an API key. You can generate or copy one from Settings -> API.The second is the ID of your transactional email. Go to the email in Loops and click on to the Publish page. Here you will find the Transactional ID.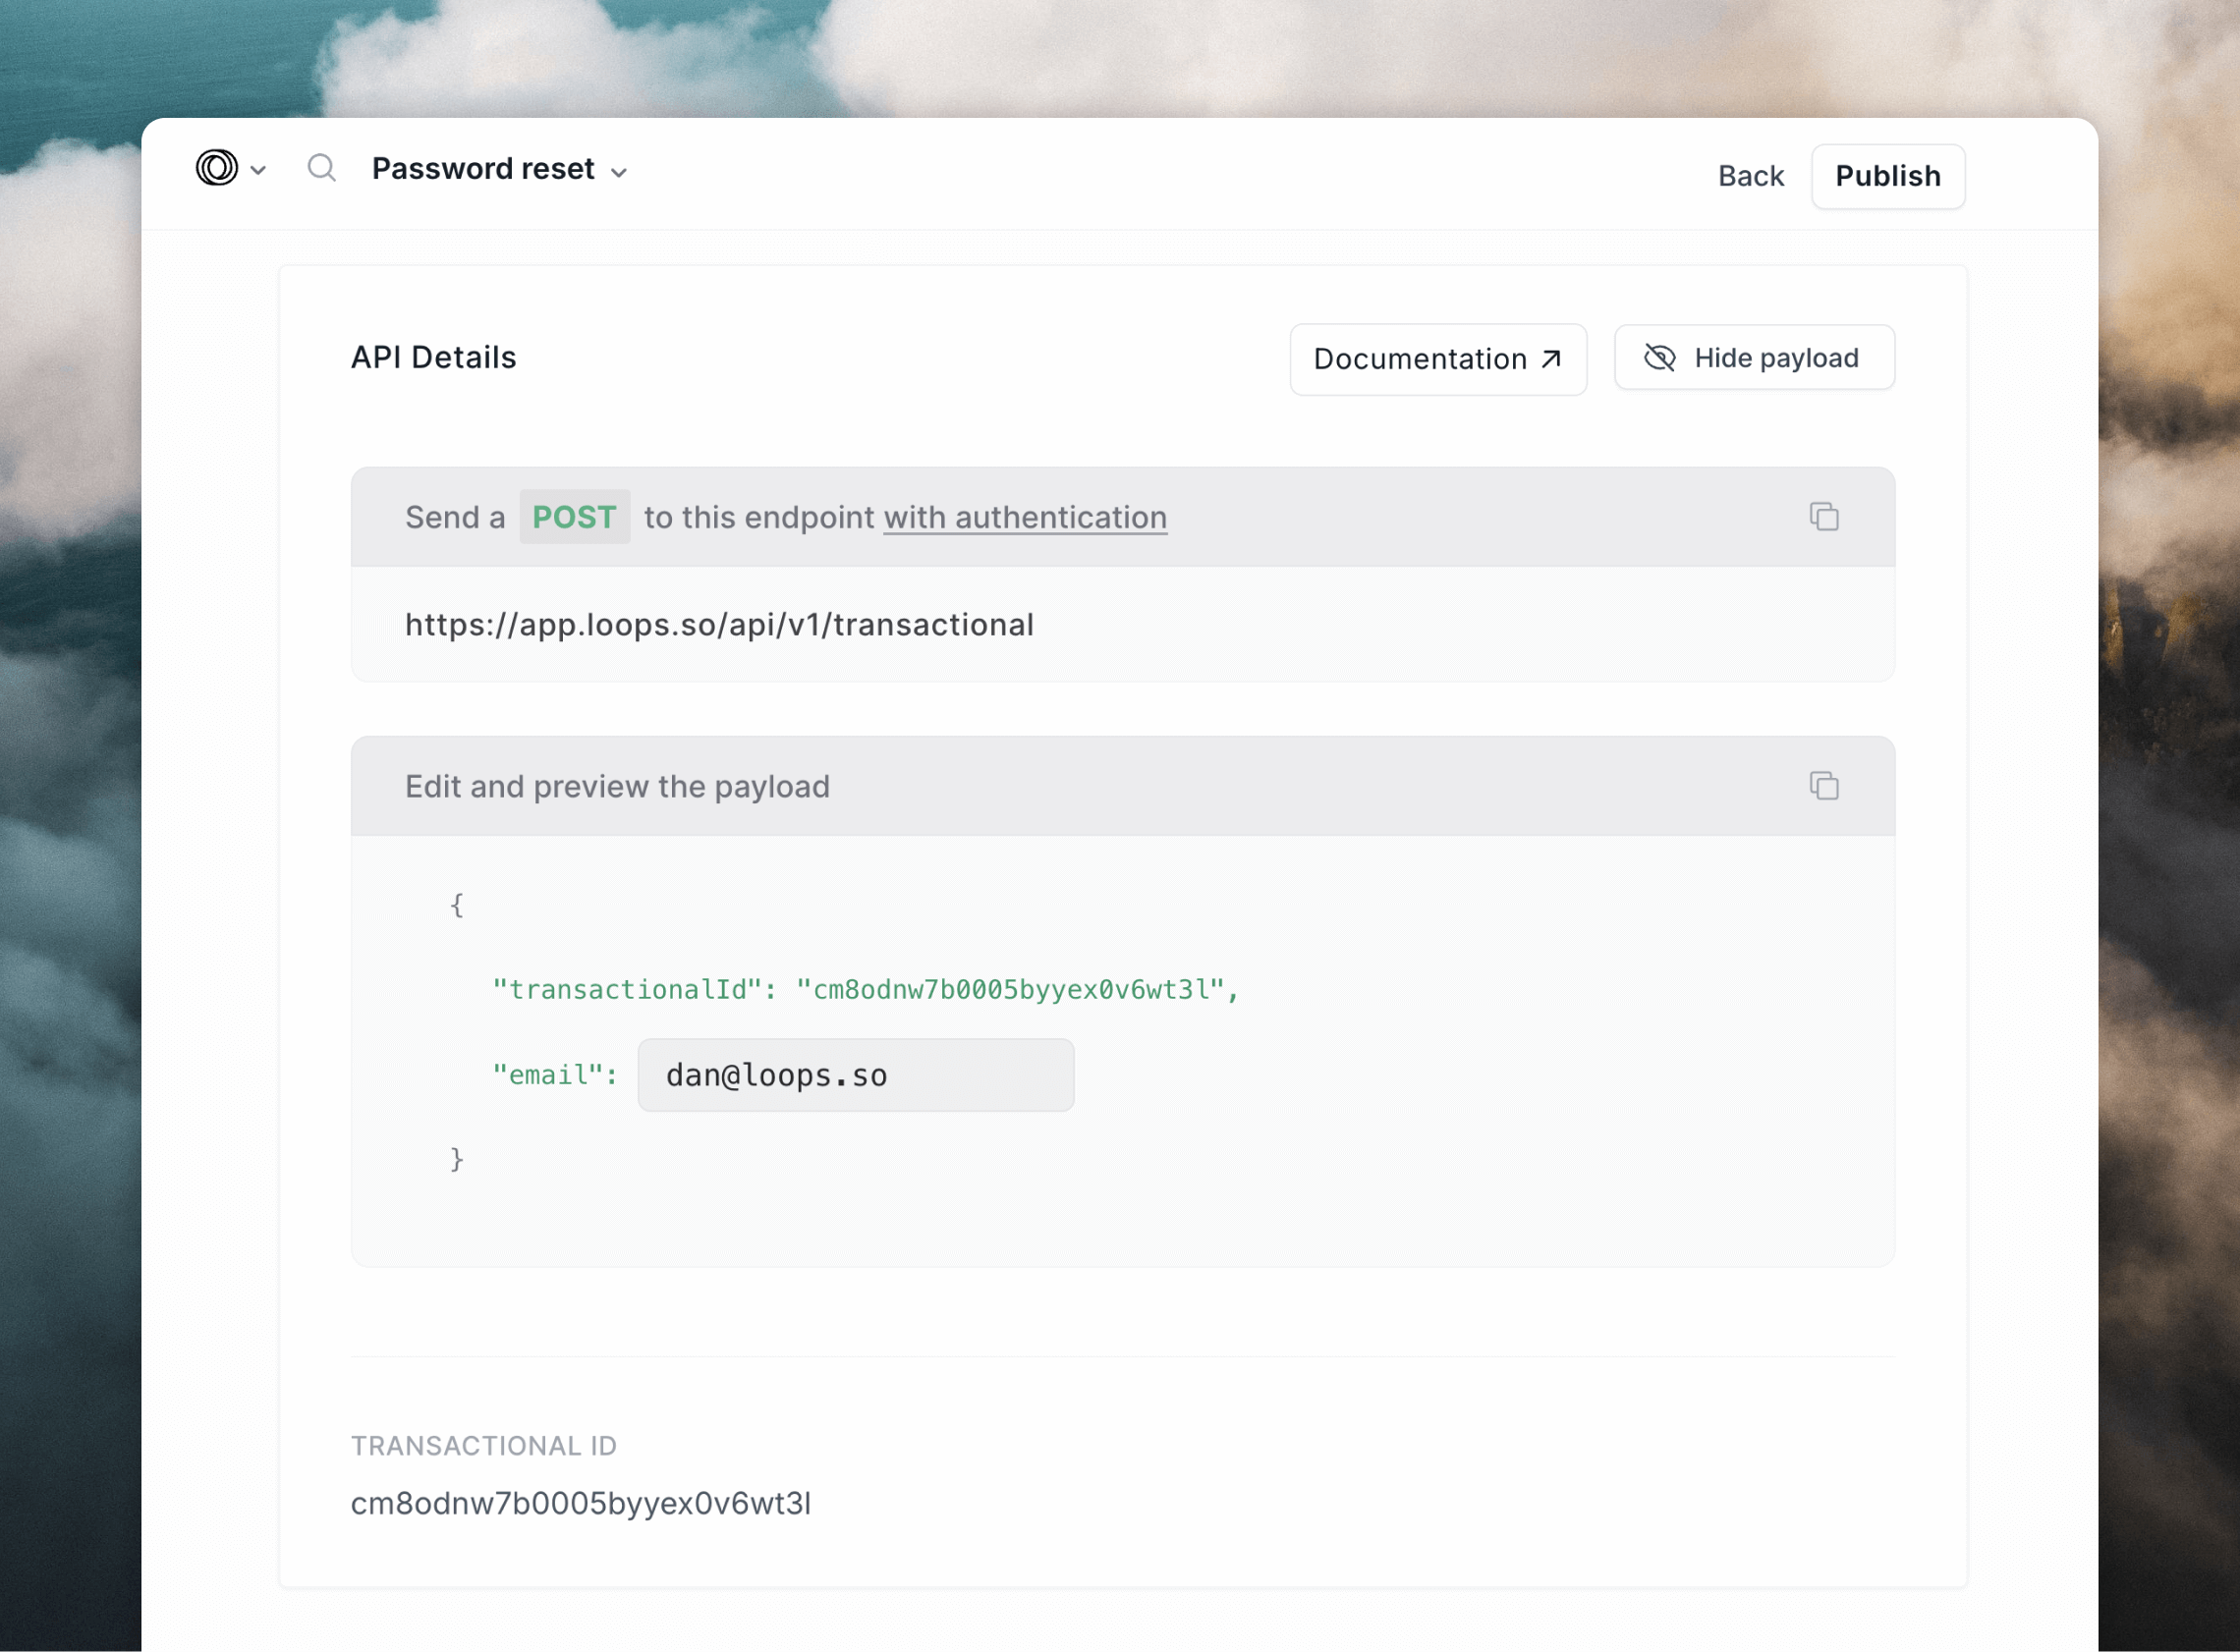
.env file: