Set up a welcome email sequence for new Ghost members
Send automated email sequences to new Ghost subscribers using Zapier and Loops.
This guide helps you set up email sequences that get sent to all new subscribers to your Ghost site.With Loops, you can set up sophisticated sequences called workflows, allowing you to send a range of welcome emails to your members over a period of time.Using Zapier, we can automatically add every new member who signs up on your Ghost site to your Loops audience.
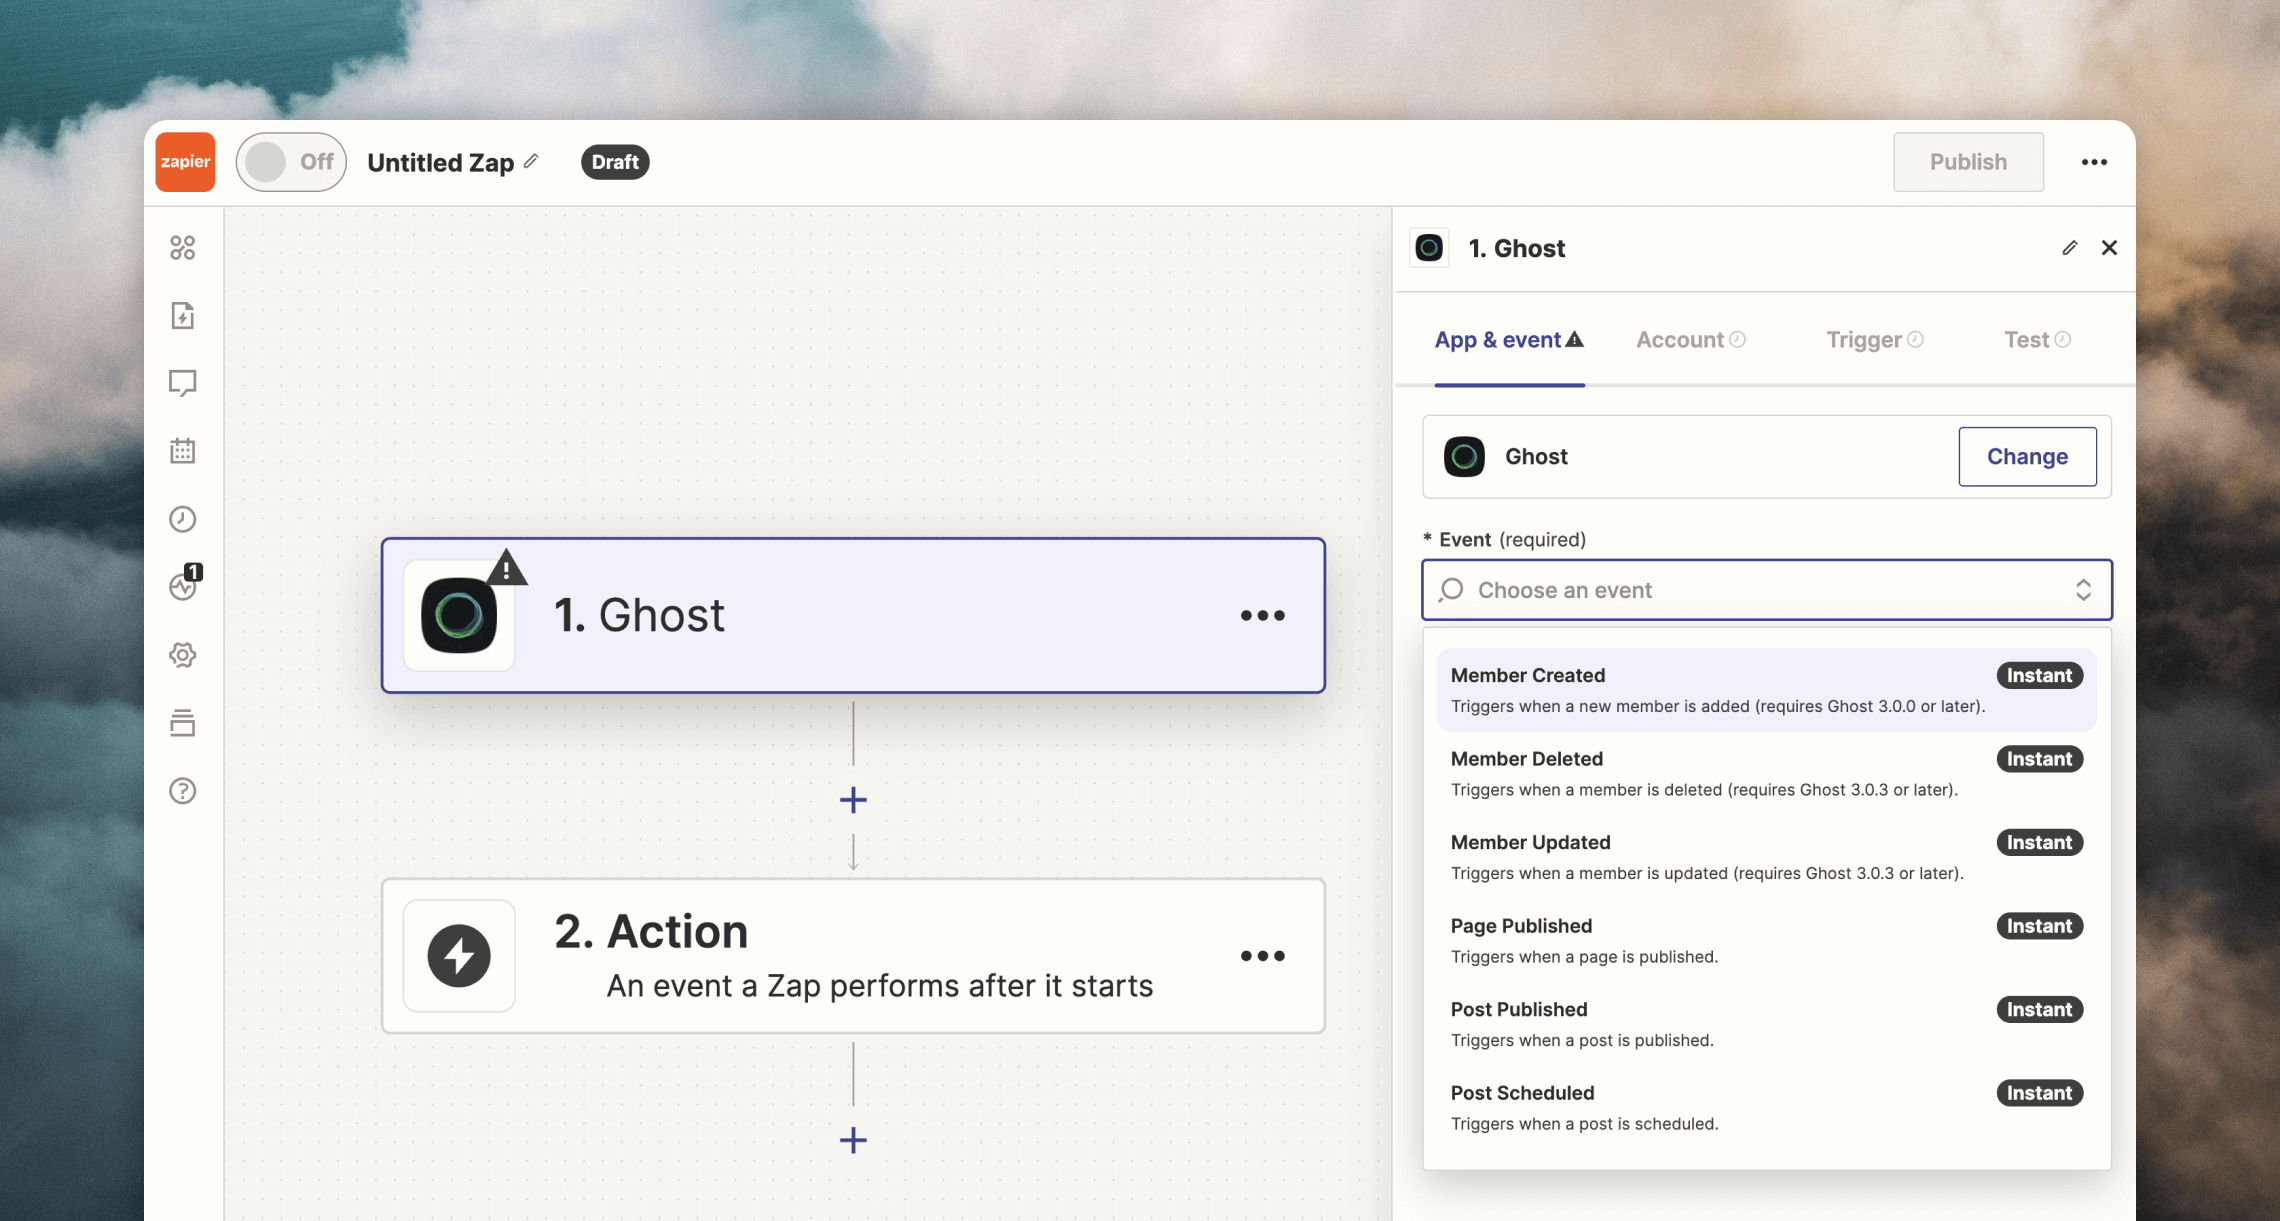
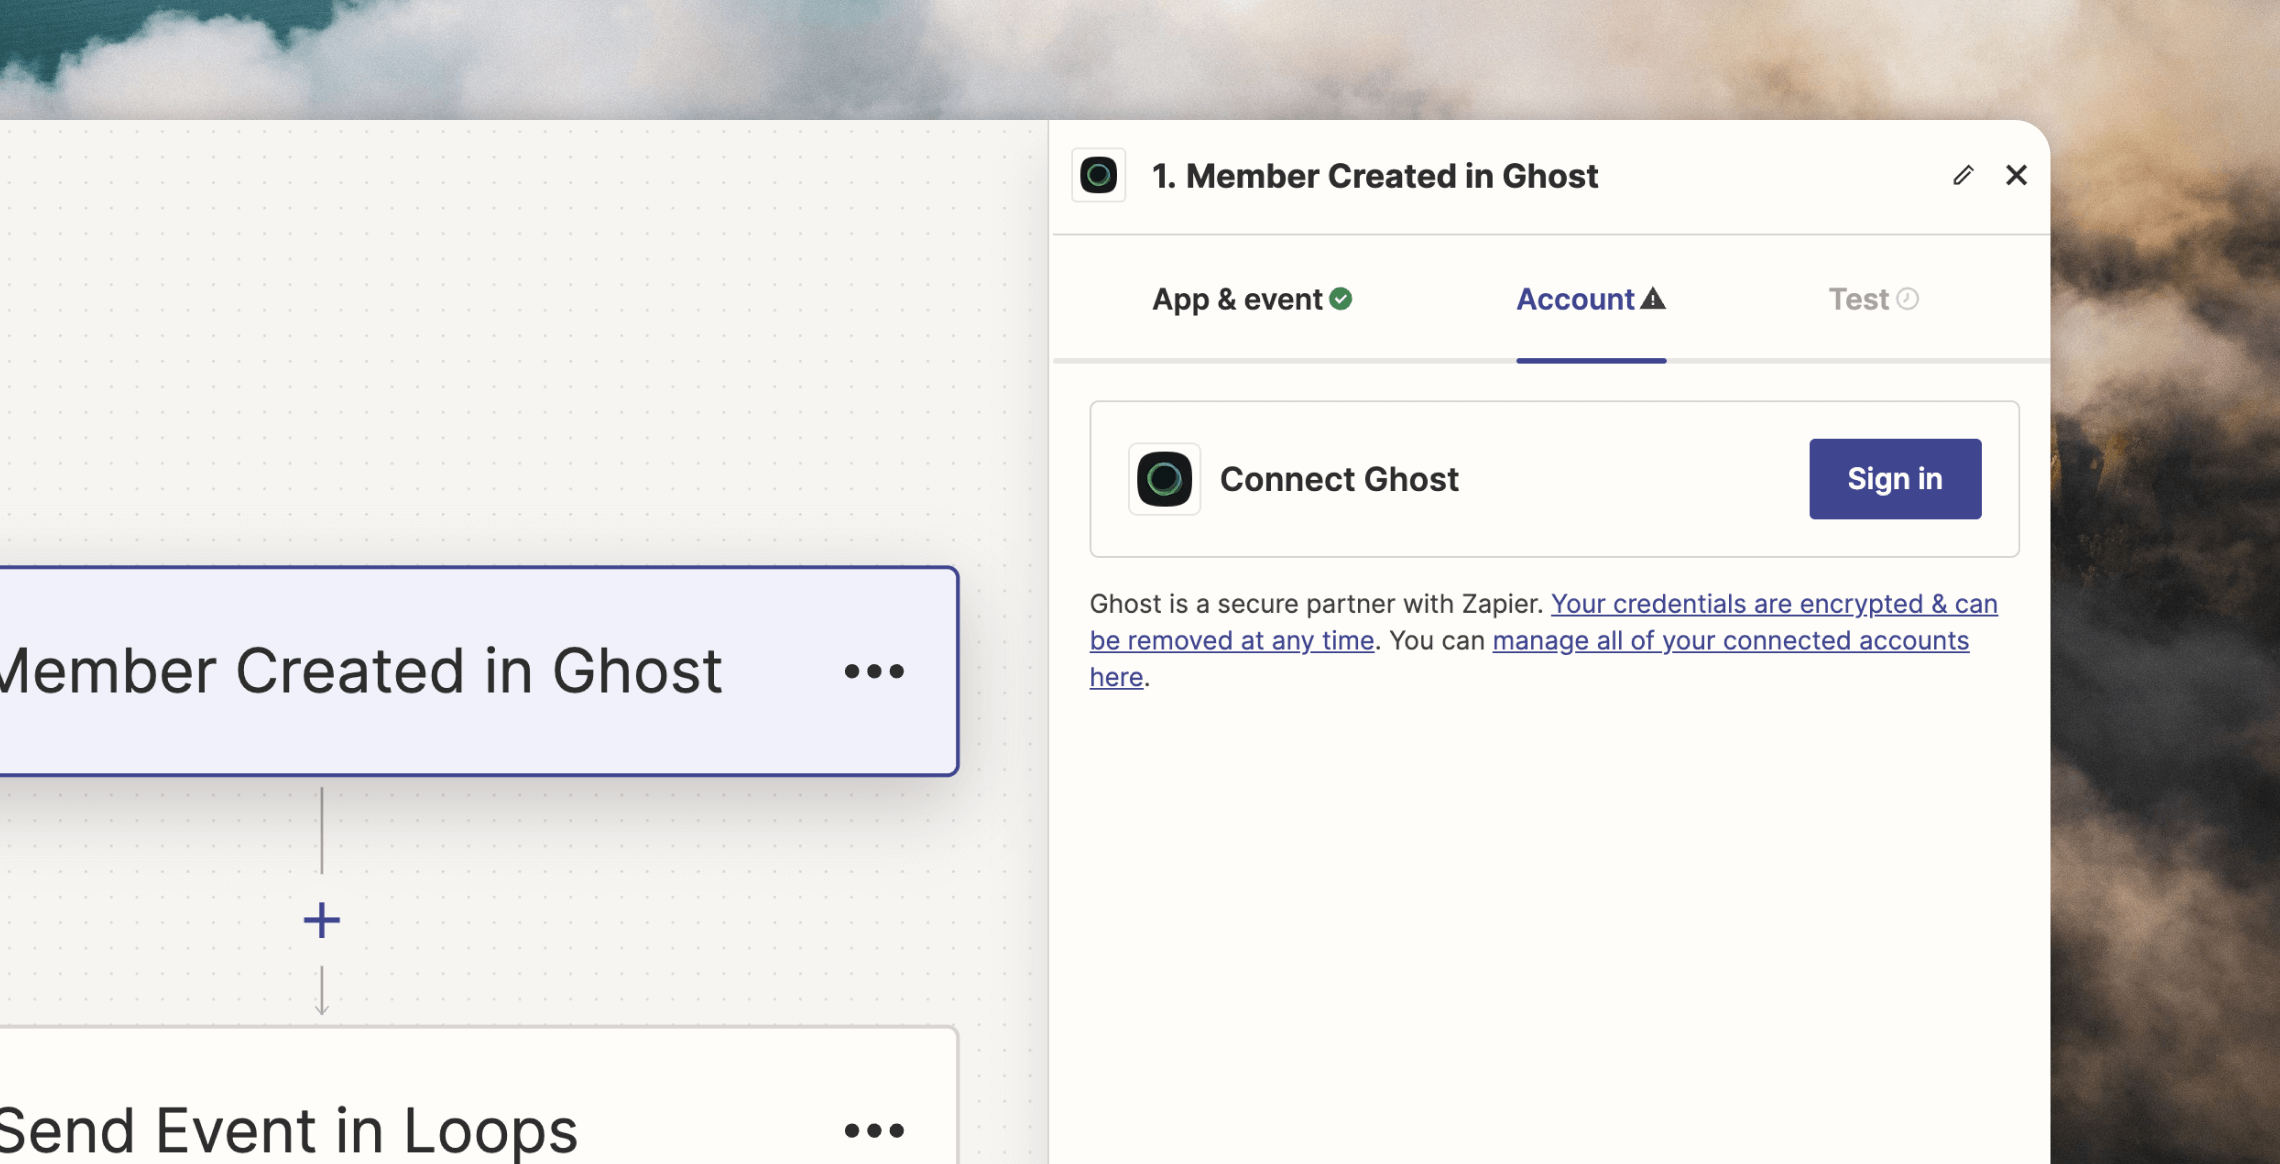
The first step is to connect your Ghost site to Loops using Zapier.Sign up to Zapier and create a new Zap using Ghost’s Member Created Trigger.This creates an automation that will trigger every time a new member is created in Ghost. Zapier will then send the contact’s information over to Loops.Now connect Ghost from the Trigger by clicking Account then Sign in and then pasting in your Ghost API key and API URL. To find these, go to Settings in your Ghost admin, search for “Integrations” and click on Zapier.
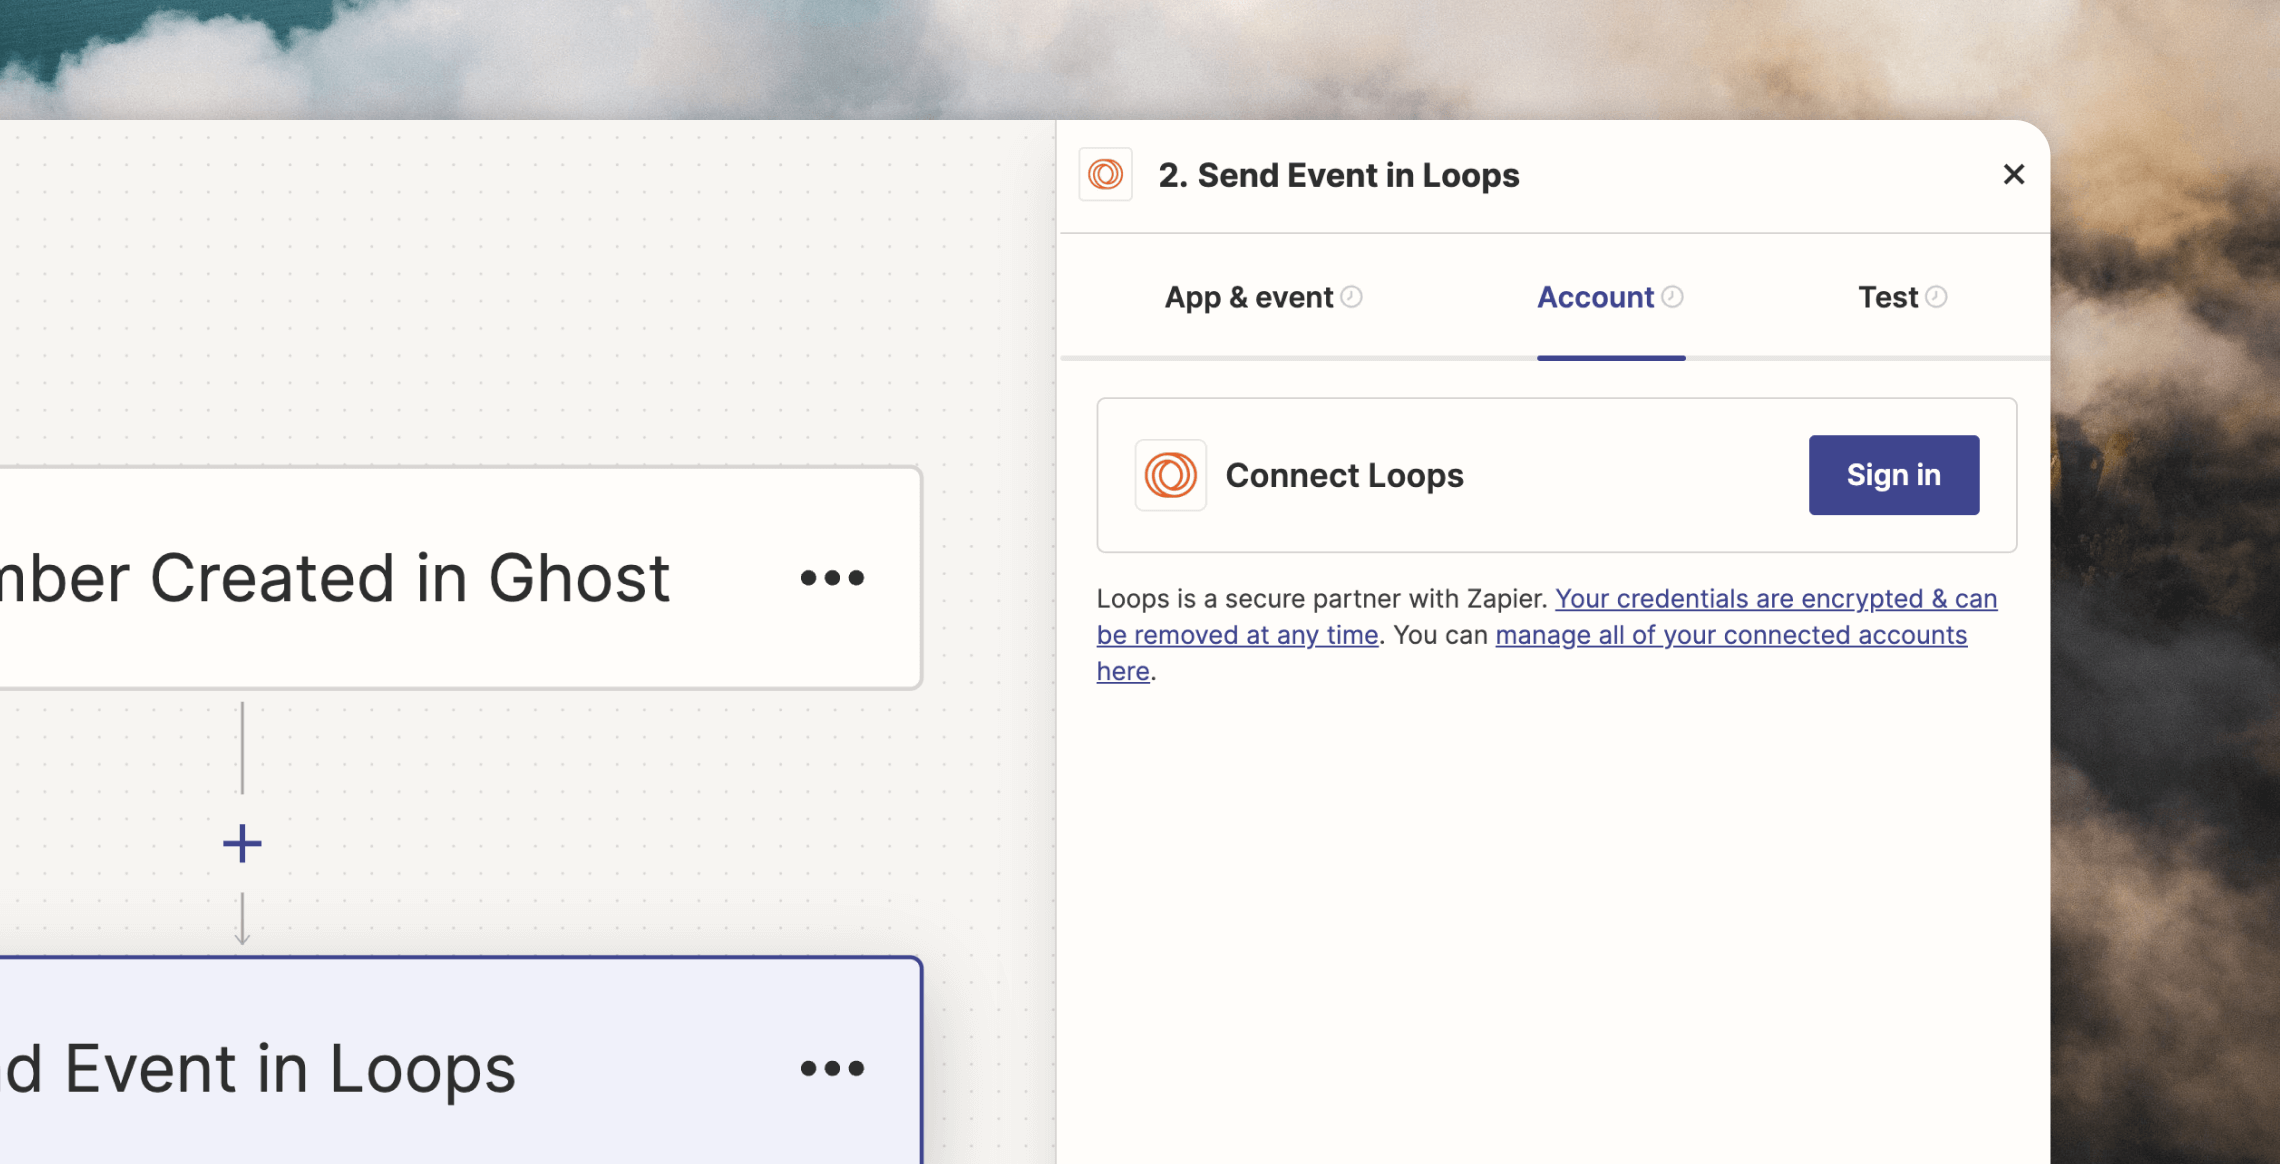
Next you need to link up Loops as the Action. Click the Action node, search for Loops and select the Send Event option in the Event dropdown.Click Continue, then Sign in and paste in your Loops API key (which you can find from your API Settings page).
Instead of using an event for the workflow trigger, you could also choose to send the workflow to every new contact created in your audience.
We choose the event trigger in this example as you may add other contacts to your audience from other sources than Ghost.
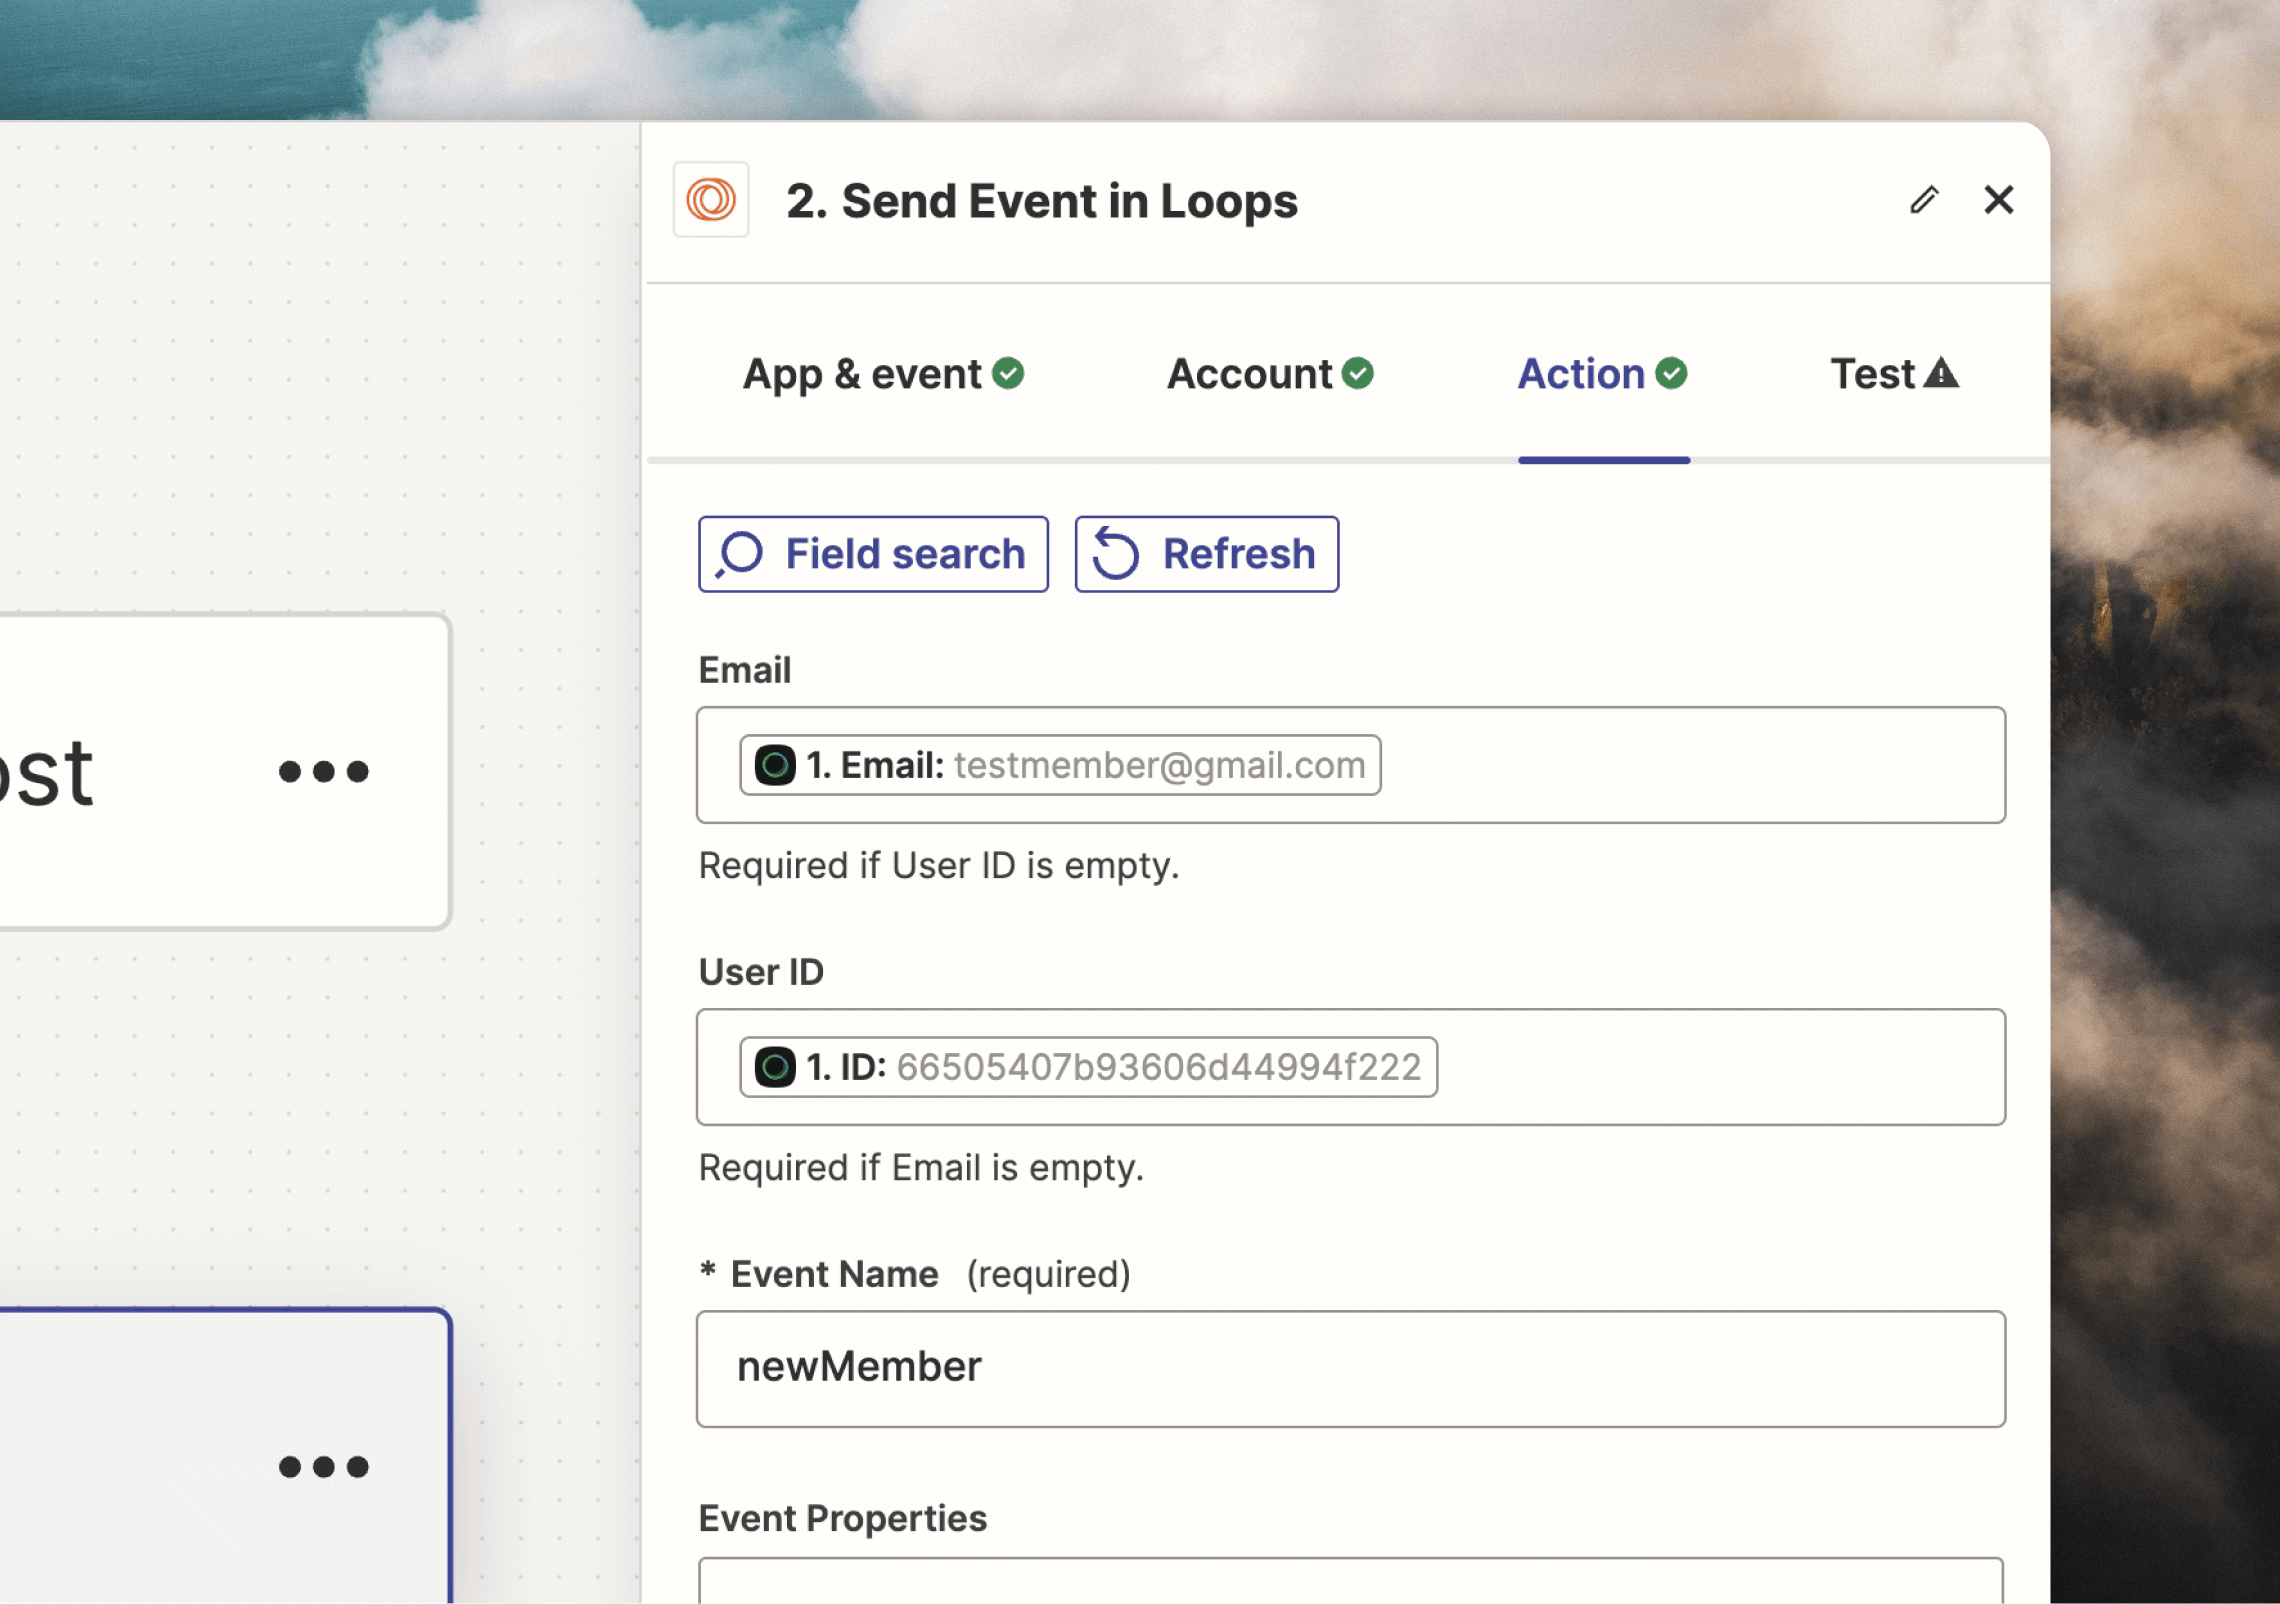
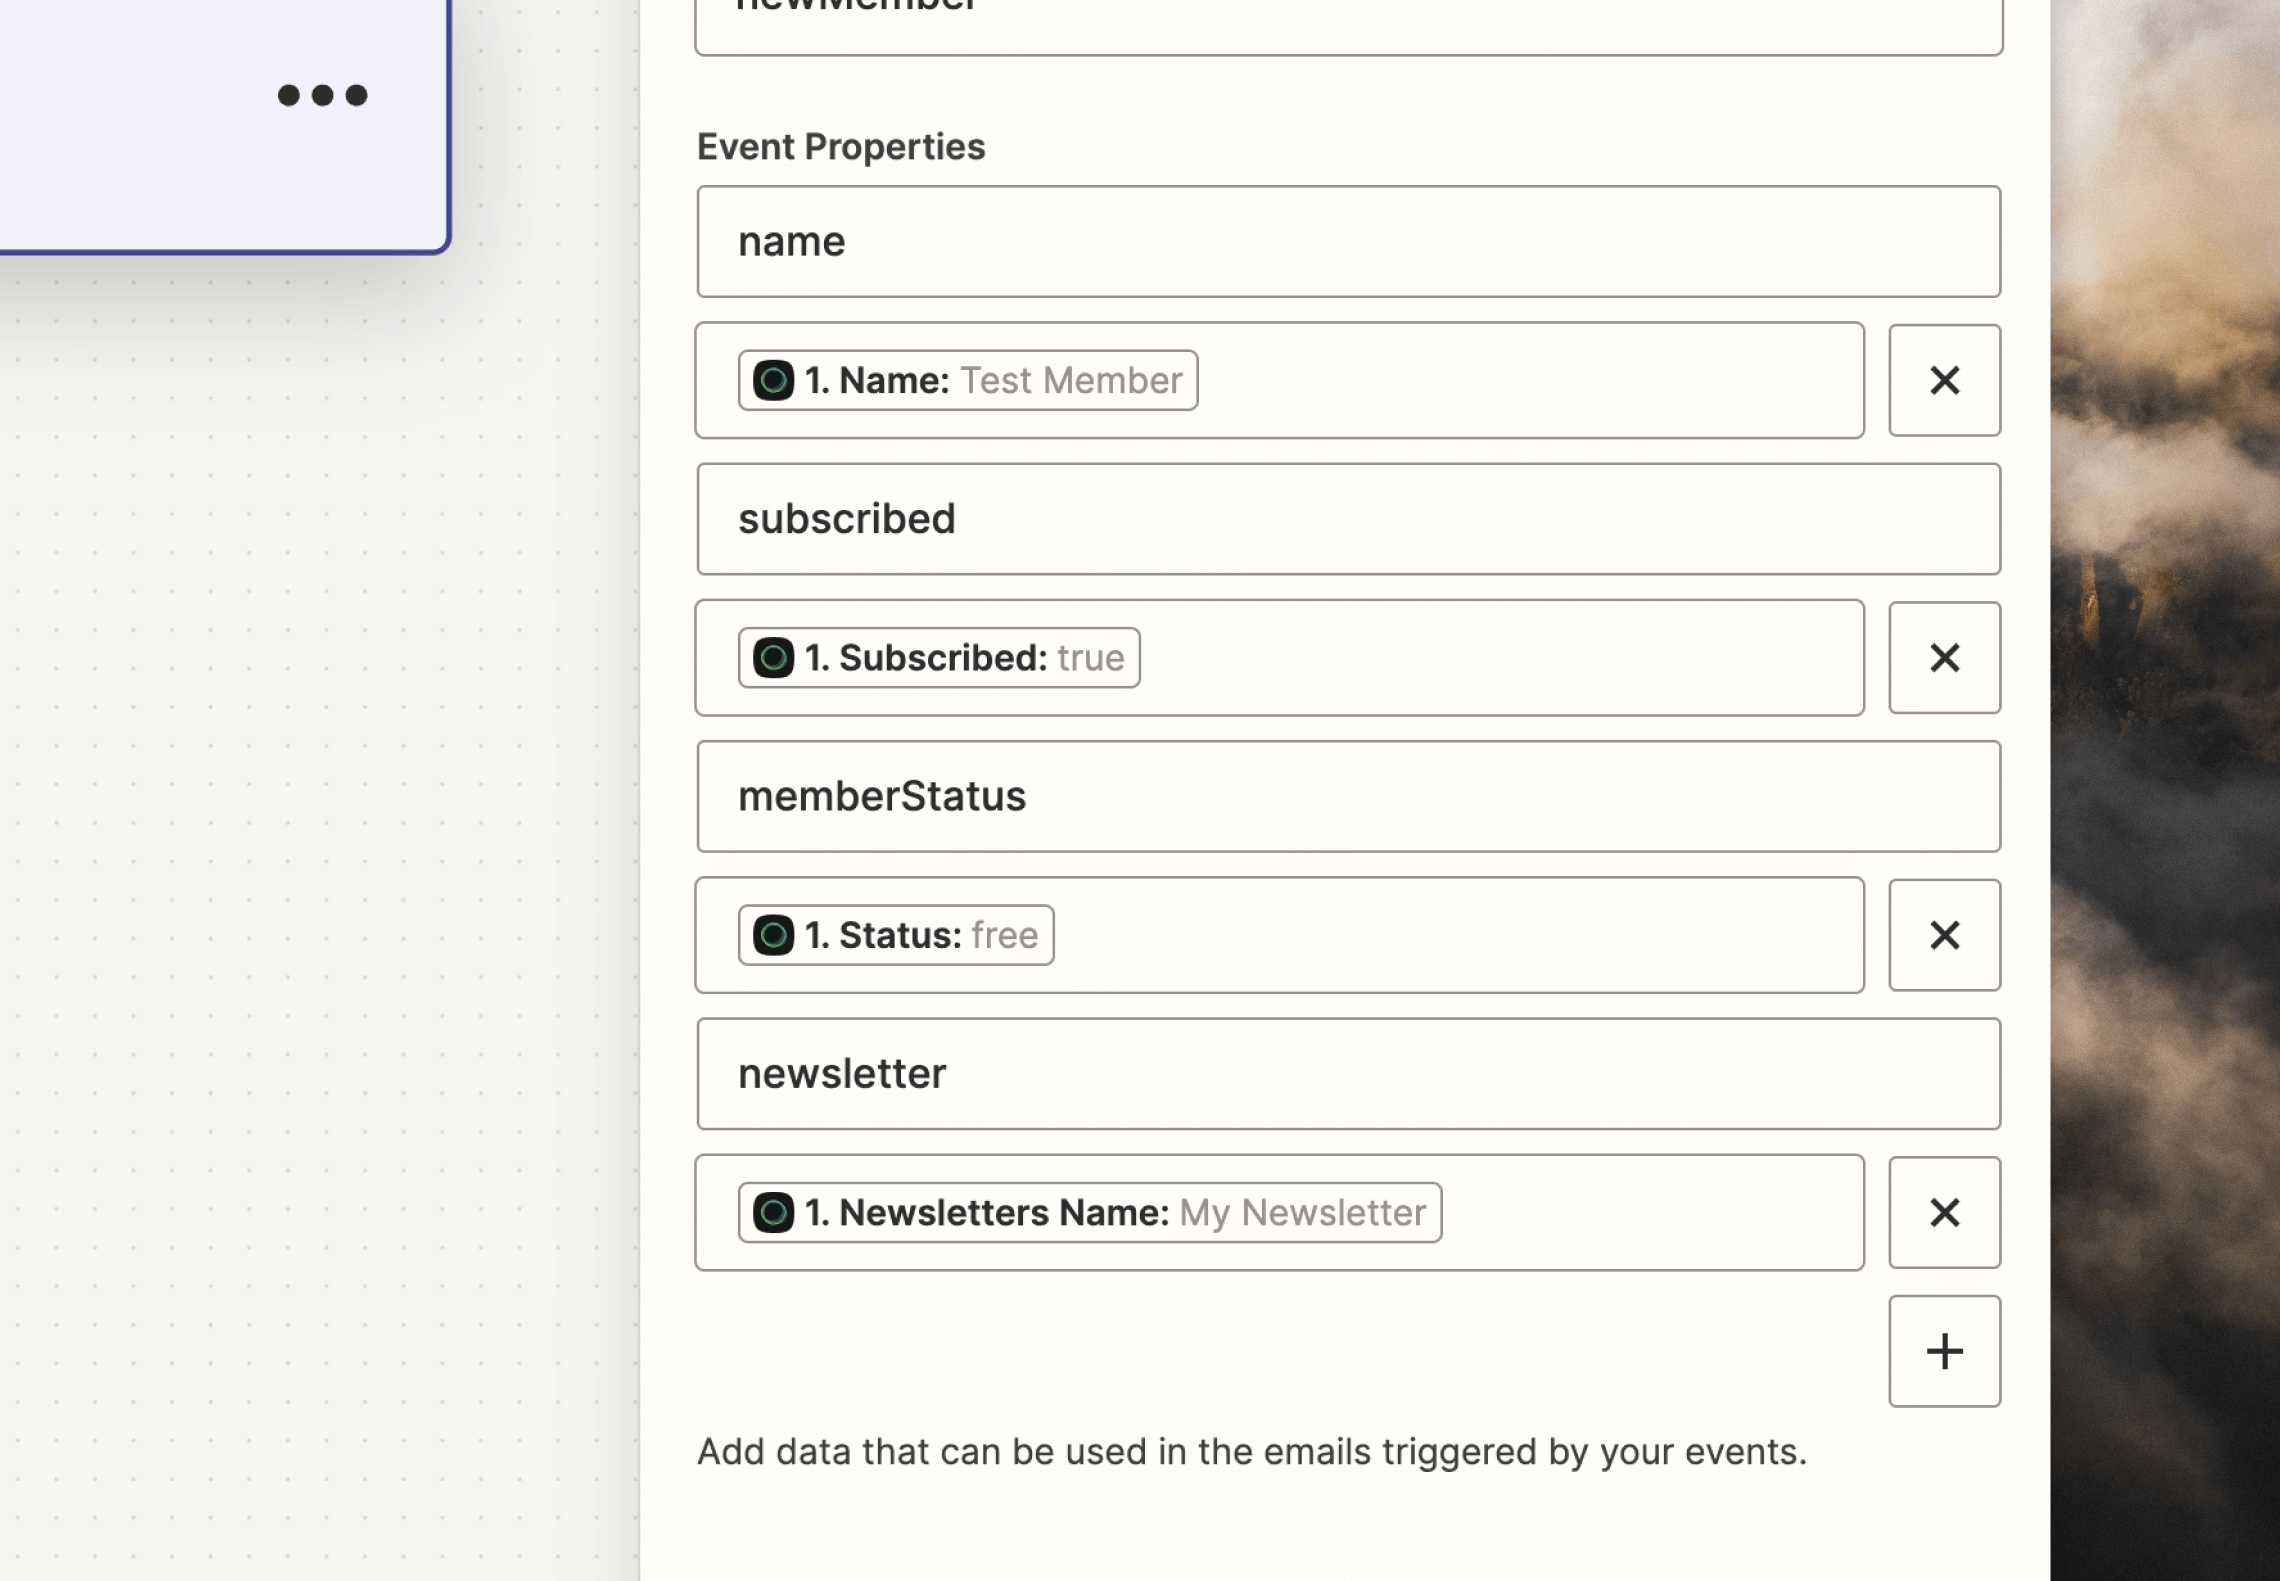
Now click Continue to move to the Action tab. This is where you can configure which Ghost data is sent to Loops.As you click each field, you can select the different Ghost-provided data.In Email, select the Email field. In User ID, select the ID field.In the Event Name field, write something like newMember. This is the name we’ll use in Loops to trigger the email sequence. You can use any name, but make it descriptive. You’ll need this name in the next step inside Loops.If you want to include contact-related information in your emails you can use event properties. To do this, add more Ghost data in the Event Properties field. For example, if you want to include the user’s name, subscribed status, member status or your newsletter’s name, you can add these properties here. Click the + button to add new properties each time.Click Continue to see an overview of the event and its data that you’ll send to Loops. Here you can test the action works by clicking Test Step. This will send actual data to Loops, which you will see in the Event Log section on the Events page.When you’re happy everything is set up properly, click Publish.
If you ever change the event properties sent from Zapier, you need to update the event data in Loops to match. You can do this from Settings -> Events. Click on the event and edit the listed properties. More info
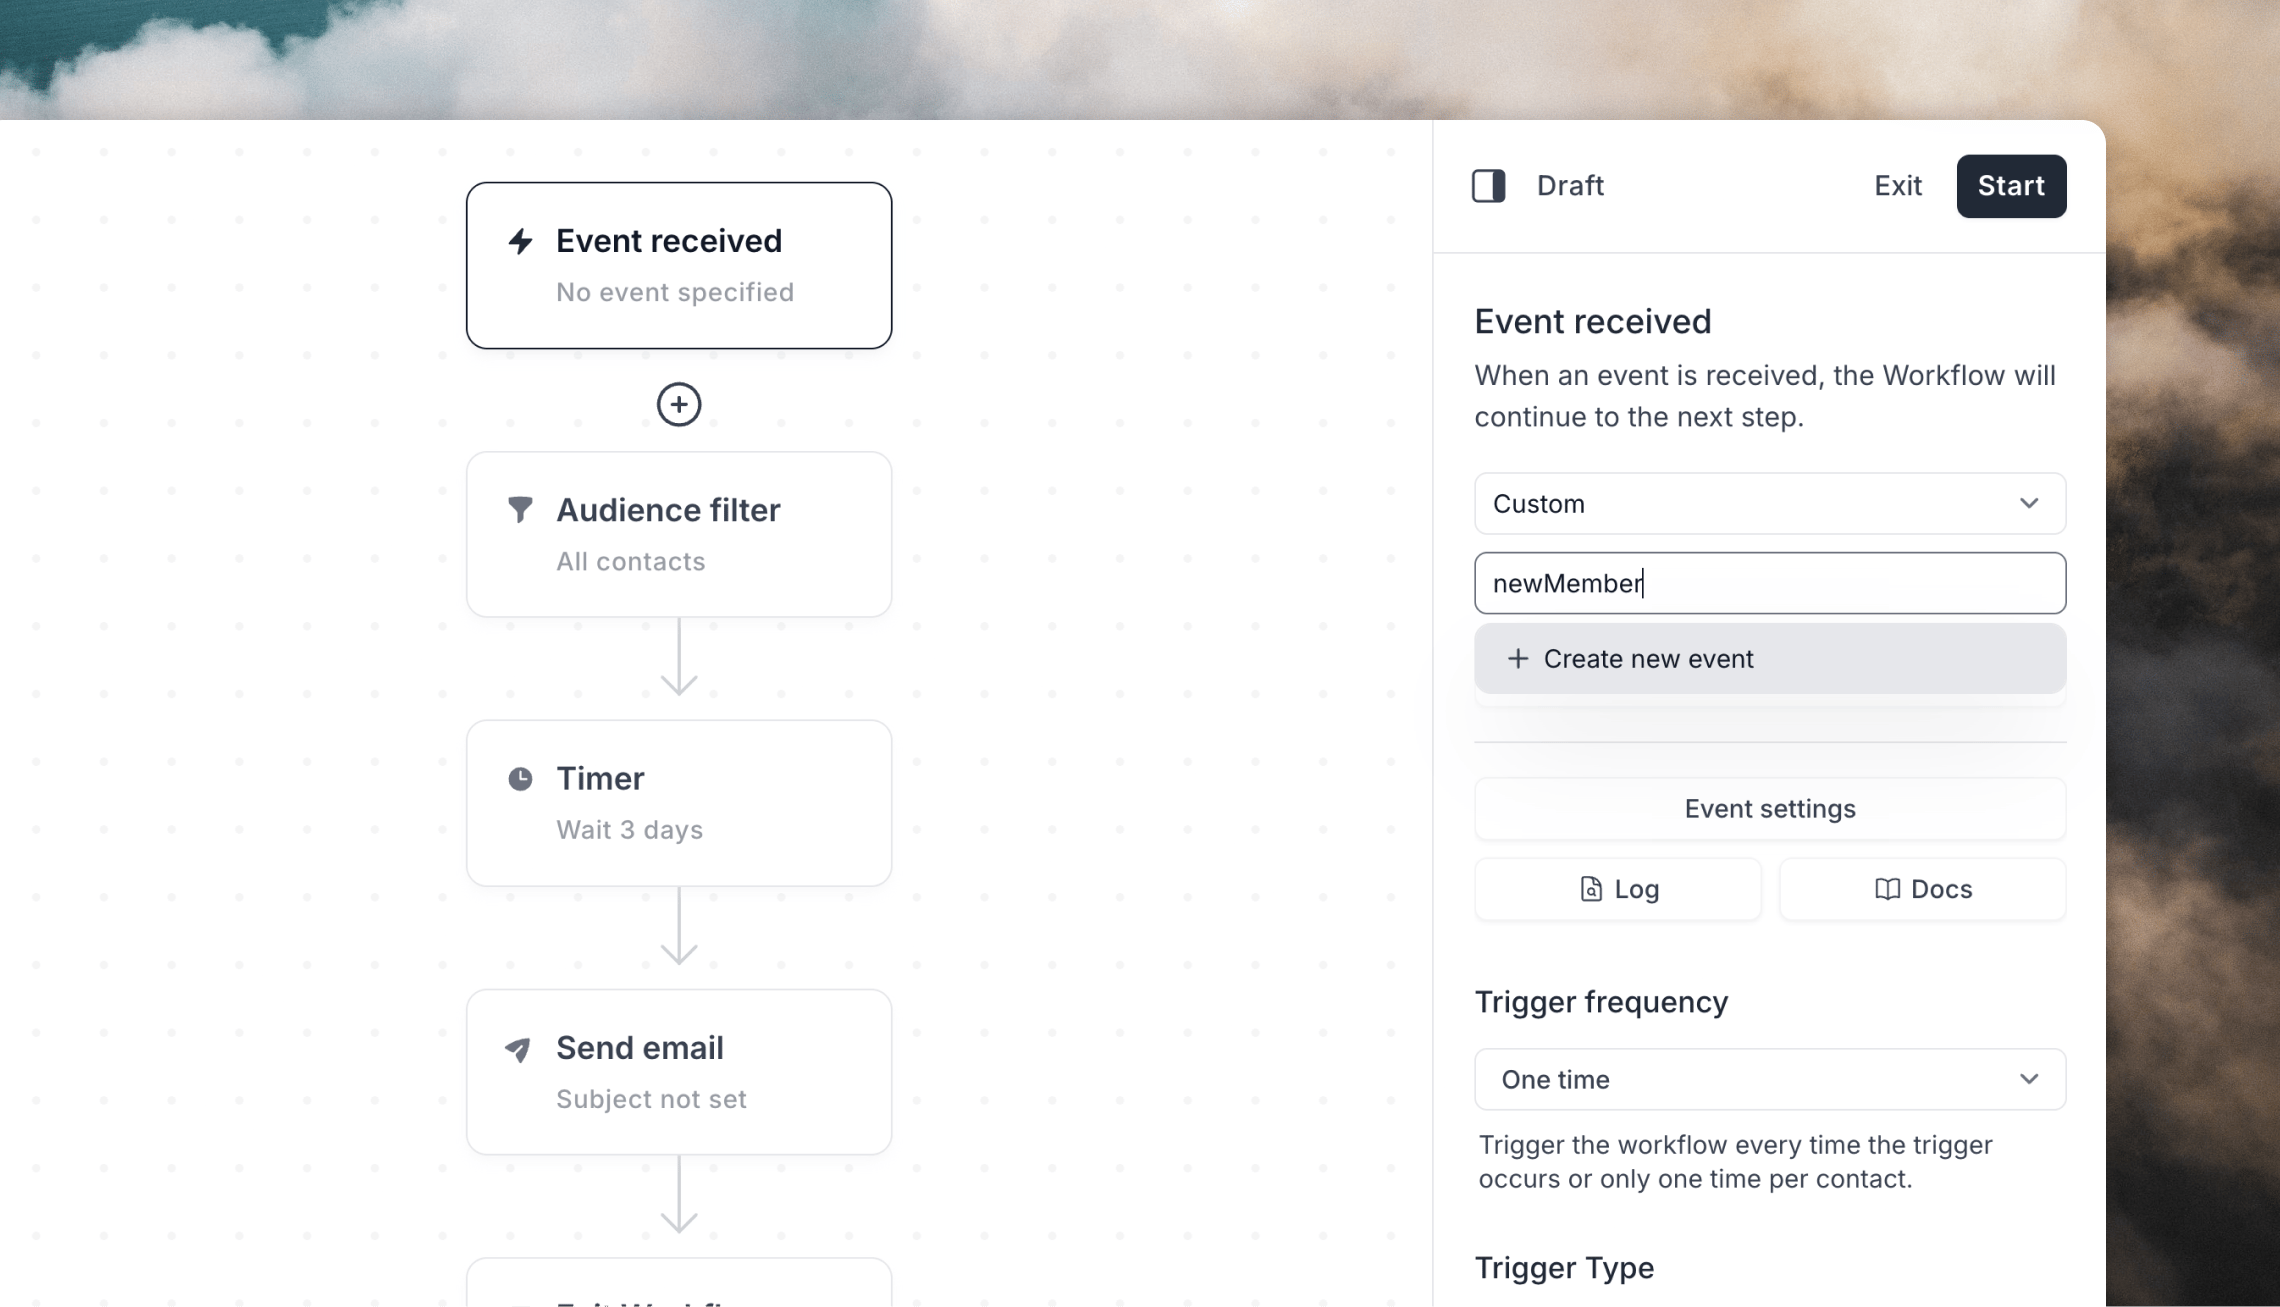
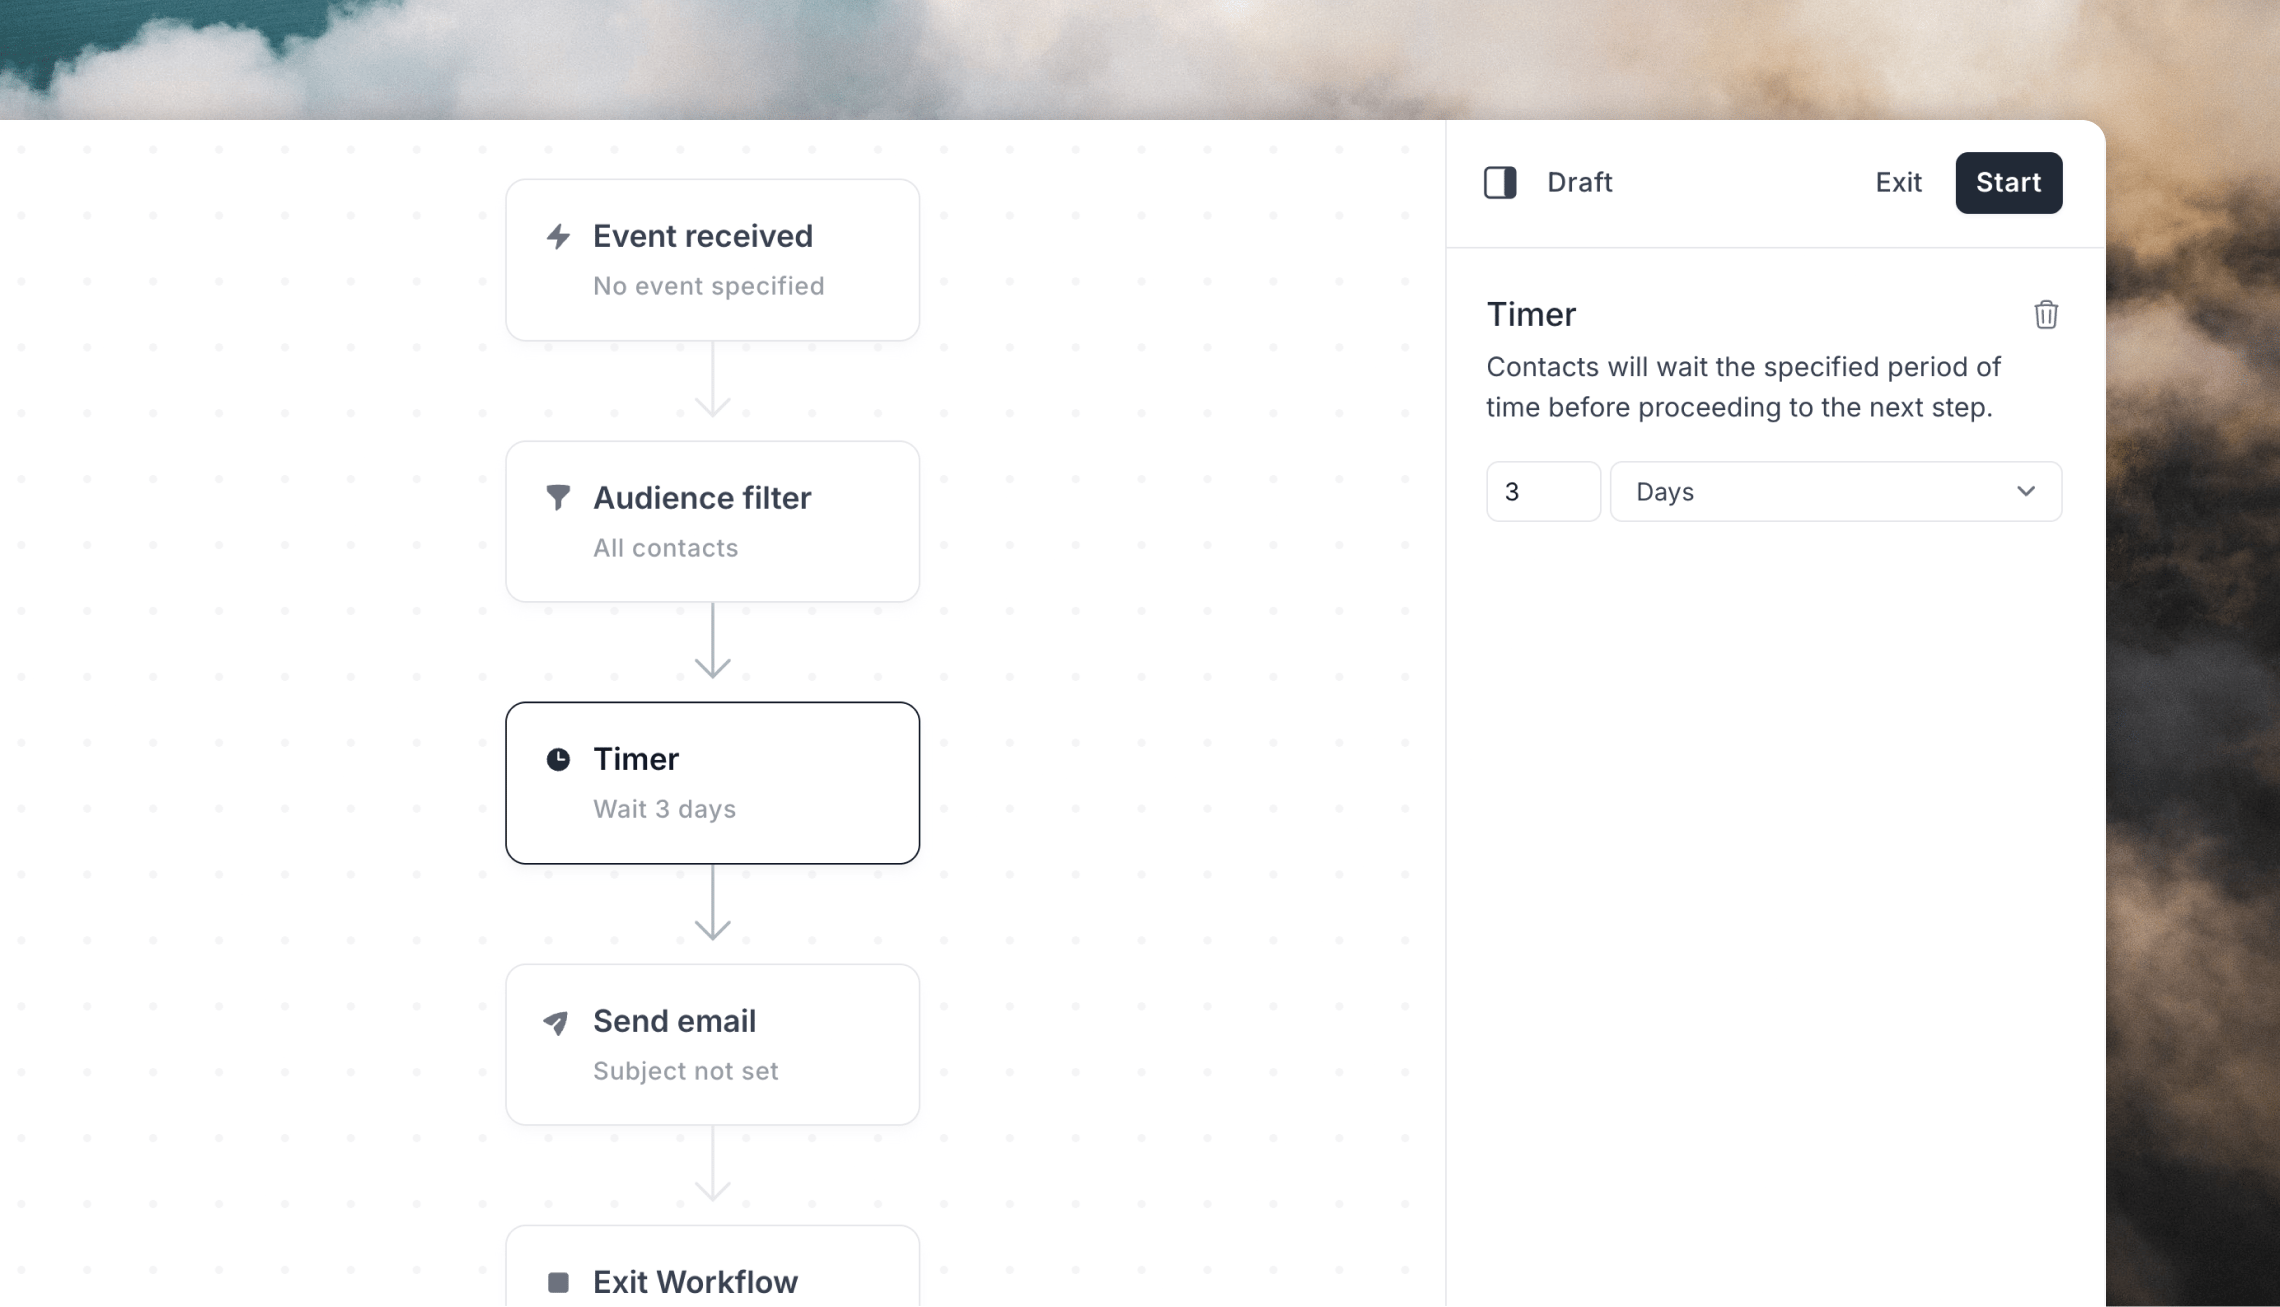
Now that the connections are set up, you can create the email workflow in Loops.Go to Loops and click on Workflows in the sidebar.Click New, which will create a new workflow and show the workflow builder.Select the Event is fired trigger option.Click on the Event received trigger in the workflow builder and enter the name you entered in Zapier in the inspector panel on the right-hand side (in this example, newMember).You can click the Timer node and edit it in the inspector panel if you want to add a delay between the event being received by Loops and the email being sent to your Ghost members.You can also add a filter to the audience for this workflow, if you want to limit sending to a certain sub-group of your members. If you want the workflow to send to all new Ghost members, just leave it as “All contacts”.Lastly, click the Send email node and then Create email in the inspector panel. You’ll see the email editor open, where you can create your email.If you opted to send event properties from Zapier, you can add them to your email by clicking the ⚡️ button above the editor (1) and then configuring in the Event Property editor panel (2).Once your first email is complete, you can add more Timer and Email nodes to your workflow to complete your email sequence. Just click on the + icon between nodes to add new ones.