Install the API Connector plugin
In Bubble, you need to first install the API Connector Plugin. This plugin is what makes the API calls to Loops. Go to Plugins and click + Add plugins. Search for “API Connector” and click Install.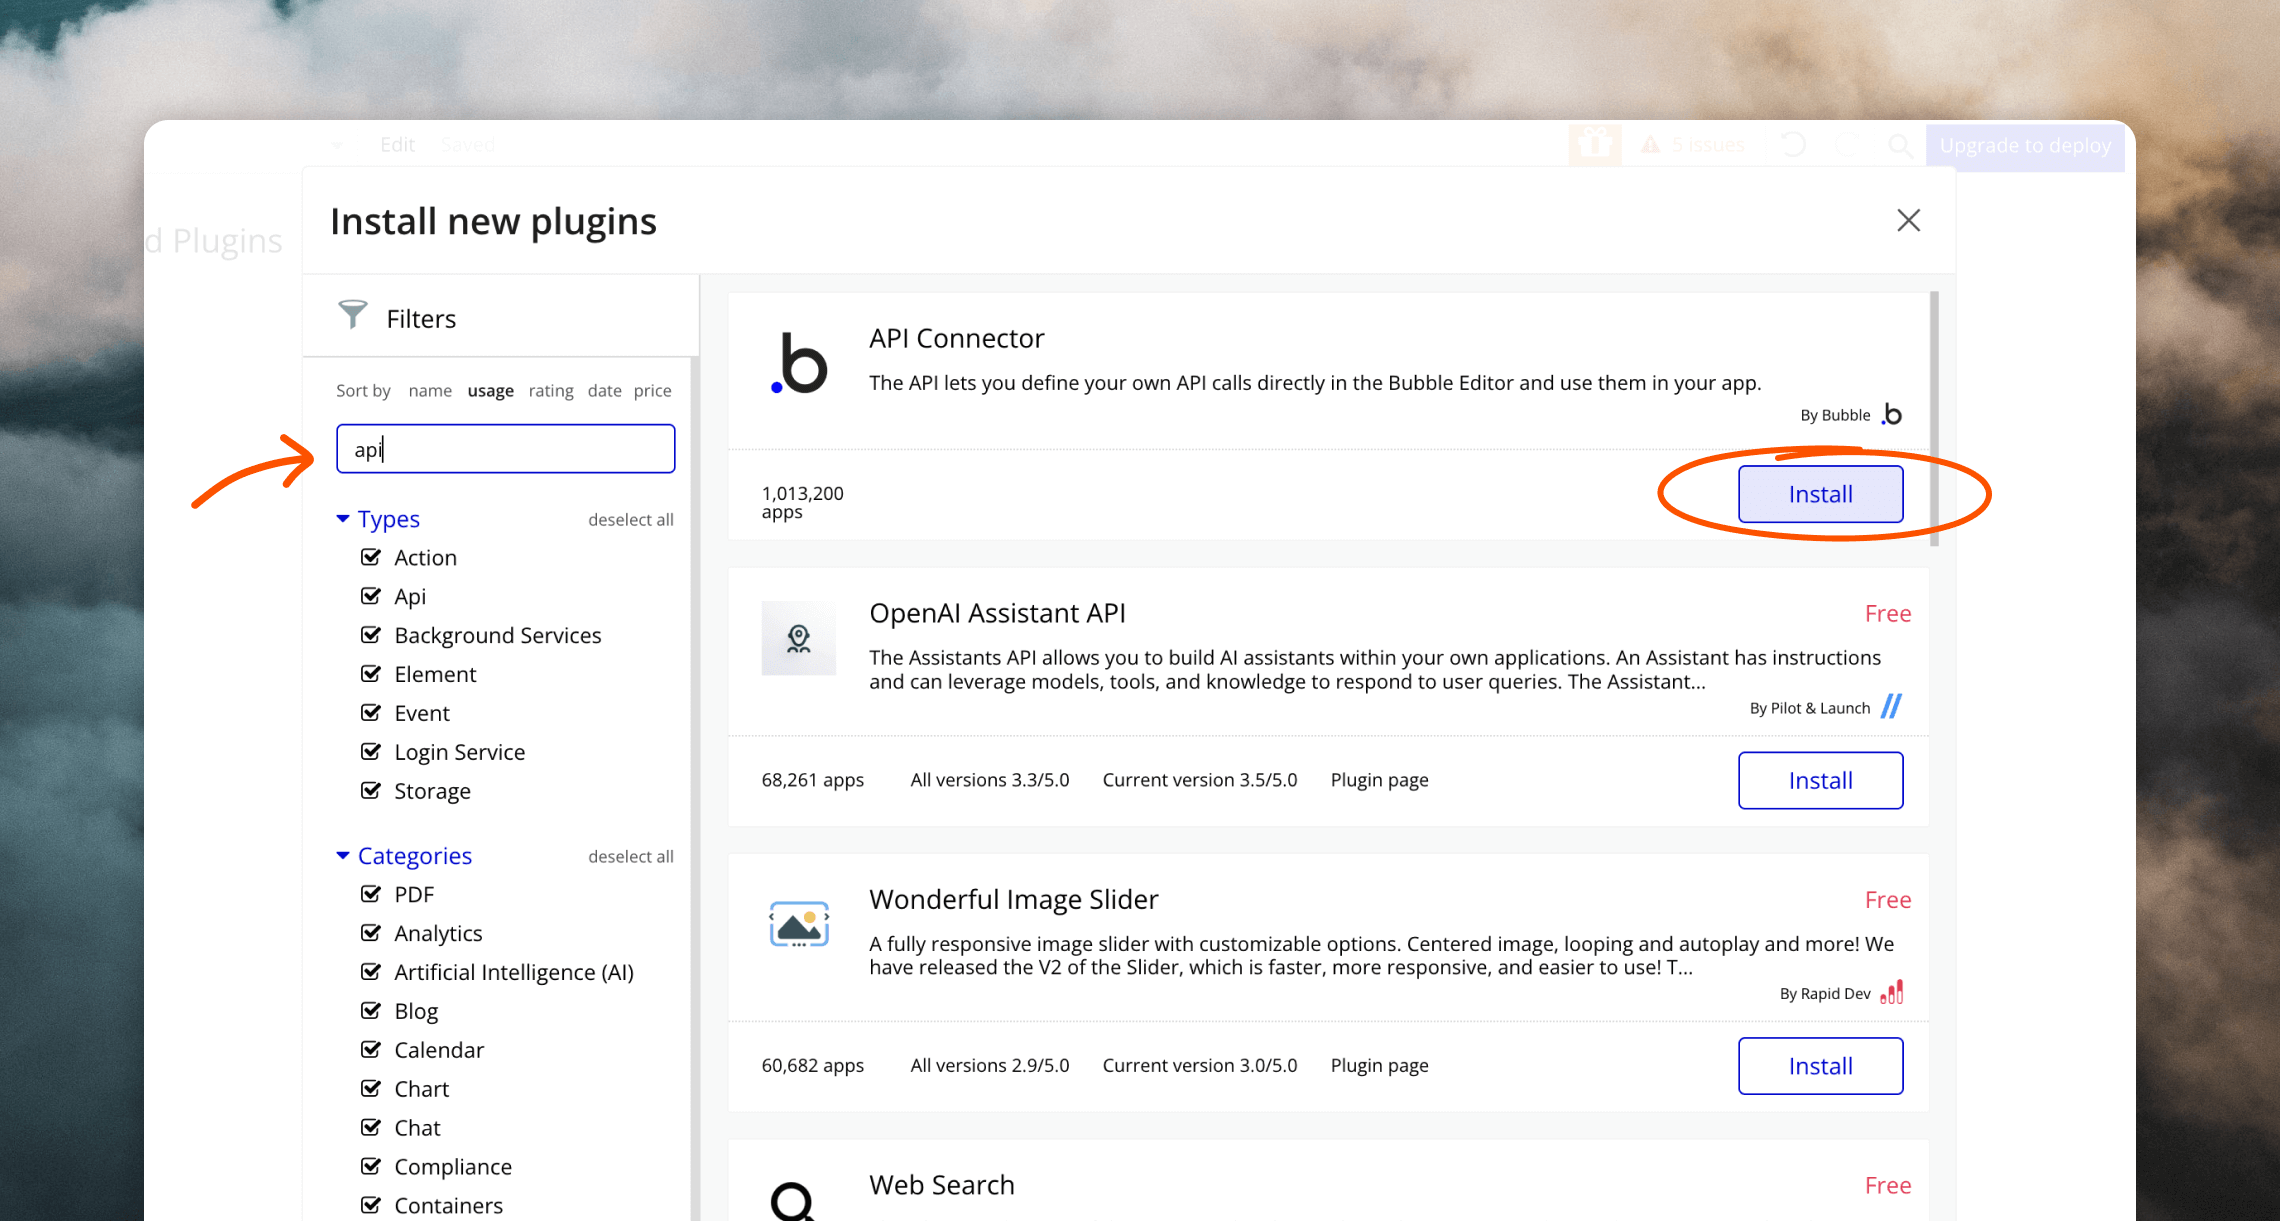
Add a Loops API connection
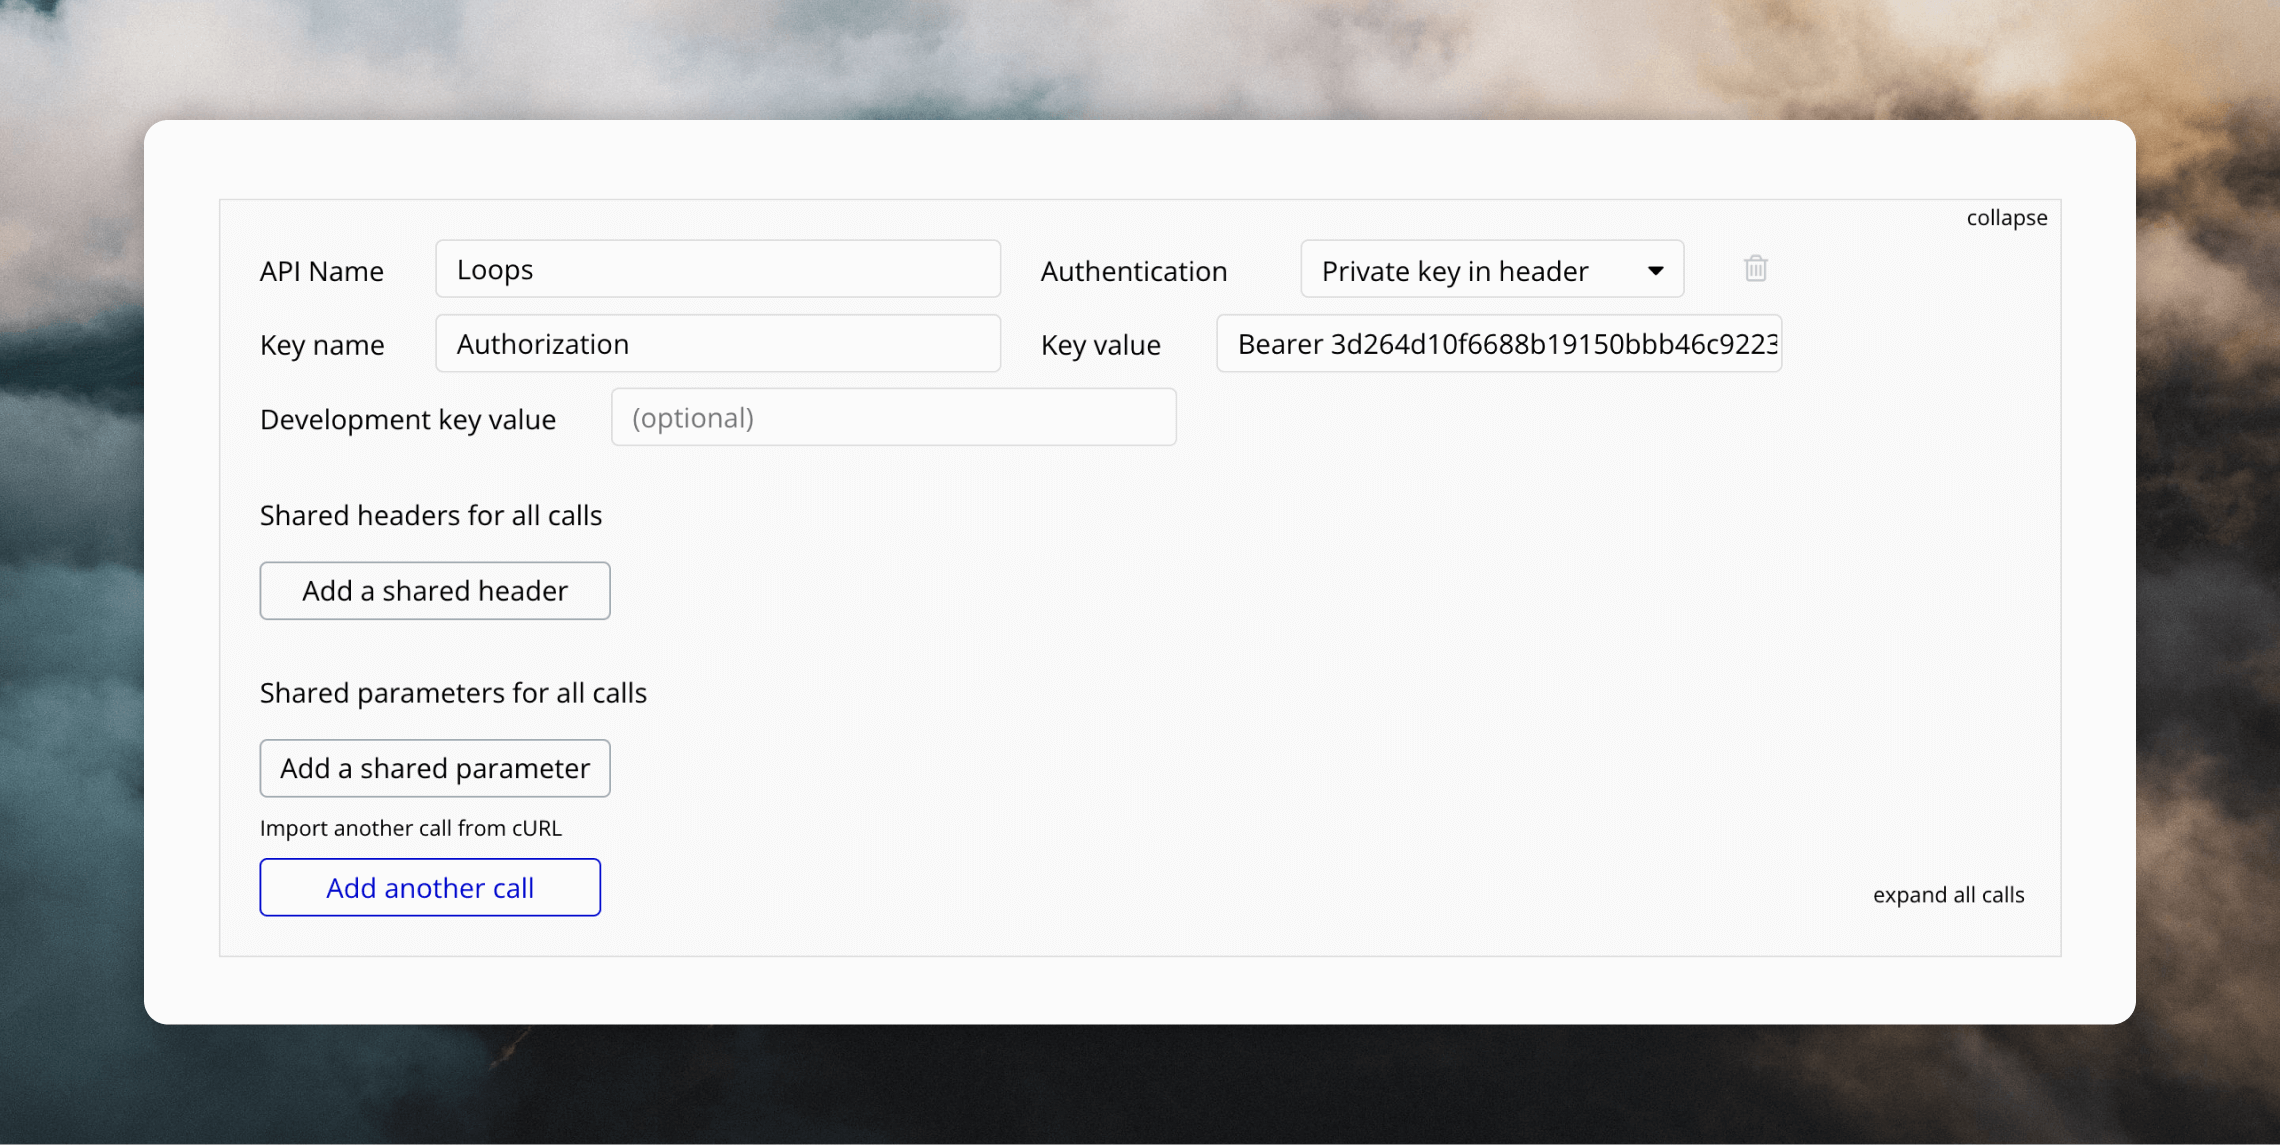
Now you have the plugin installed, you can add an API connection. Click Add another API. In the form that appears, enter “Loops” into the API Name field (Bubble uses this field to group API calls together in the interface). Make sure the Key name value is “Authorization” (this is the default). In the Authentication field, select “Private key in header”. In Loops, go to your API Settings page and copy an API key (you can create a new key if you like). Back in Bubble, in the Key value field, write the wordBearer, then a space character, then paste your API key, so it looks something like Bearer YourApiKey.
Add an API call to sync users to Loops
Now you can create an API call using the connection you just created. Click Add another call at the bottom of the gray box. In the Name field, write something like “Sync users”. In the Use as field, select “Action”. The Data type field should be “JSON” (this is the default). In the dropdown where it says “GET”, select “POST”, and in the subsequent field, paste the following endpoint URL: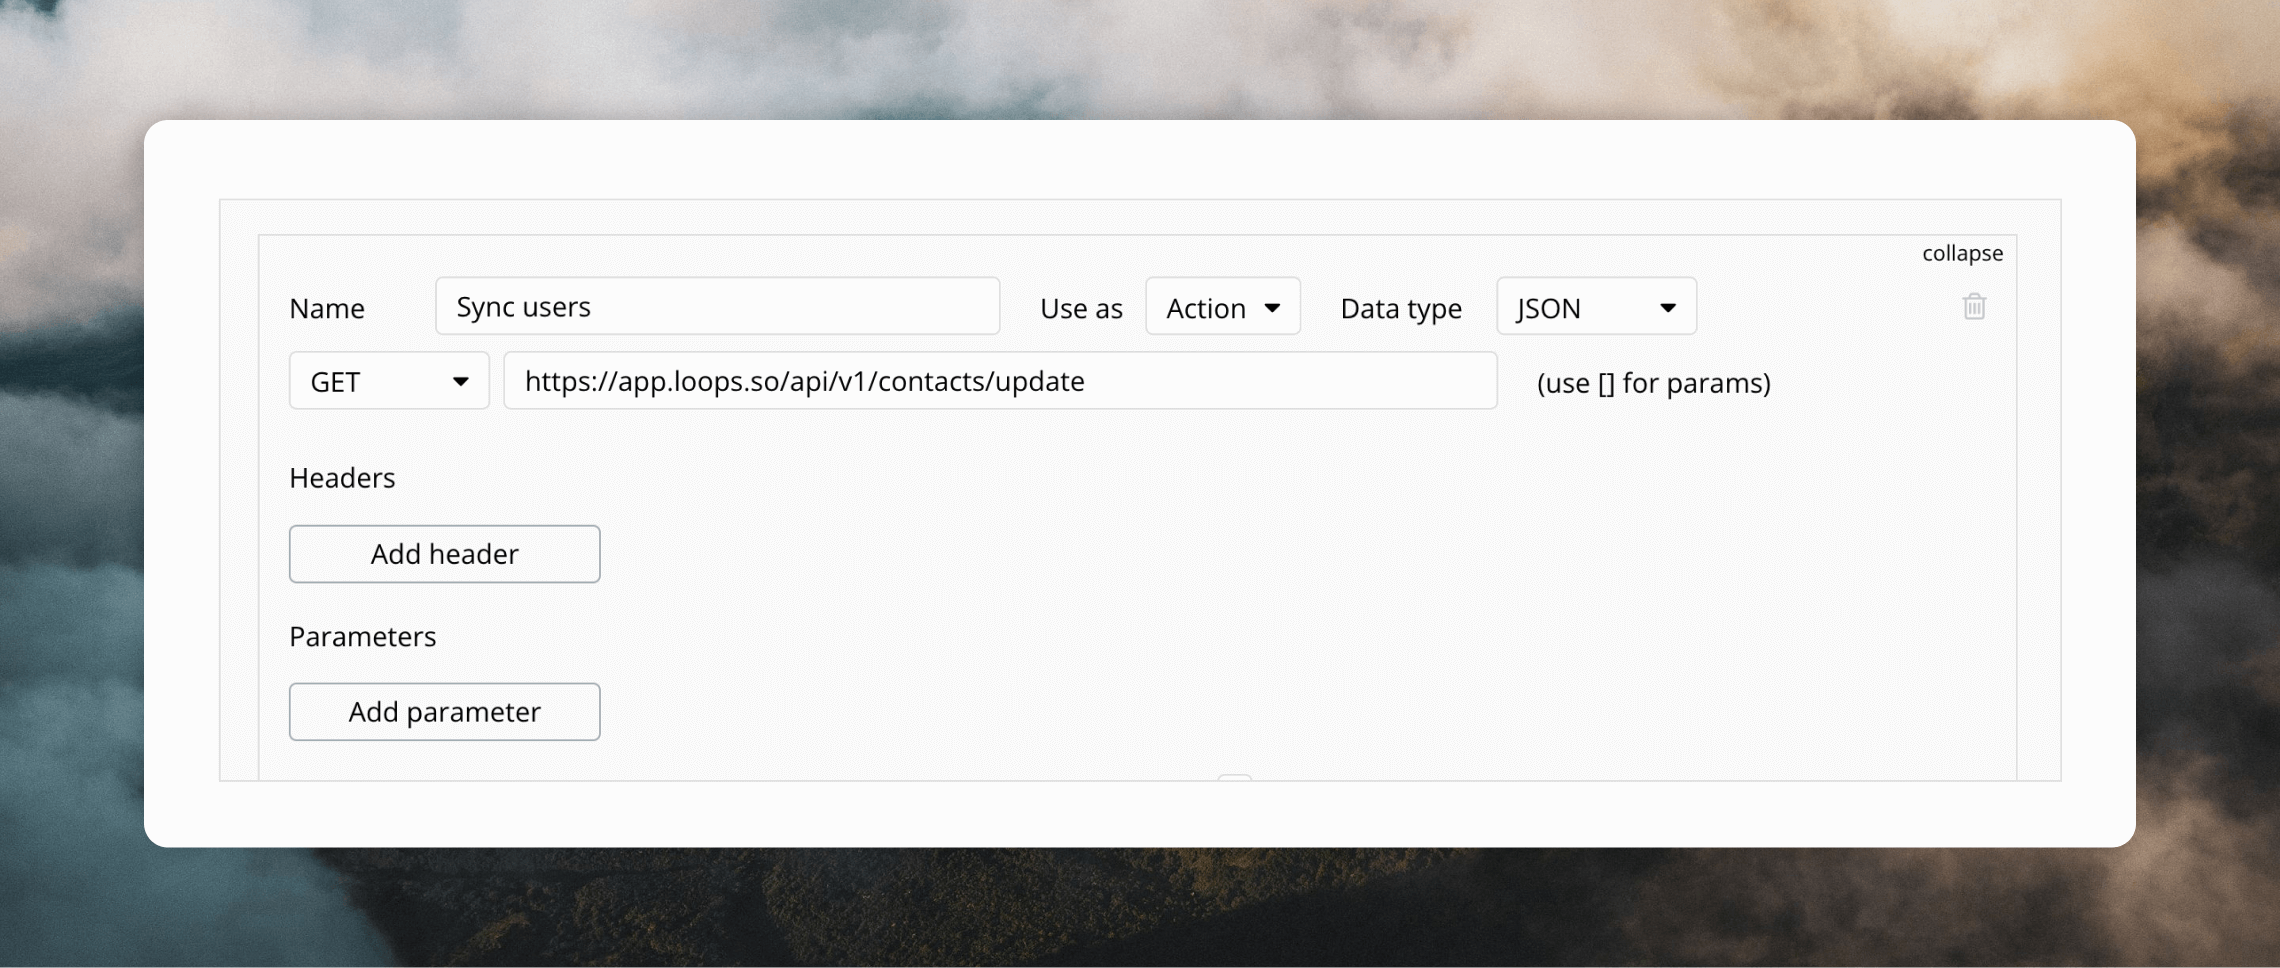
Email, User_ID and Plan_name) we added to the body data.
Uncheck the Private checkbox for each of these variables, otherwise they won’t show up in the Bubble interface when you come to use this API call.
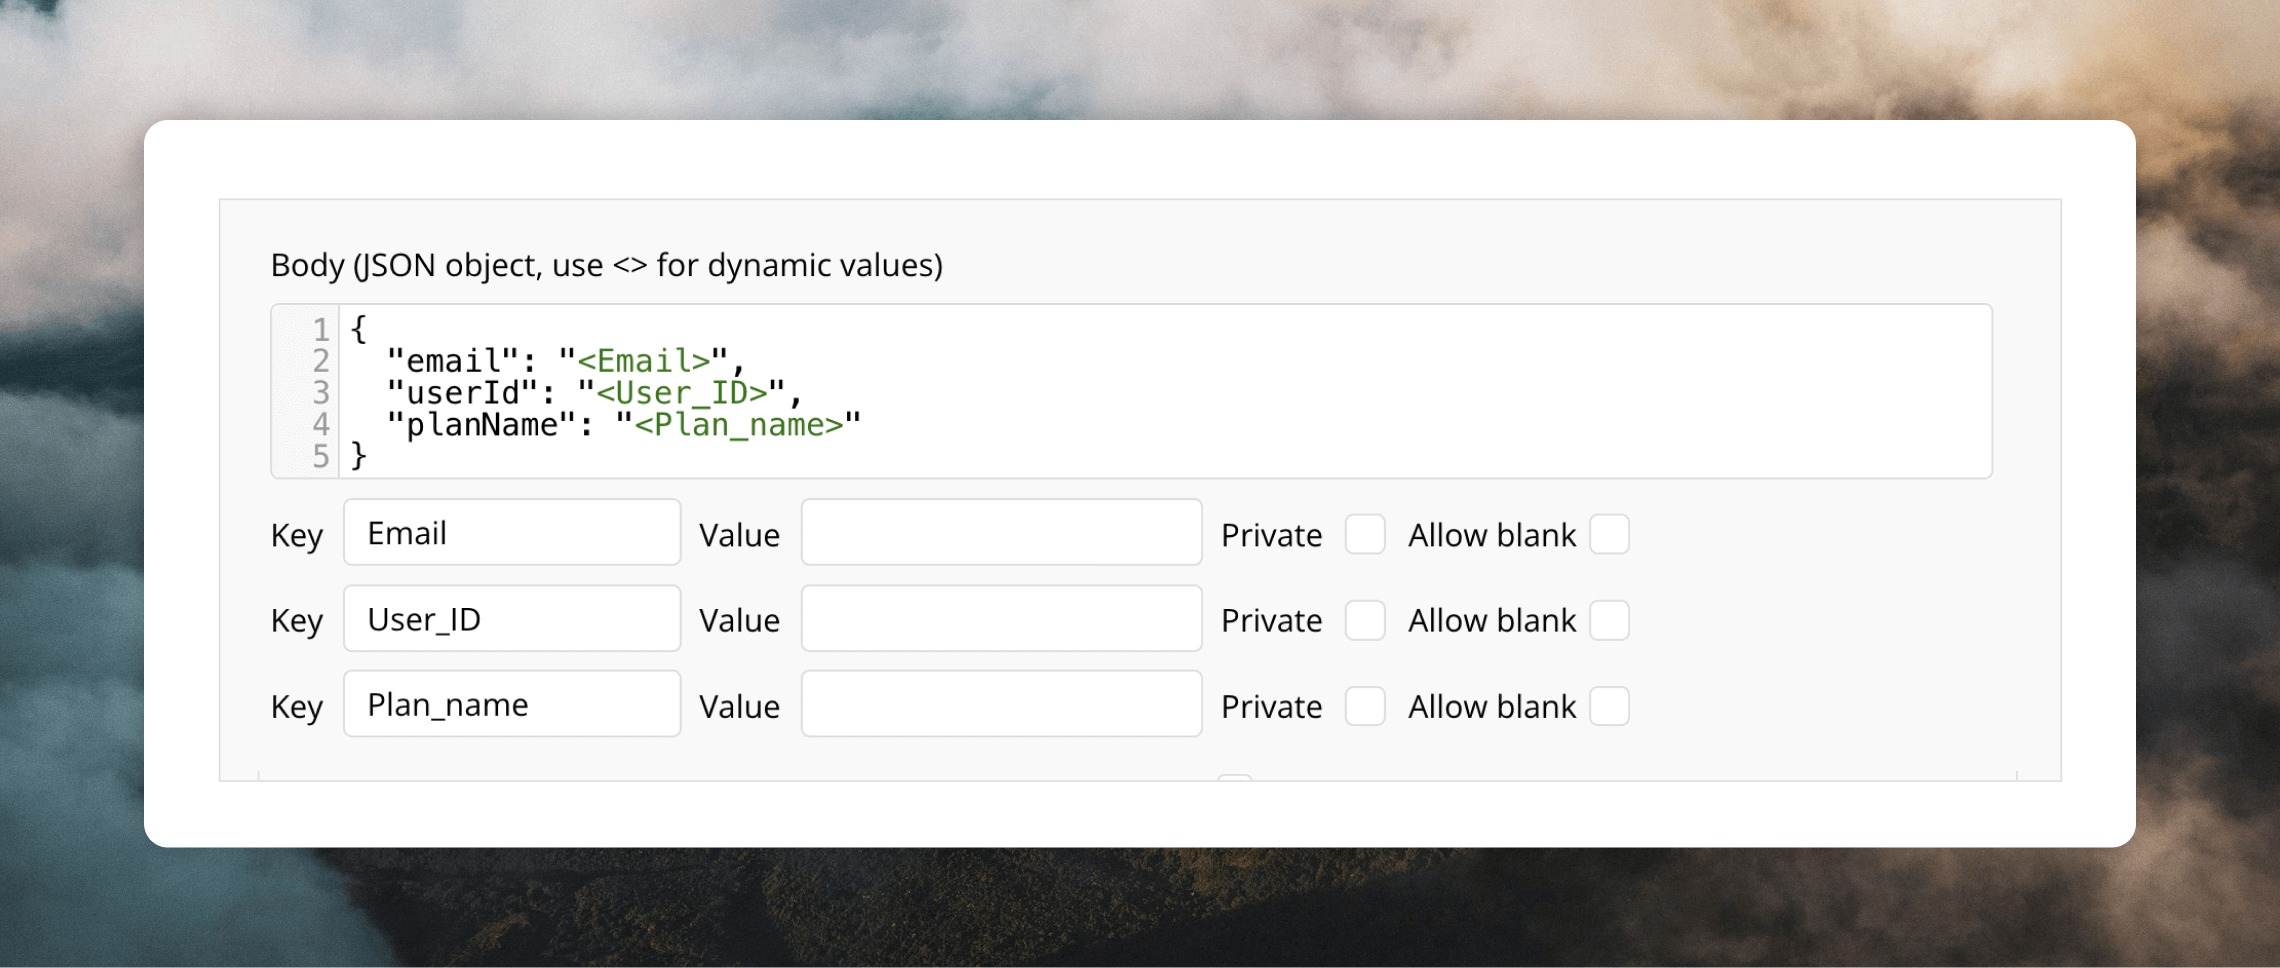
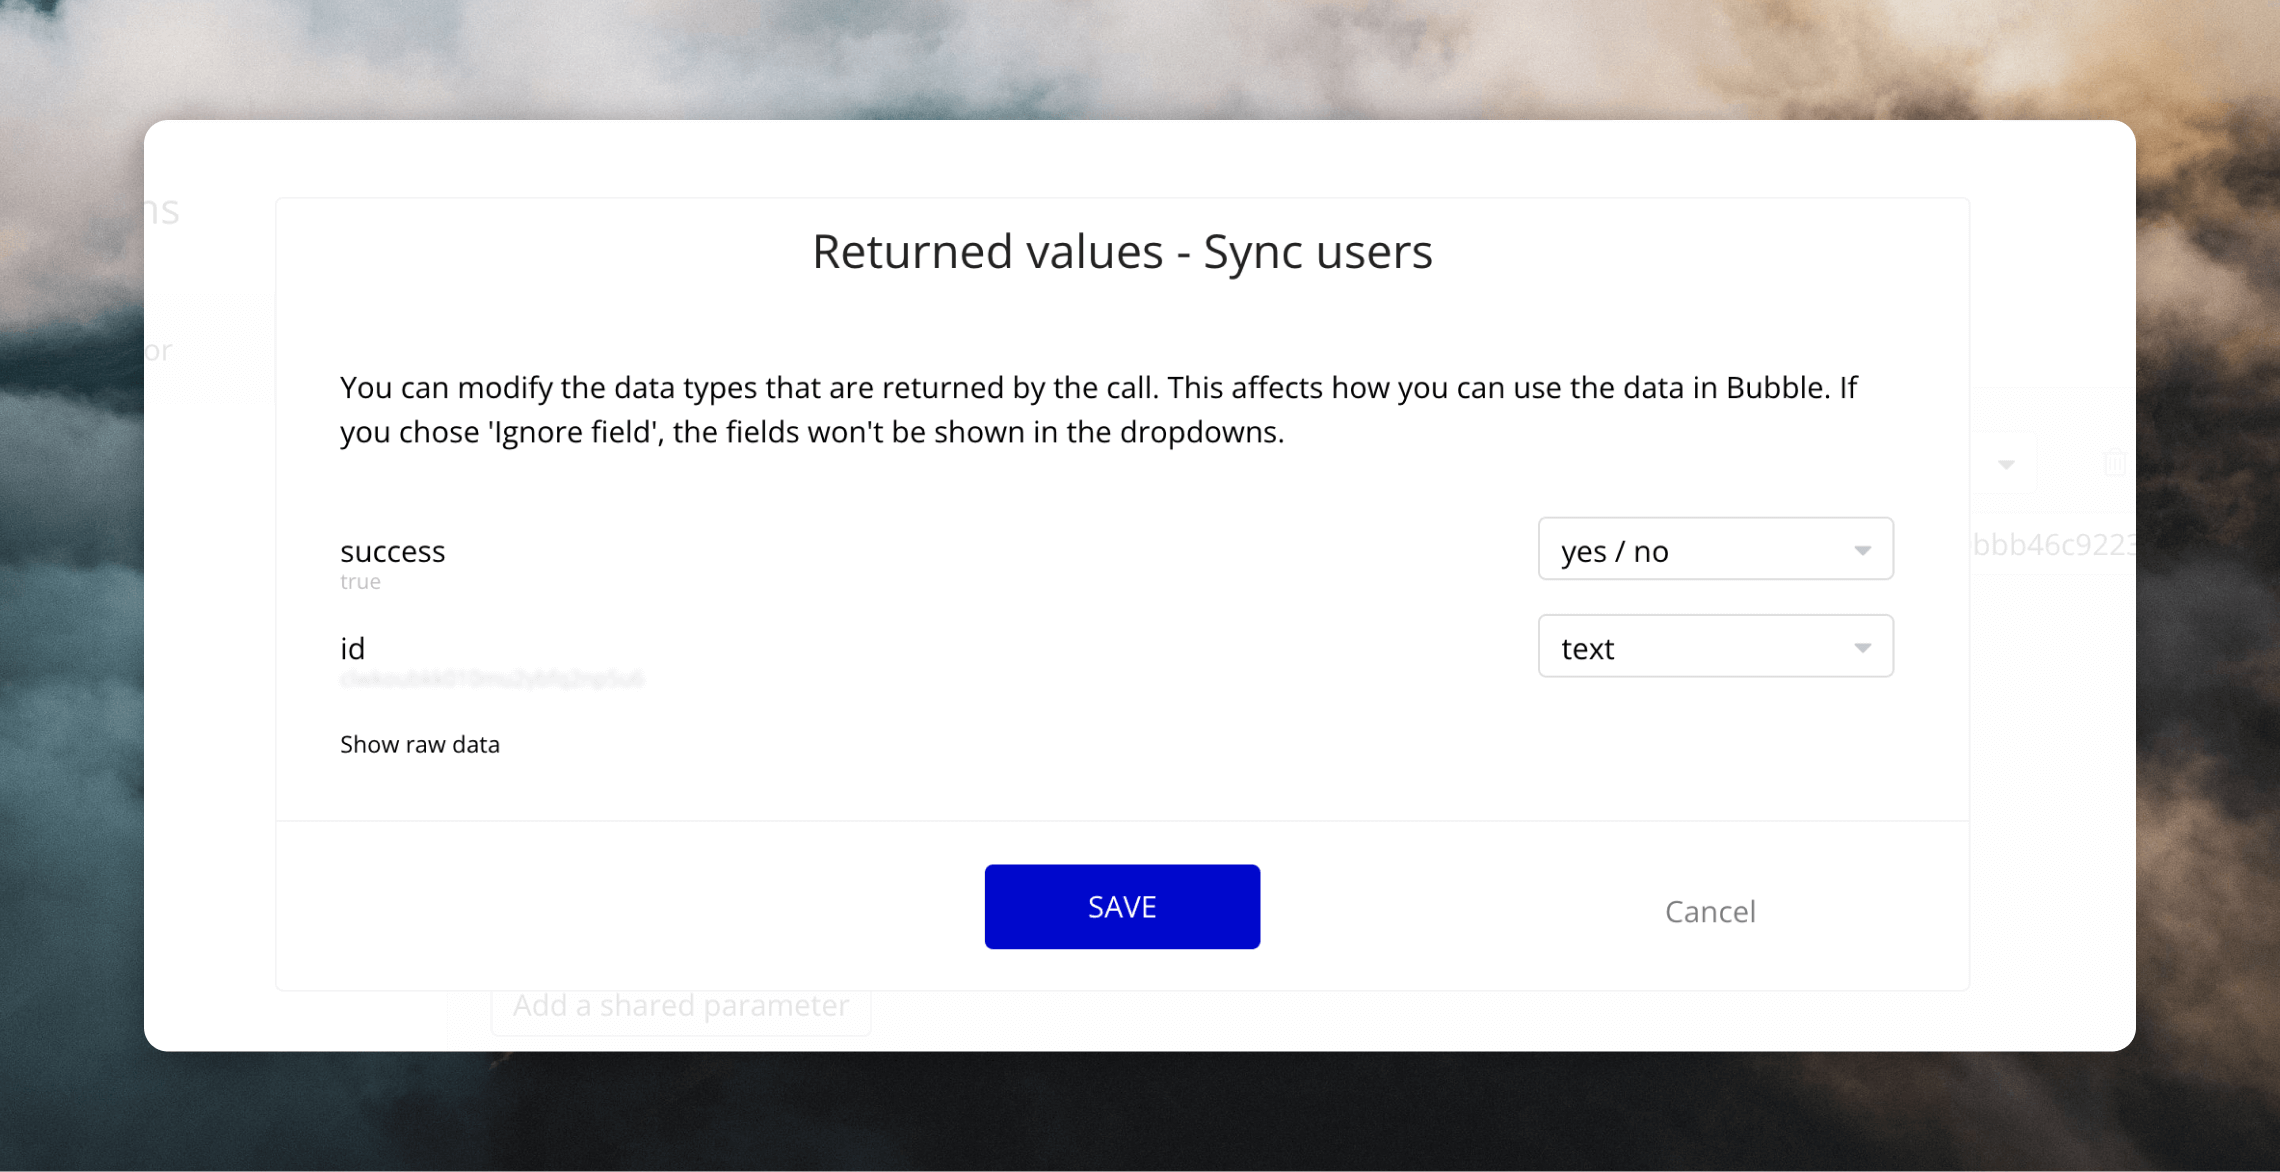
When you’re done, remember to delete the test data you just added in the Value fields.
Add the action to your Workflow
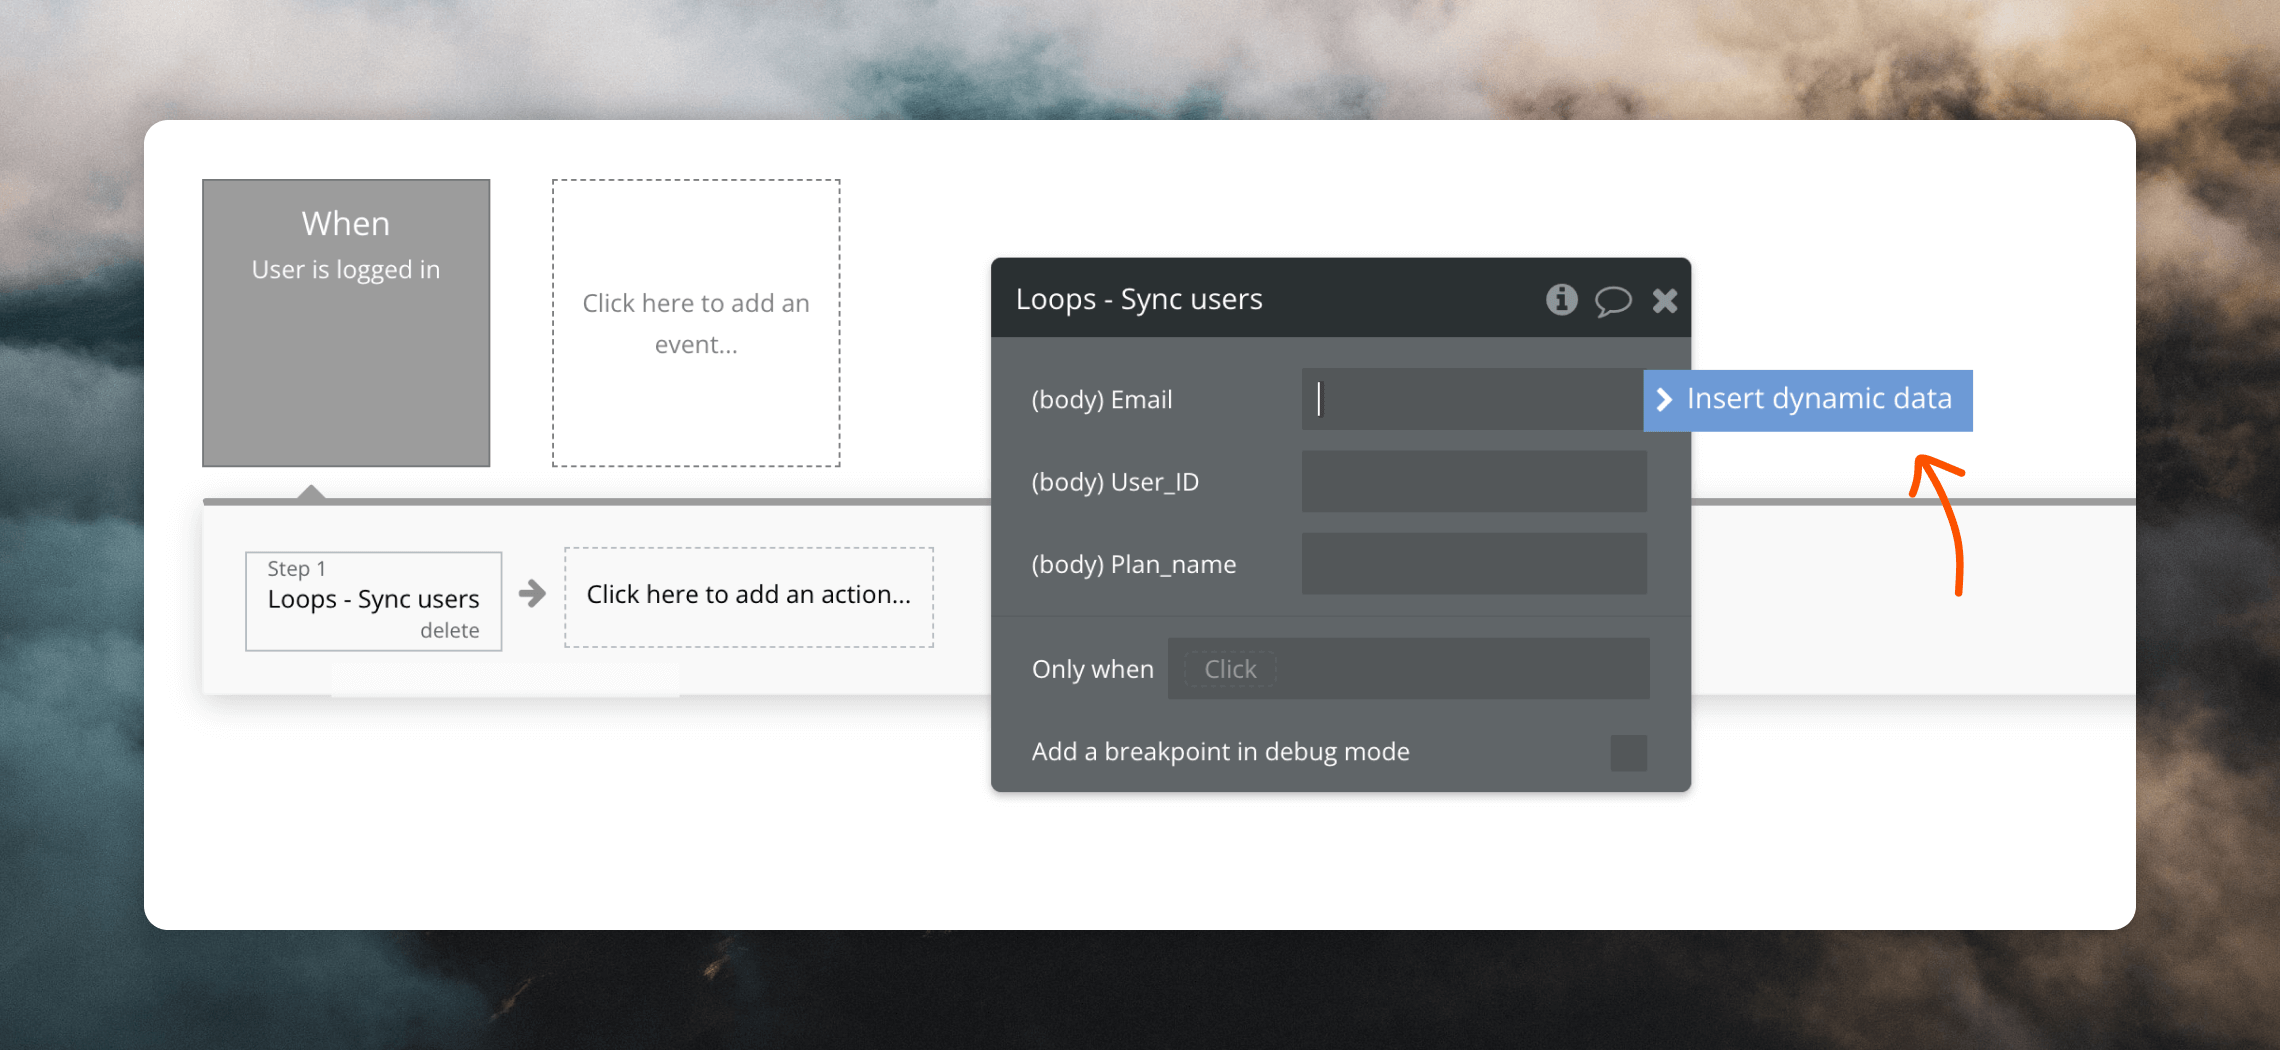
The final step is using your API call inside your application. To do this, go to Workflows in your Bubble account and create a workflow for when you want to send a user to Loops. In this example, I want to sync users to Loops whenever they log in (they could also be synced after other events, like if their email address changes). To do this, click Click here to add an event… and select “General > User is logged in”. Click Click here to add an action…, hover over Plugins and select the action you created by the name you gave it (naming is organized by “API name - API call name”).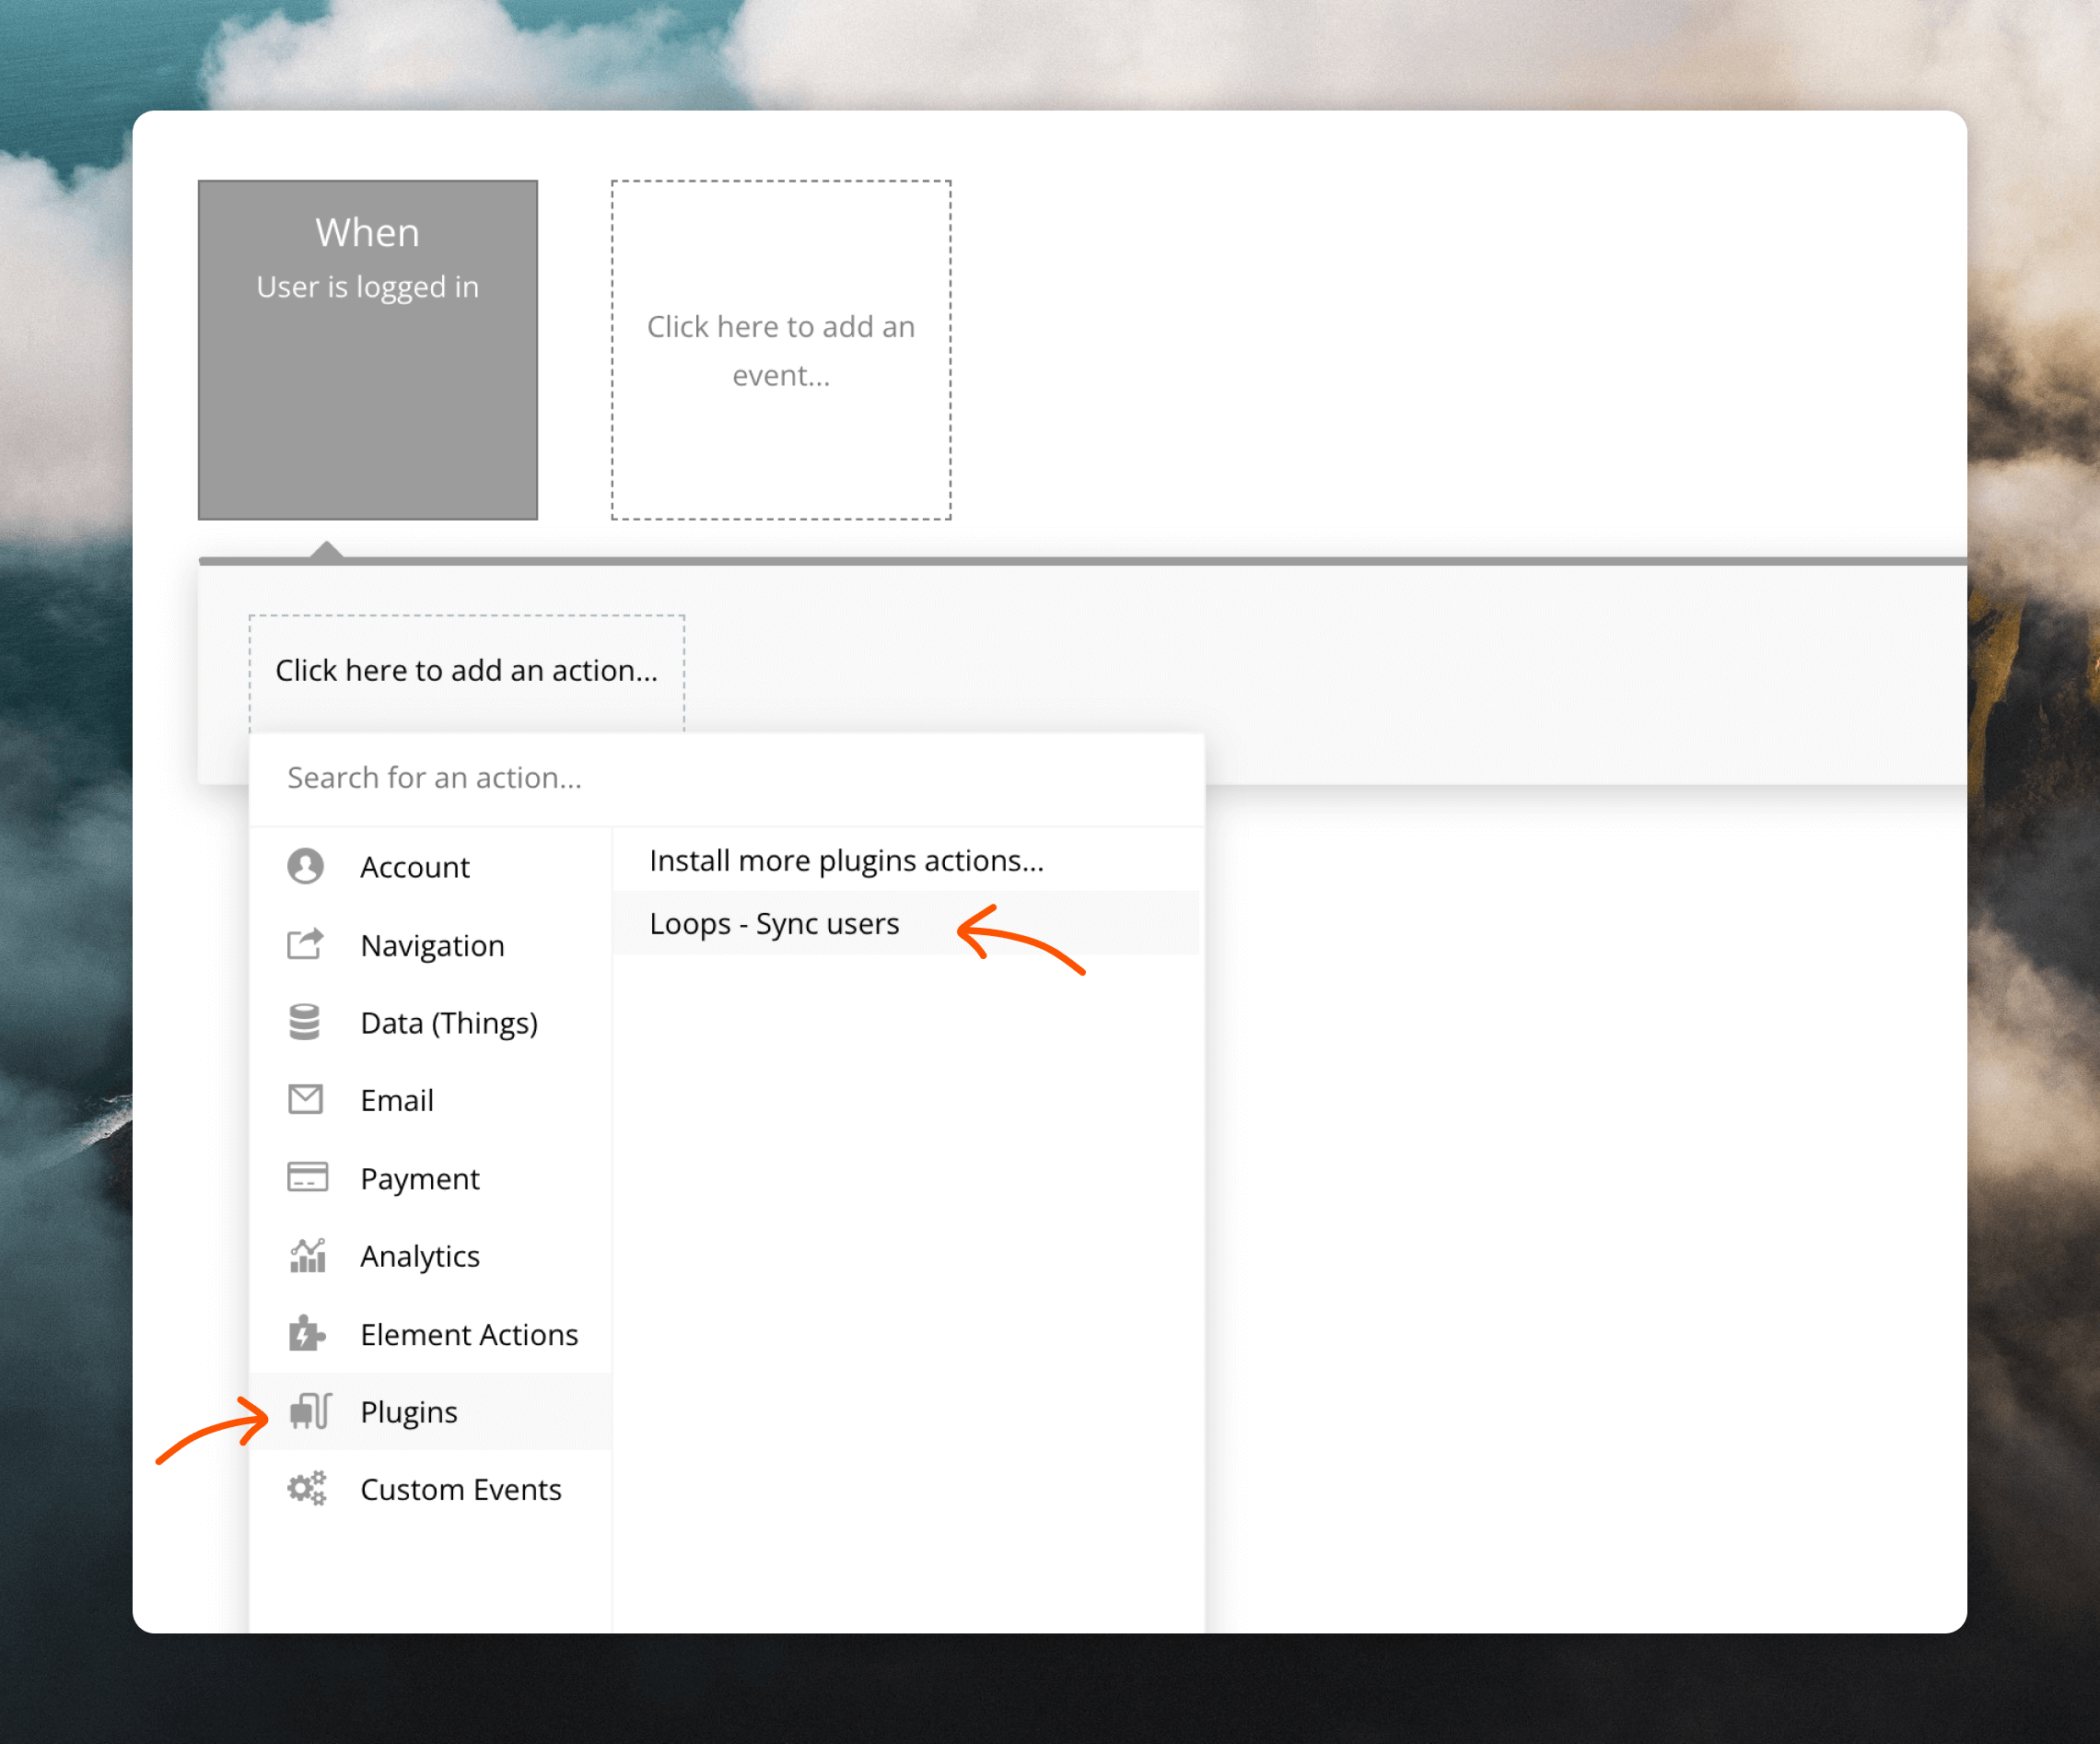
's email, 's unique ID and 's plan to fill out the three fields.)
Other examples
There are lots of different ways you can use Bubble’s API Connector to send data to Loops:- Create a newsletter subscription form and send all submitted email addresses to Loops.
- Sync contacts whenever a user’s email address is changed in Bubble.
- Trigger an event in Loops for all new sign ups using the Send event endpoint, to enter new users into a welcome email sequence.
- Periodically sync contact properties to Loops so you can send personalized emails.
Learn more
Bubble plugin
Manage contacts and send emails with our Bubble plugin.
Loops API
View all of our API endpoints.
Contact properties
Learn more about custom contact properties.