A common use case for crafting a user journey is to send different emails based on whether a contact has completed an action or not. For example, you may want to send a different email to free users versus paid users. You can do this by adding a Branch node to your workflow.Documentation Index
Fetch the complete documentation index at: https://loops.so/docs/llms.txt
Use this file to discover all available pages before exploring further.
Creating a branching workflow
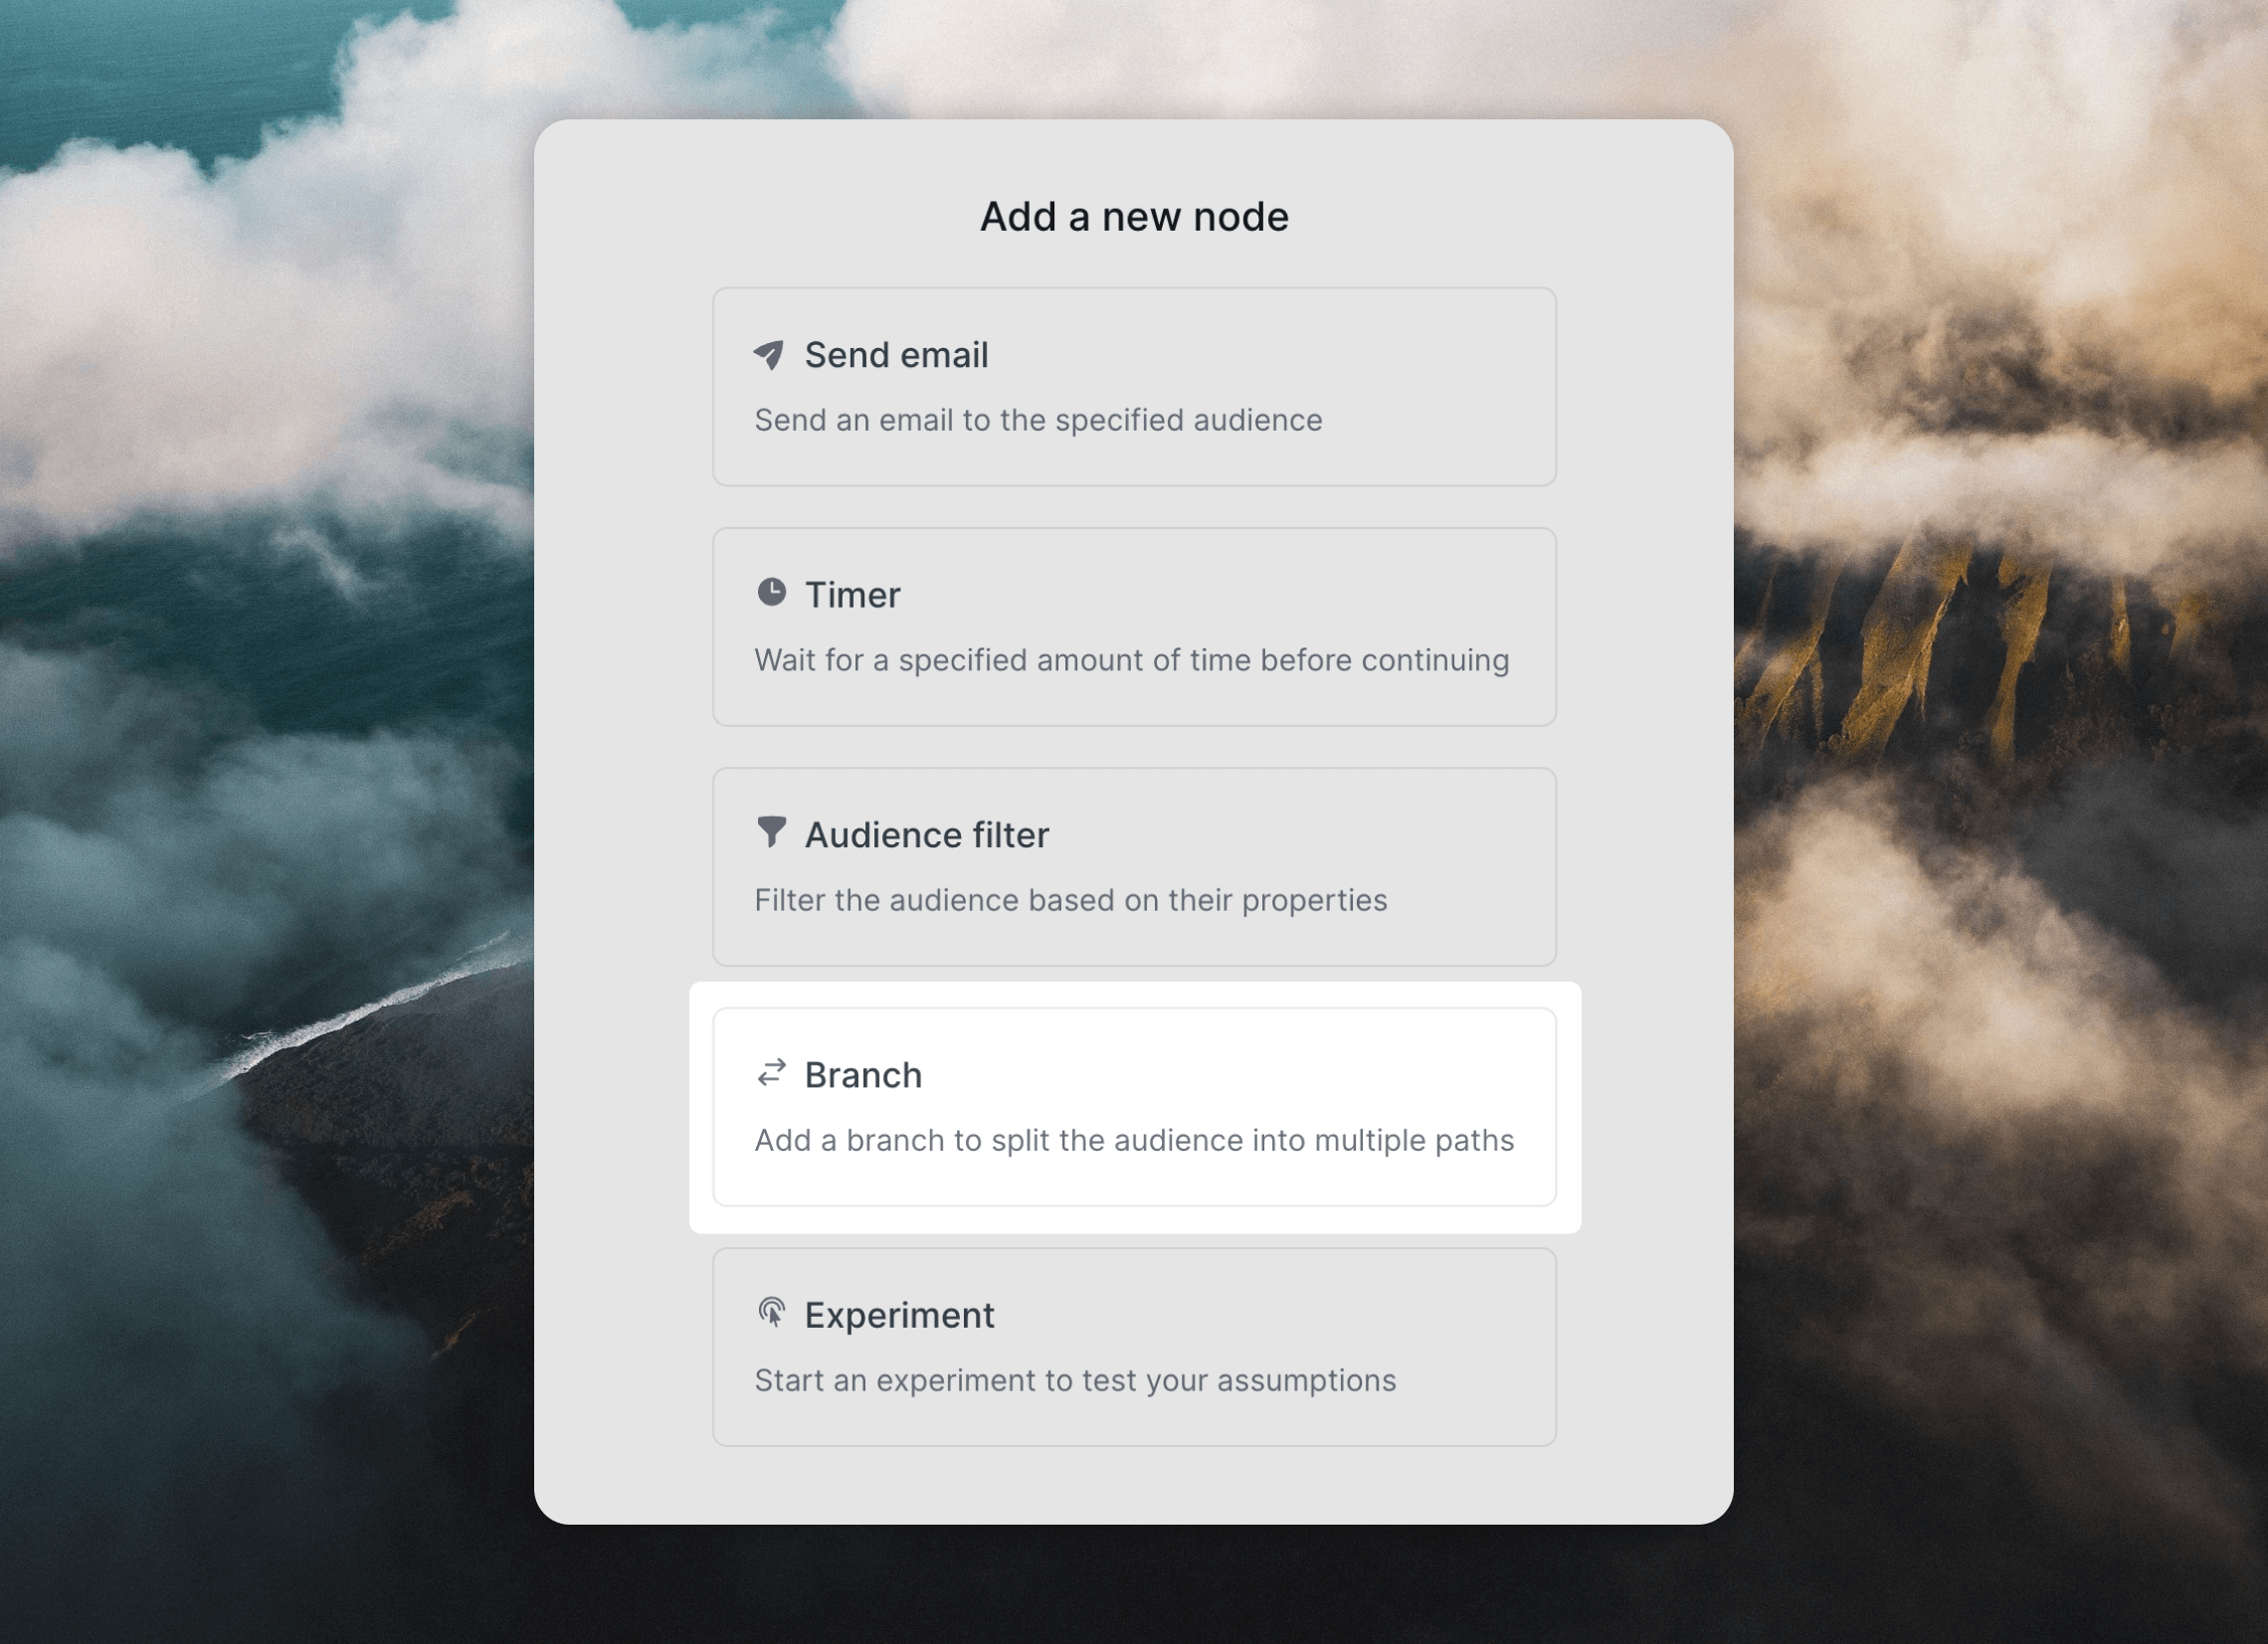
+ icon where you want branching to be added and select the Branch node type.
Two audience filter nodes are automatically created for you. Edit the audience filter settings for each to send different contacts down each branch, based on their properties.
You can add as many branches as you like to your workflow. Add more branches by clicking the + Branch option that appears on hover just below the Branch node.
Each branch can contain emails, timers, audience filters, more branches, and experiments.
Node types
Learn about the different node types.
Experiments
Add A/B testing to your workflows.
Audience filters
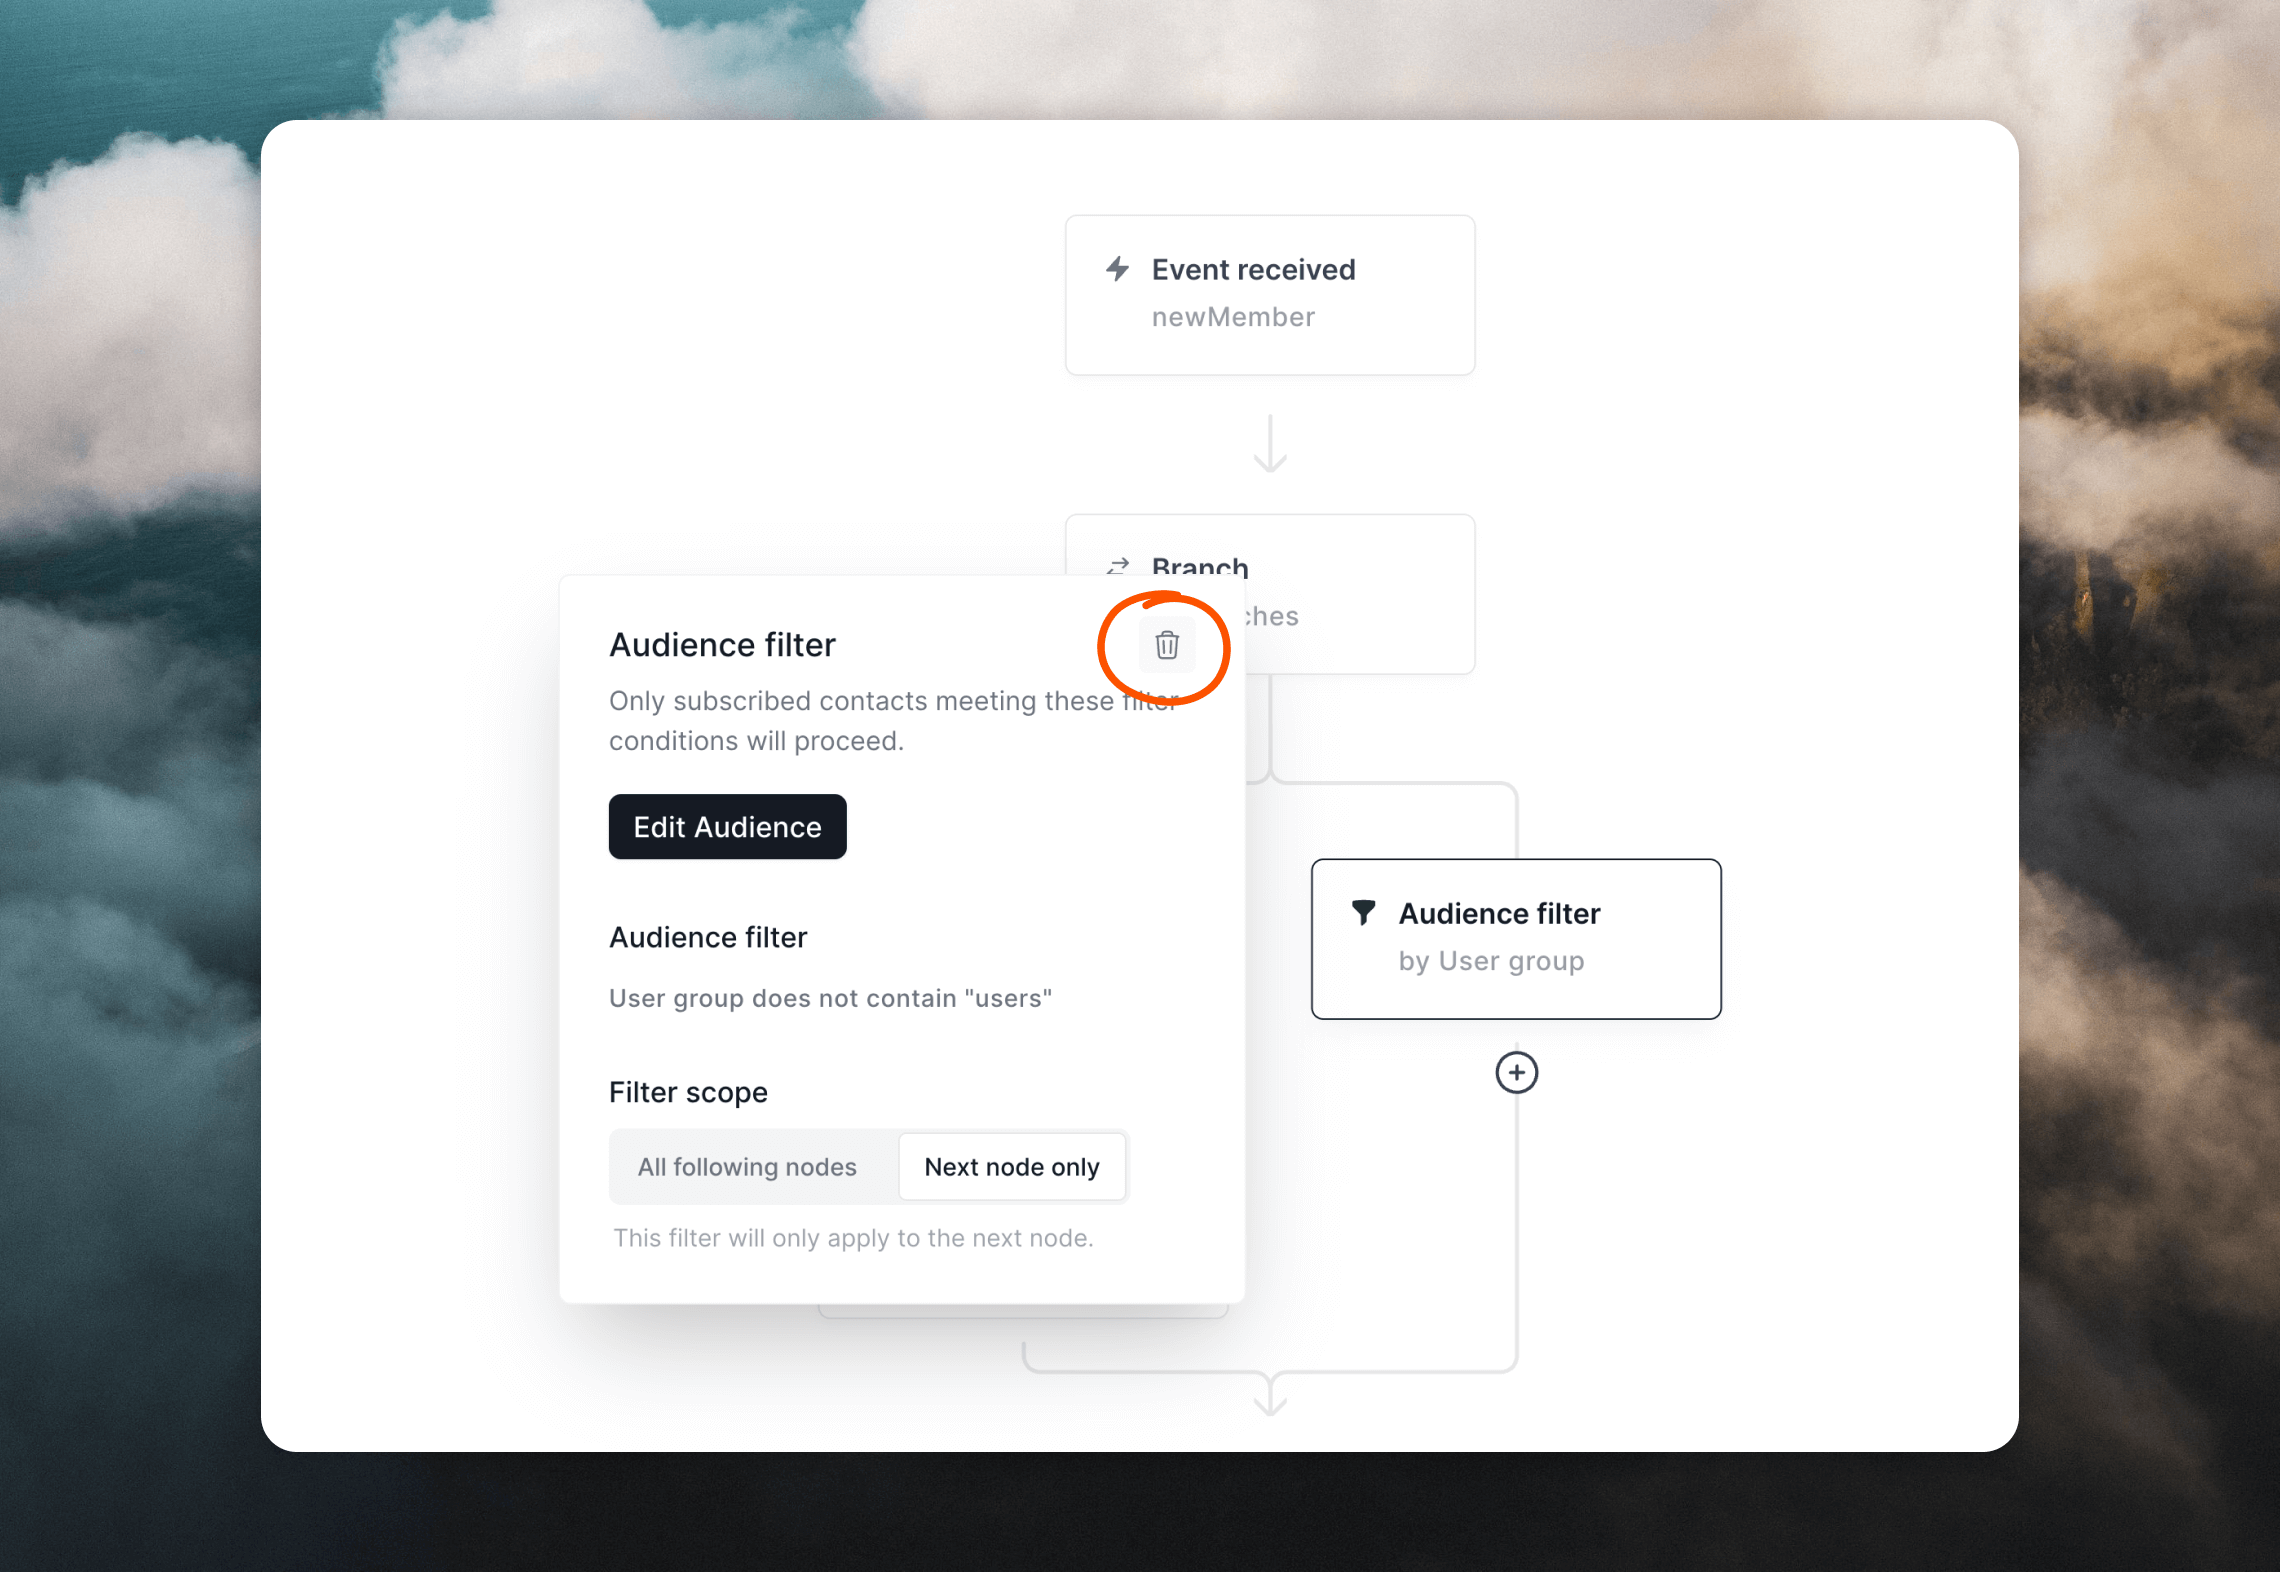
Every branch is defined by an audience filter, which is always the first node in a branch. Filters determine which contacts follow each branch. When a contact reaches a branch node, the audience filter nodes are evaluated left-to-right as defined in the workflow builder. The contact will proceed to the first matching filter and the remaining filters are skipped. If the contact matches none of the filters, they exit the workflow. You can create the equivalent of a “default path” by making the right-most filter have empty conditions so that it matches any contact.Upgrade notice
Previously, a branch node would send contacts who matched multiple filters down multiple parallel branches.This behavior has been changed; now, in any new branches added to workflows, contacts will only follow the first branch they match.Branches with the old behavior are marked in your workflows. They will retain the old logic until you explicitly press the “Upgrade Branch Node” button shown in the Branch head node’s options panel. For more information, see the branch node upgrade documentation.- All following nodes: The audience filter will apply to all nodes downstream of the filter. If a contact stops matching the filter later down the branch, they will be removed from the workflow.
- Next node only: The audience filter will only apply when contacts reach the next node in the branch. If a contact stops matching the filter later in the branch, they will remain in the workflow.
Audience filters
Read more about audience filters.
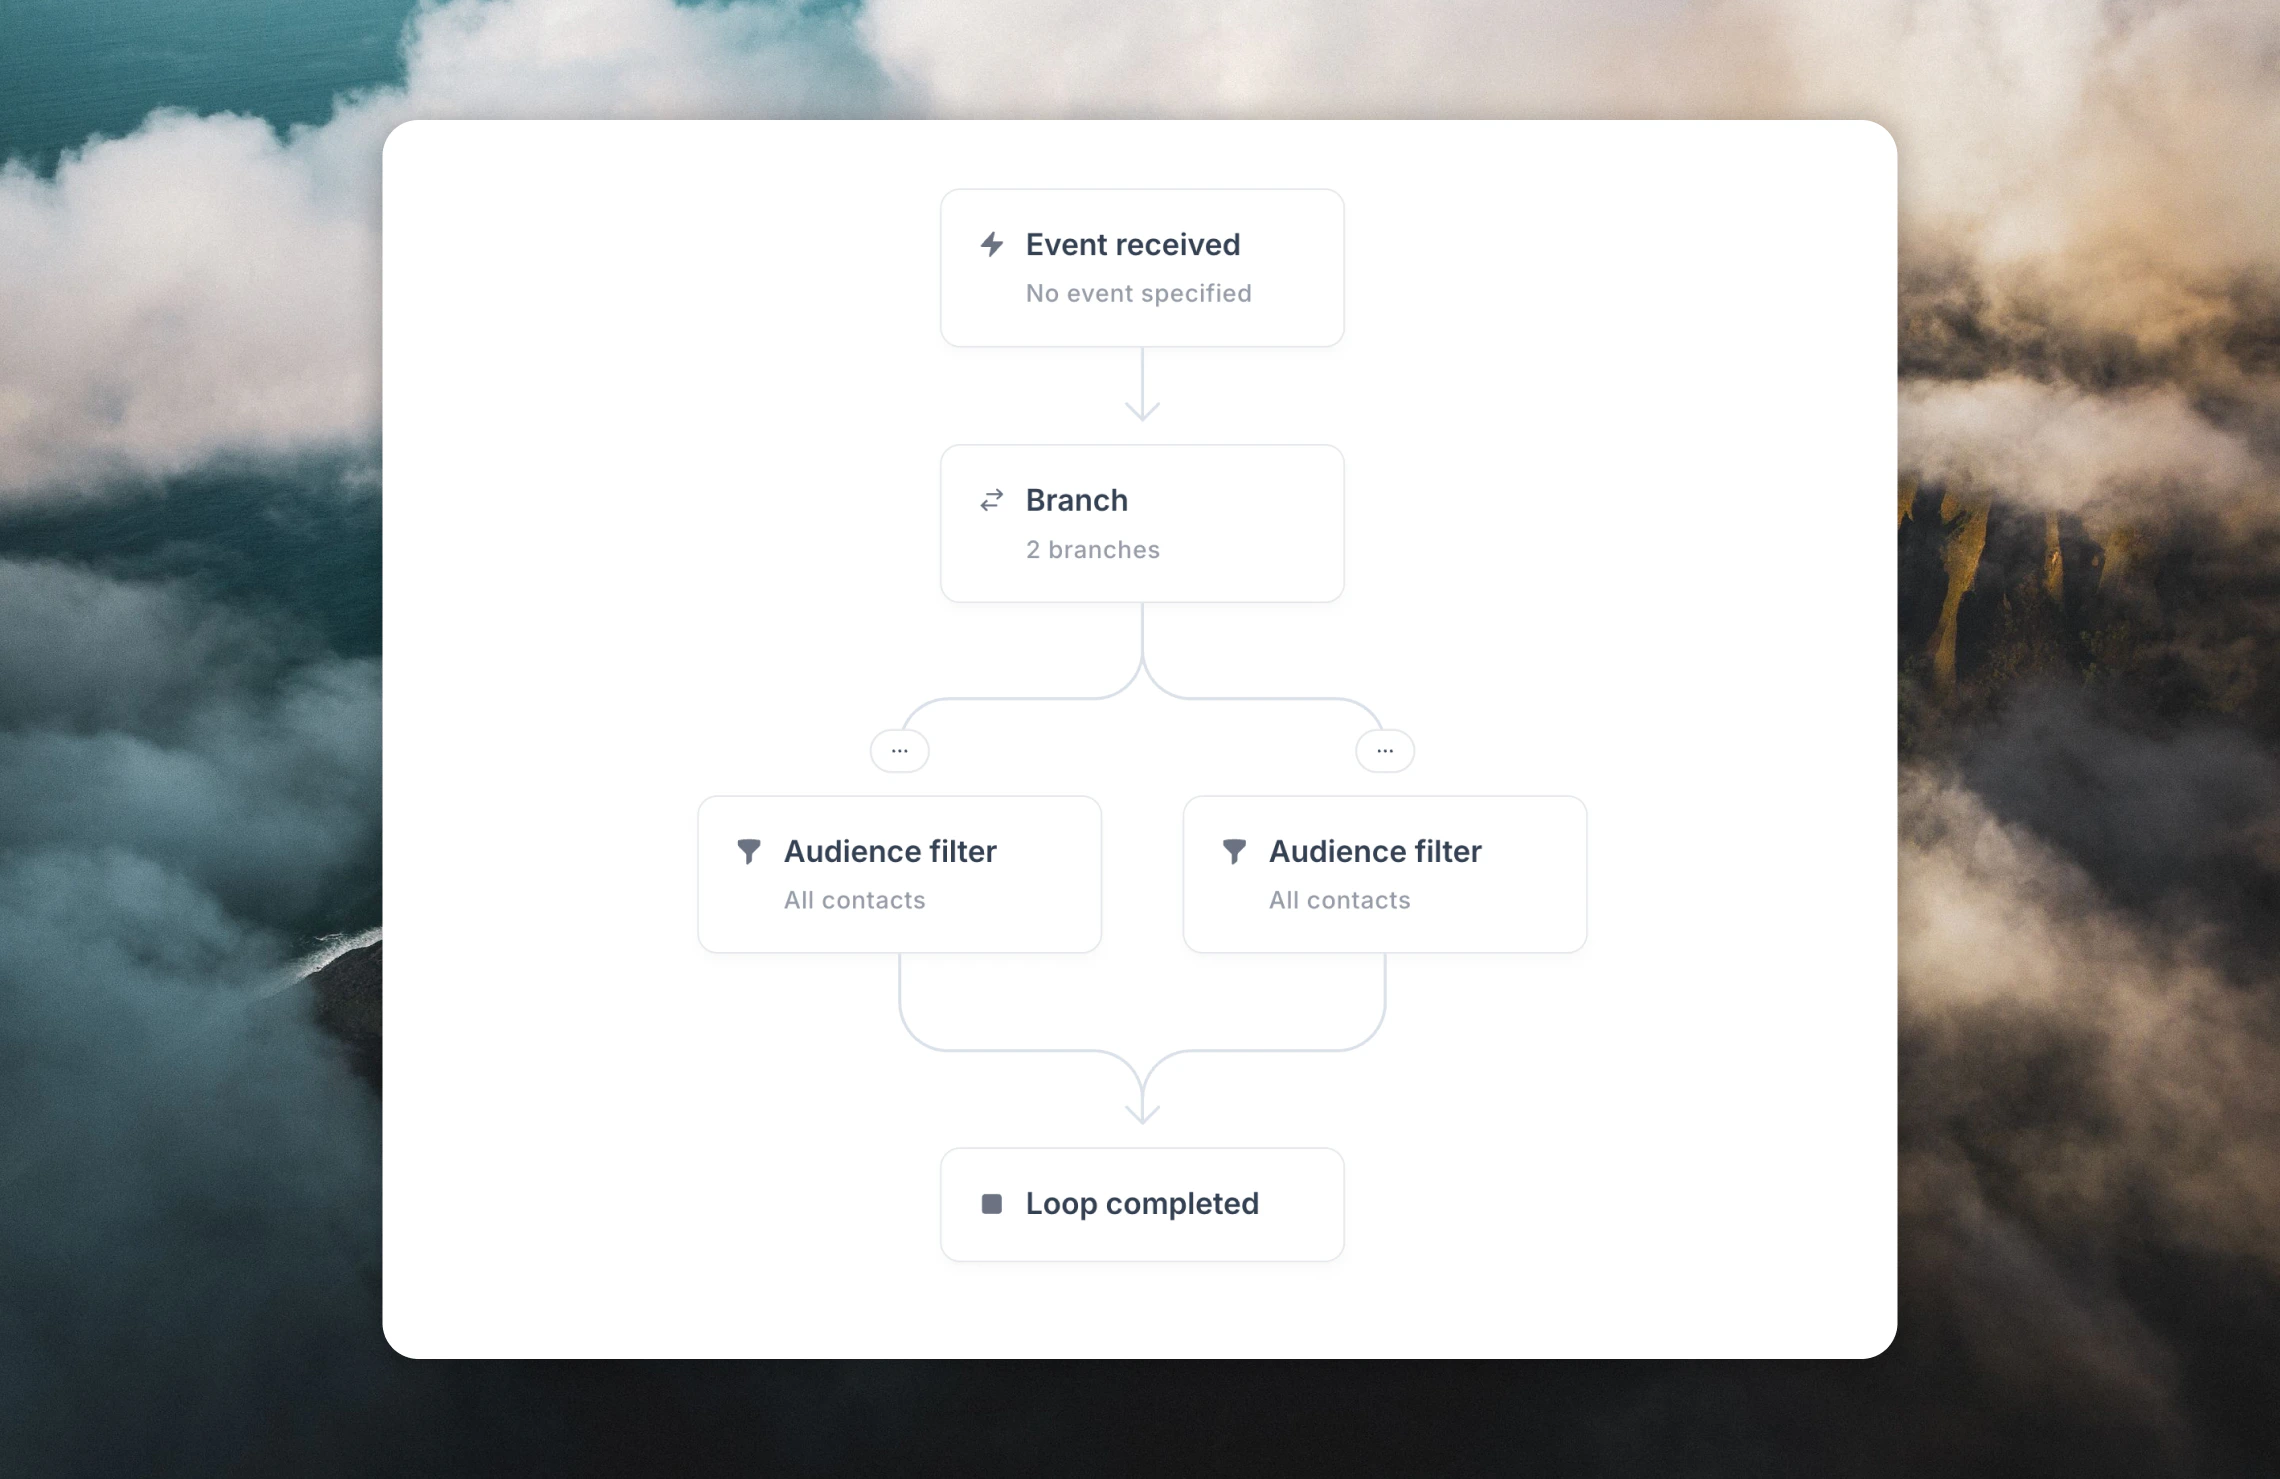
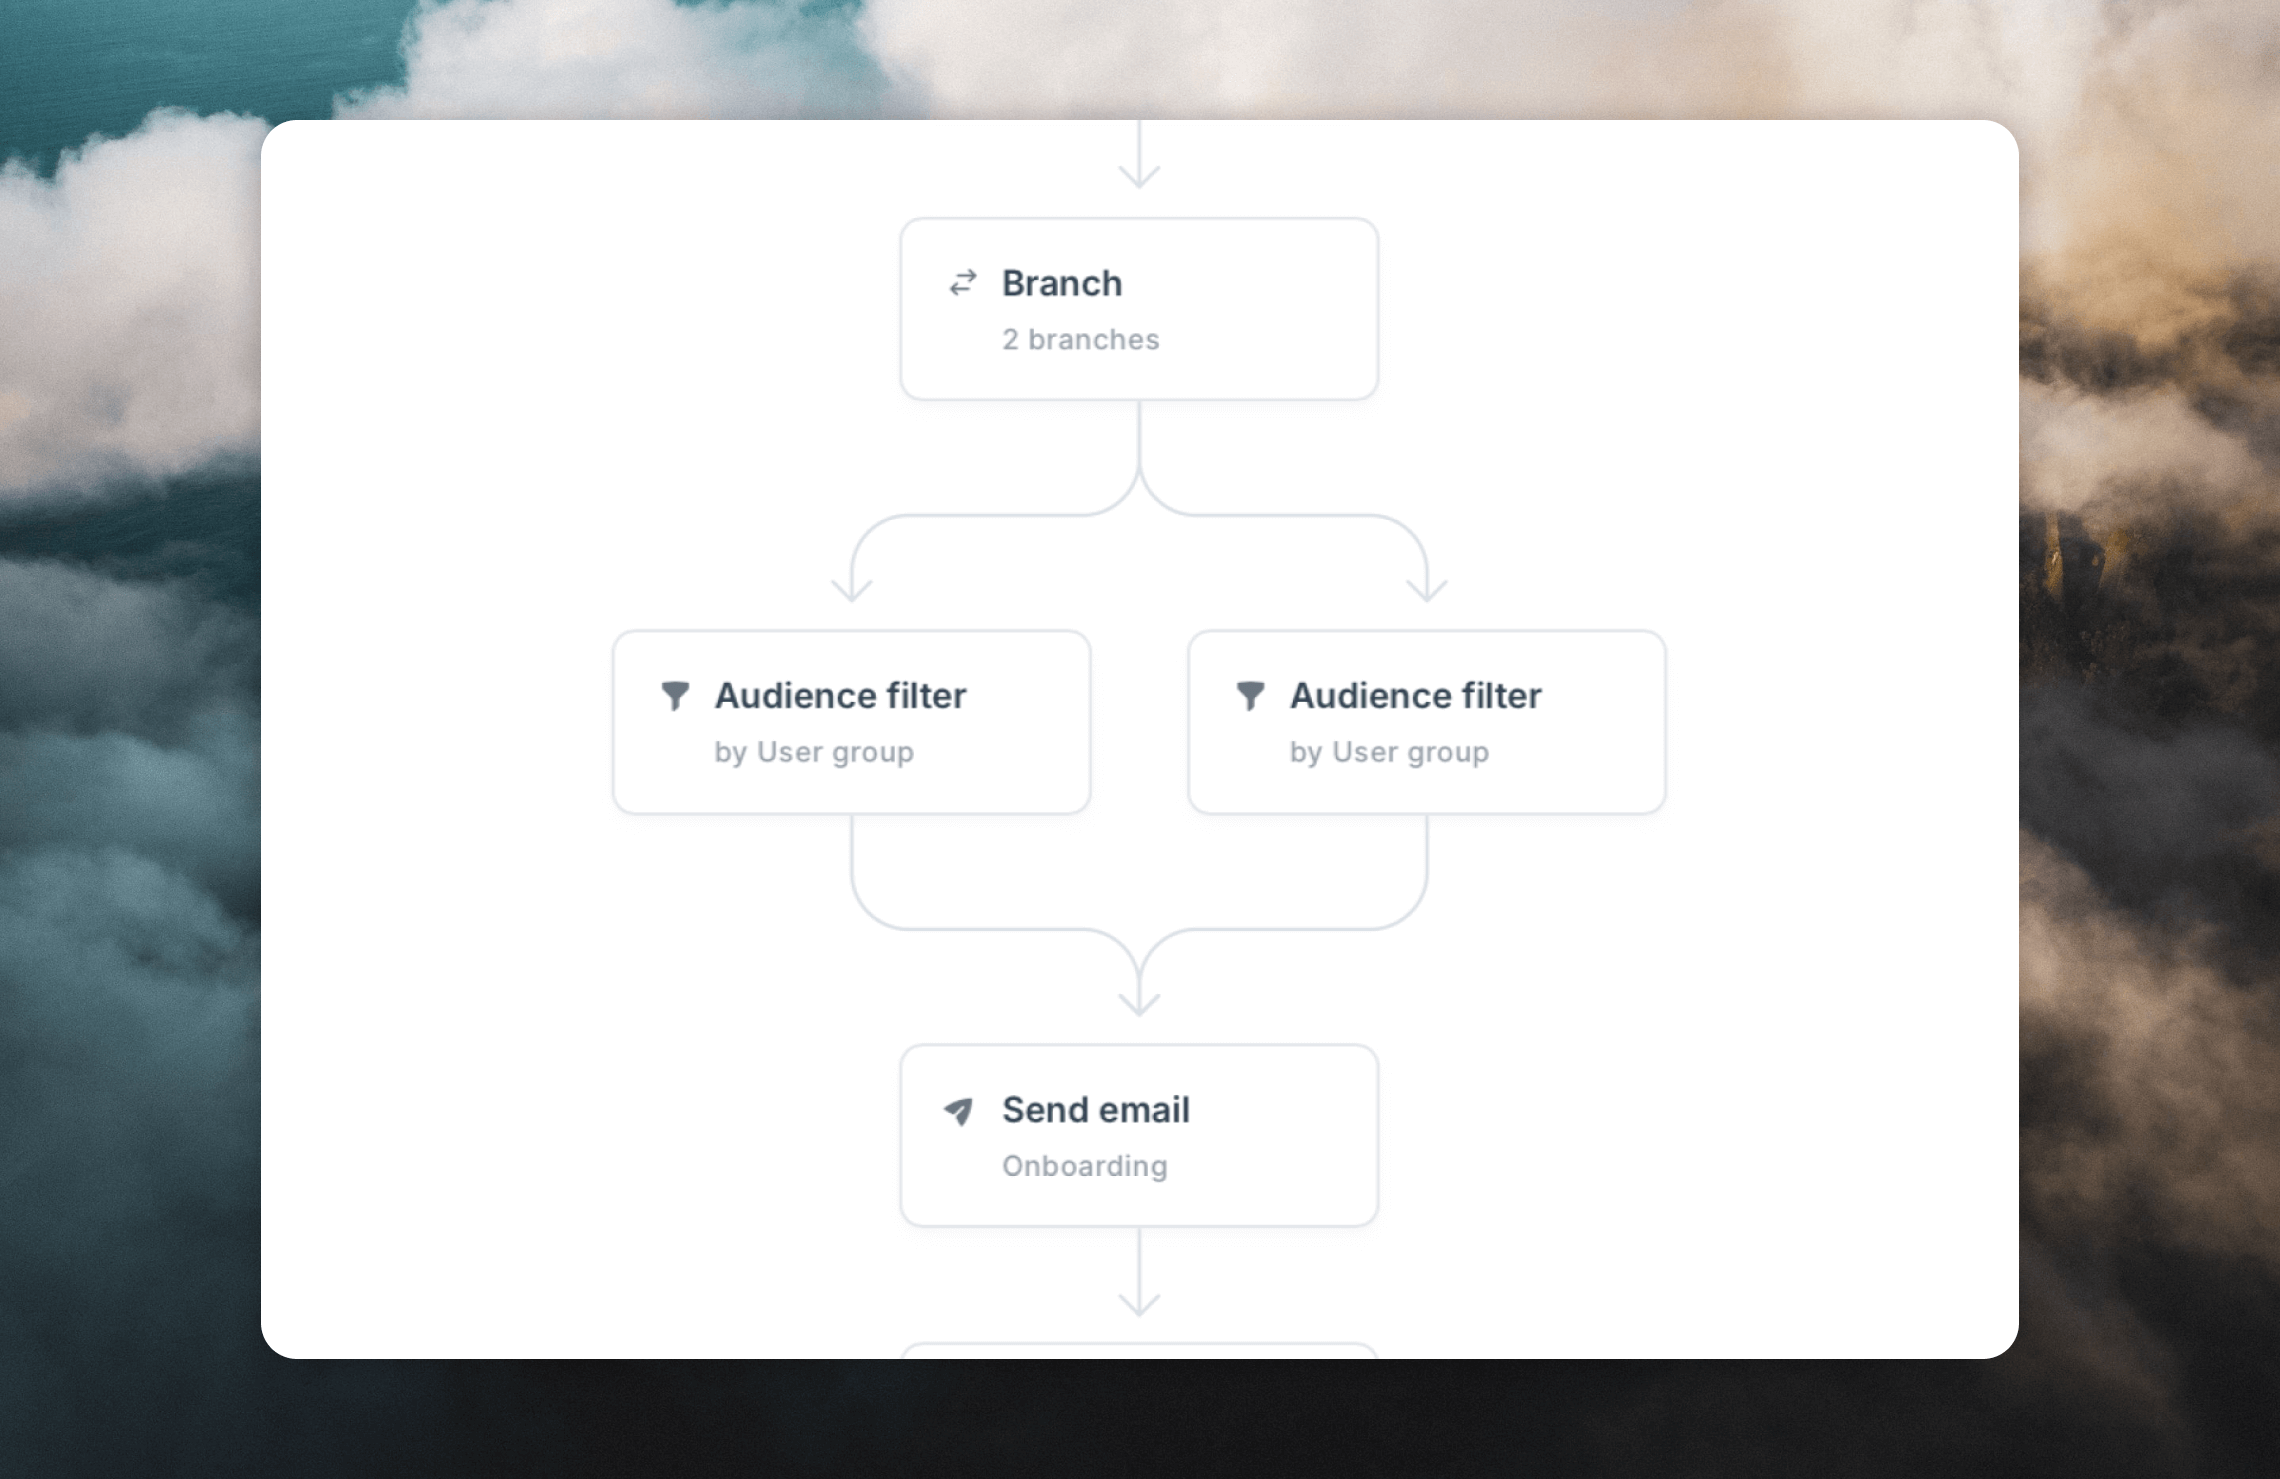
Converging branches
A common use case is to have different branches converge back to the same path. For example, you may want to create branches with different filters that lead to different onboarding emails, but have all branches converge on a single timer that waits a week before sending the same follow-up email. Here’s how you can set up converging paths in a workflow: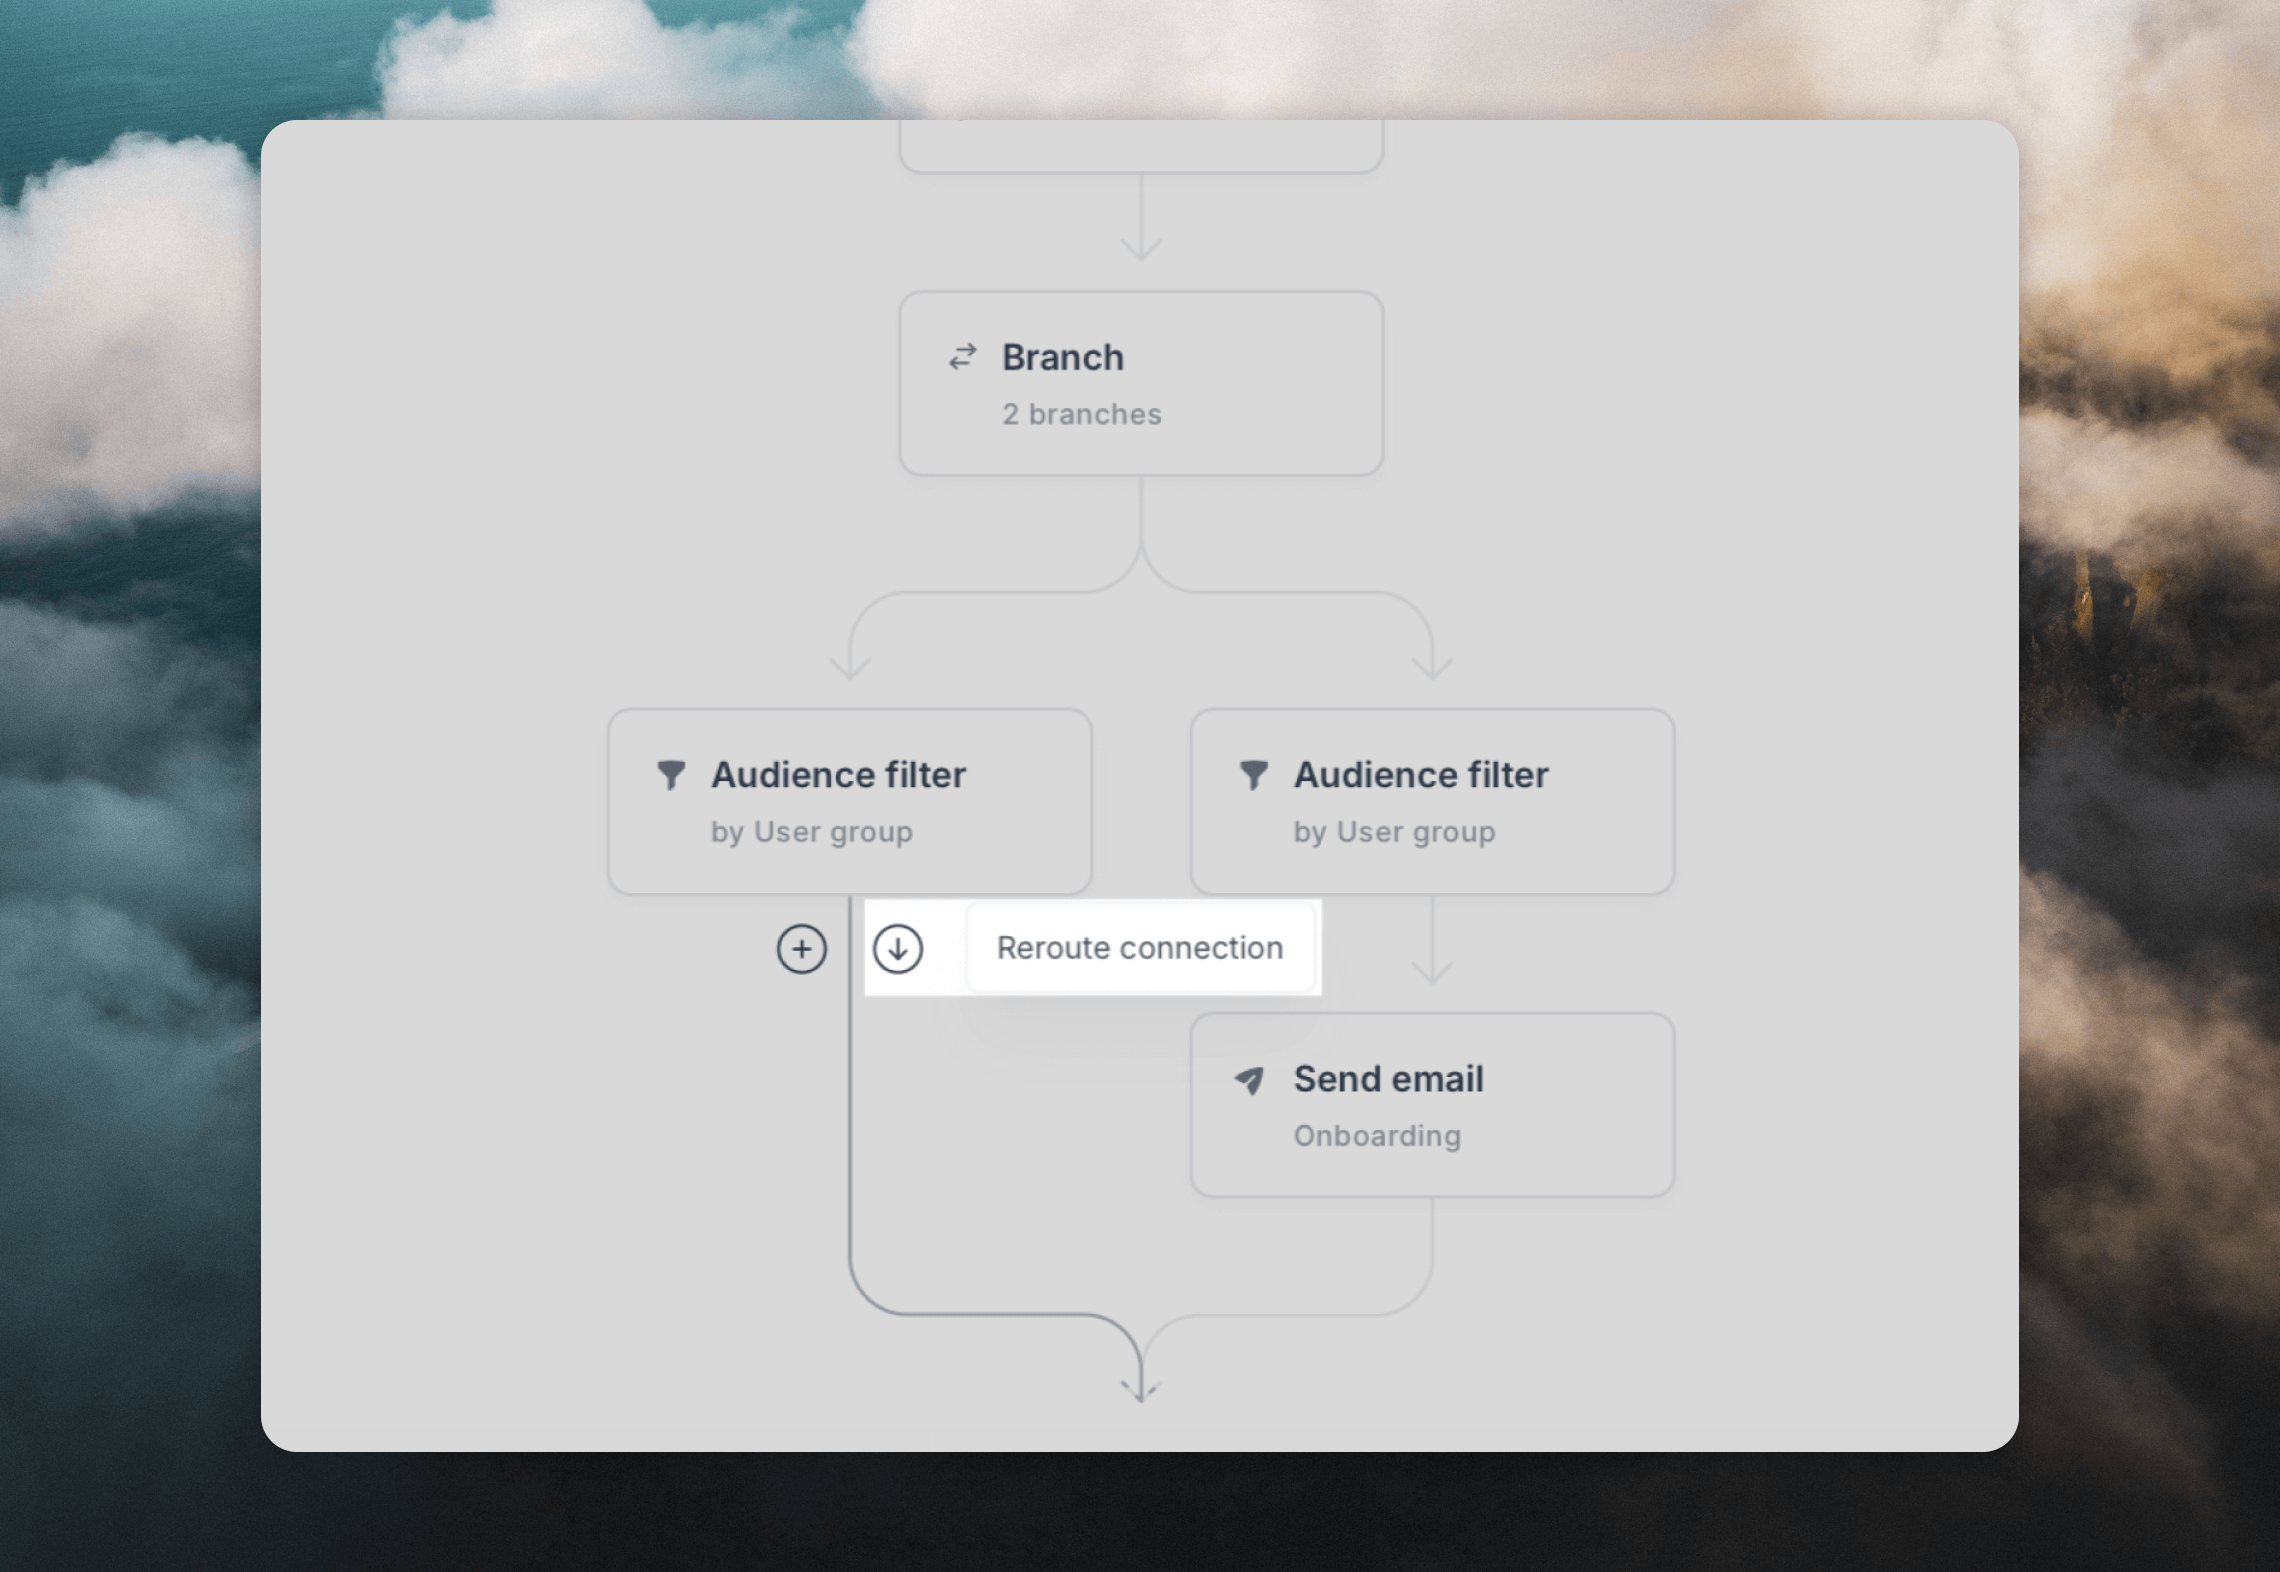
Click on a target node
Now select the target node you want to reroute to.Since workflows do not allow circular paths, only valid target nodes will be visible, and any invalid target nodes will be dimmed.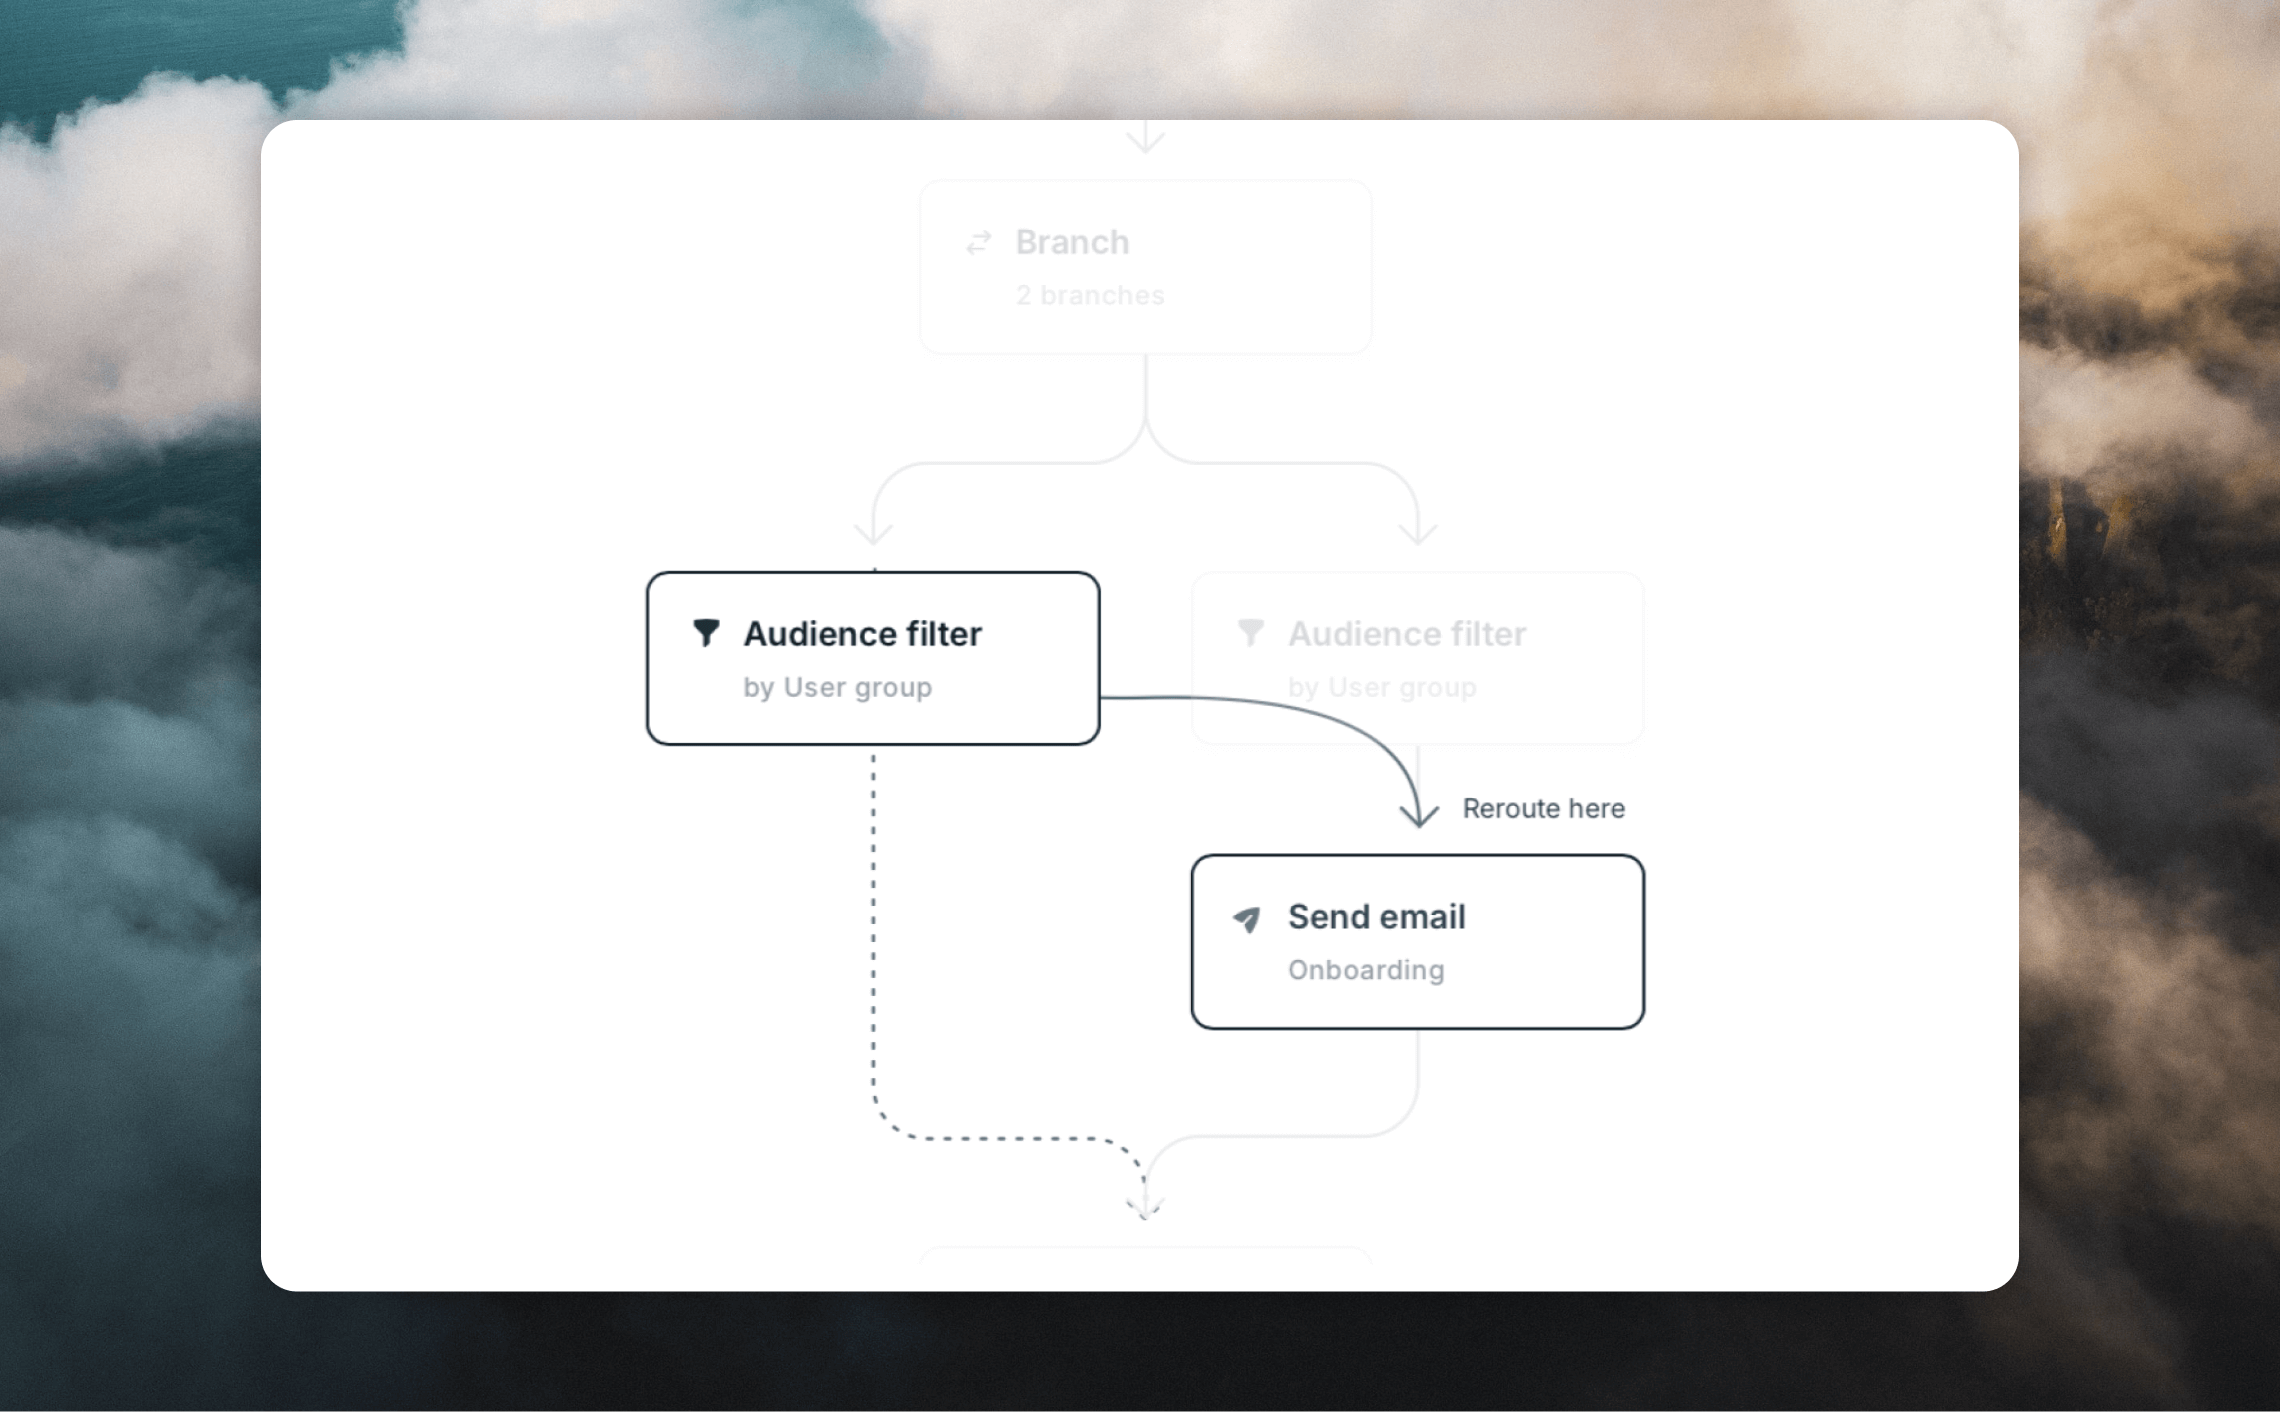
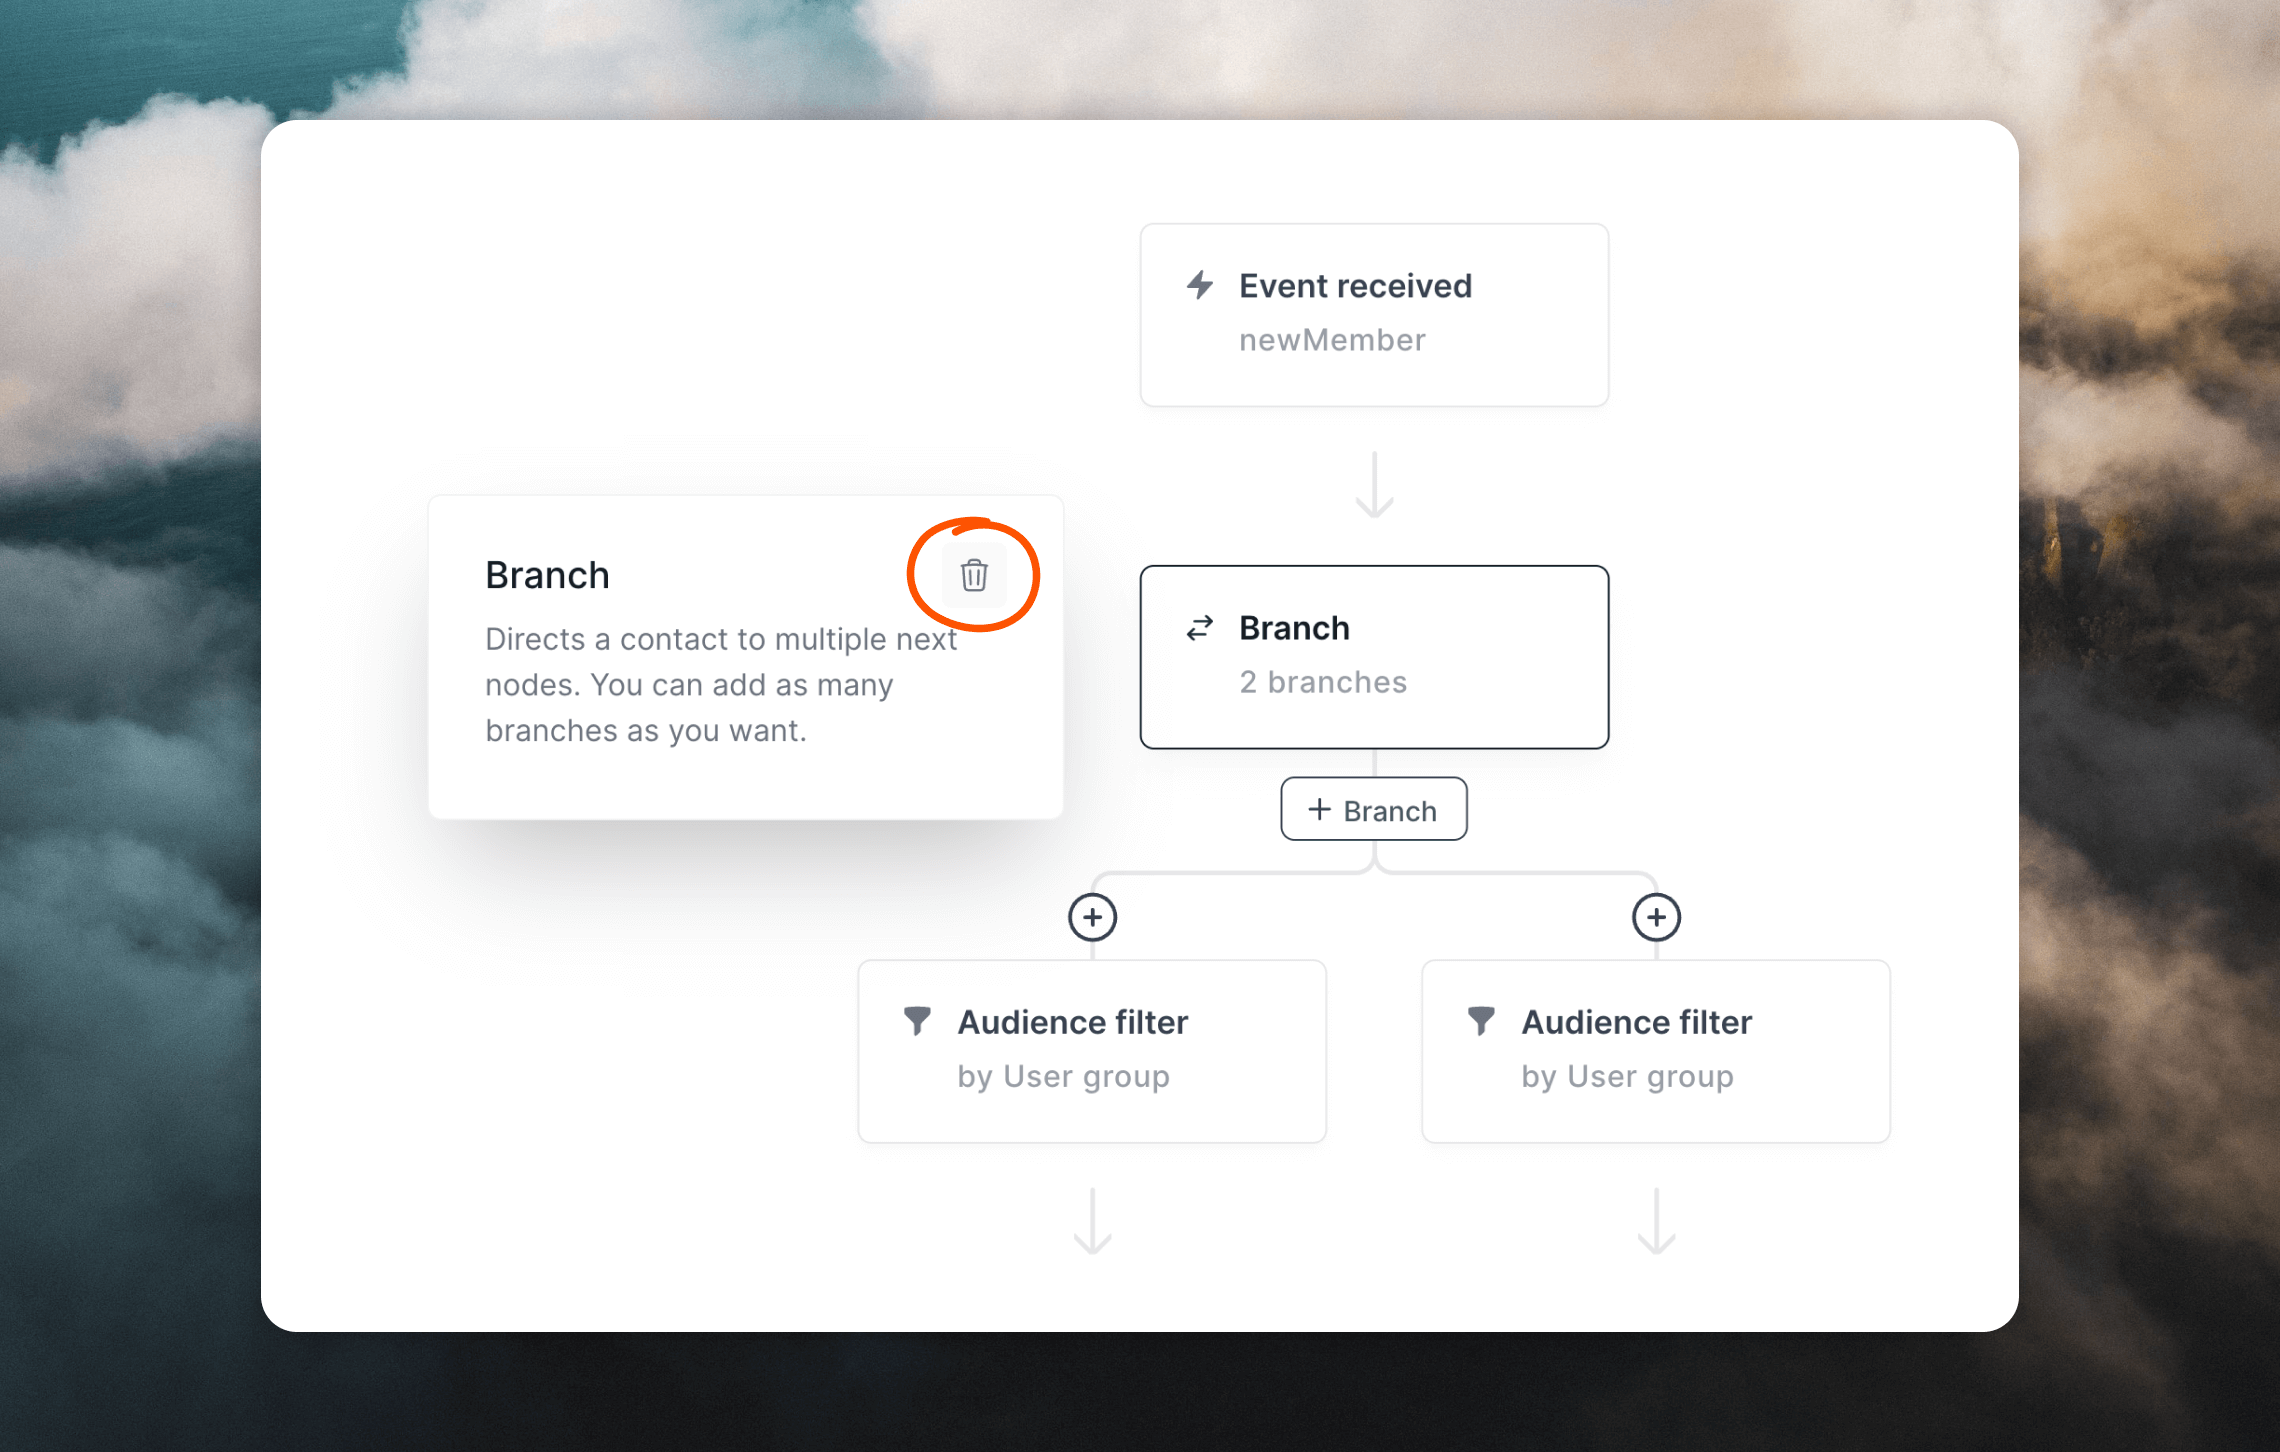
Deleting branches
To delete all branches, select the head Branch node and click the trash icon. This will remove all branches—including all nodes—following it.