Types of dynamic content
The three email types in Loops have different dynamic content available to them:- Campaign emails can contain contact properties.
- Workflow emails can contain contact properties and event properties.
- Transactional emails can contain data variables.
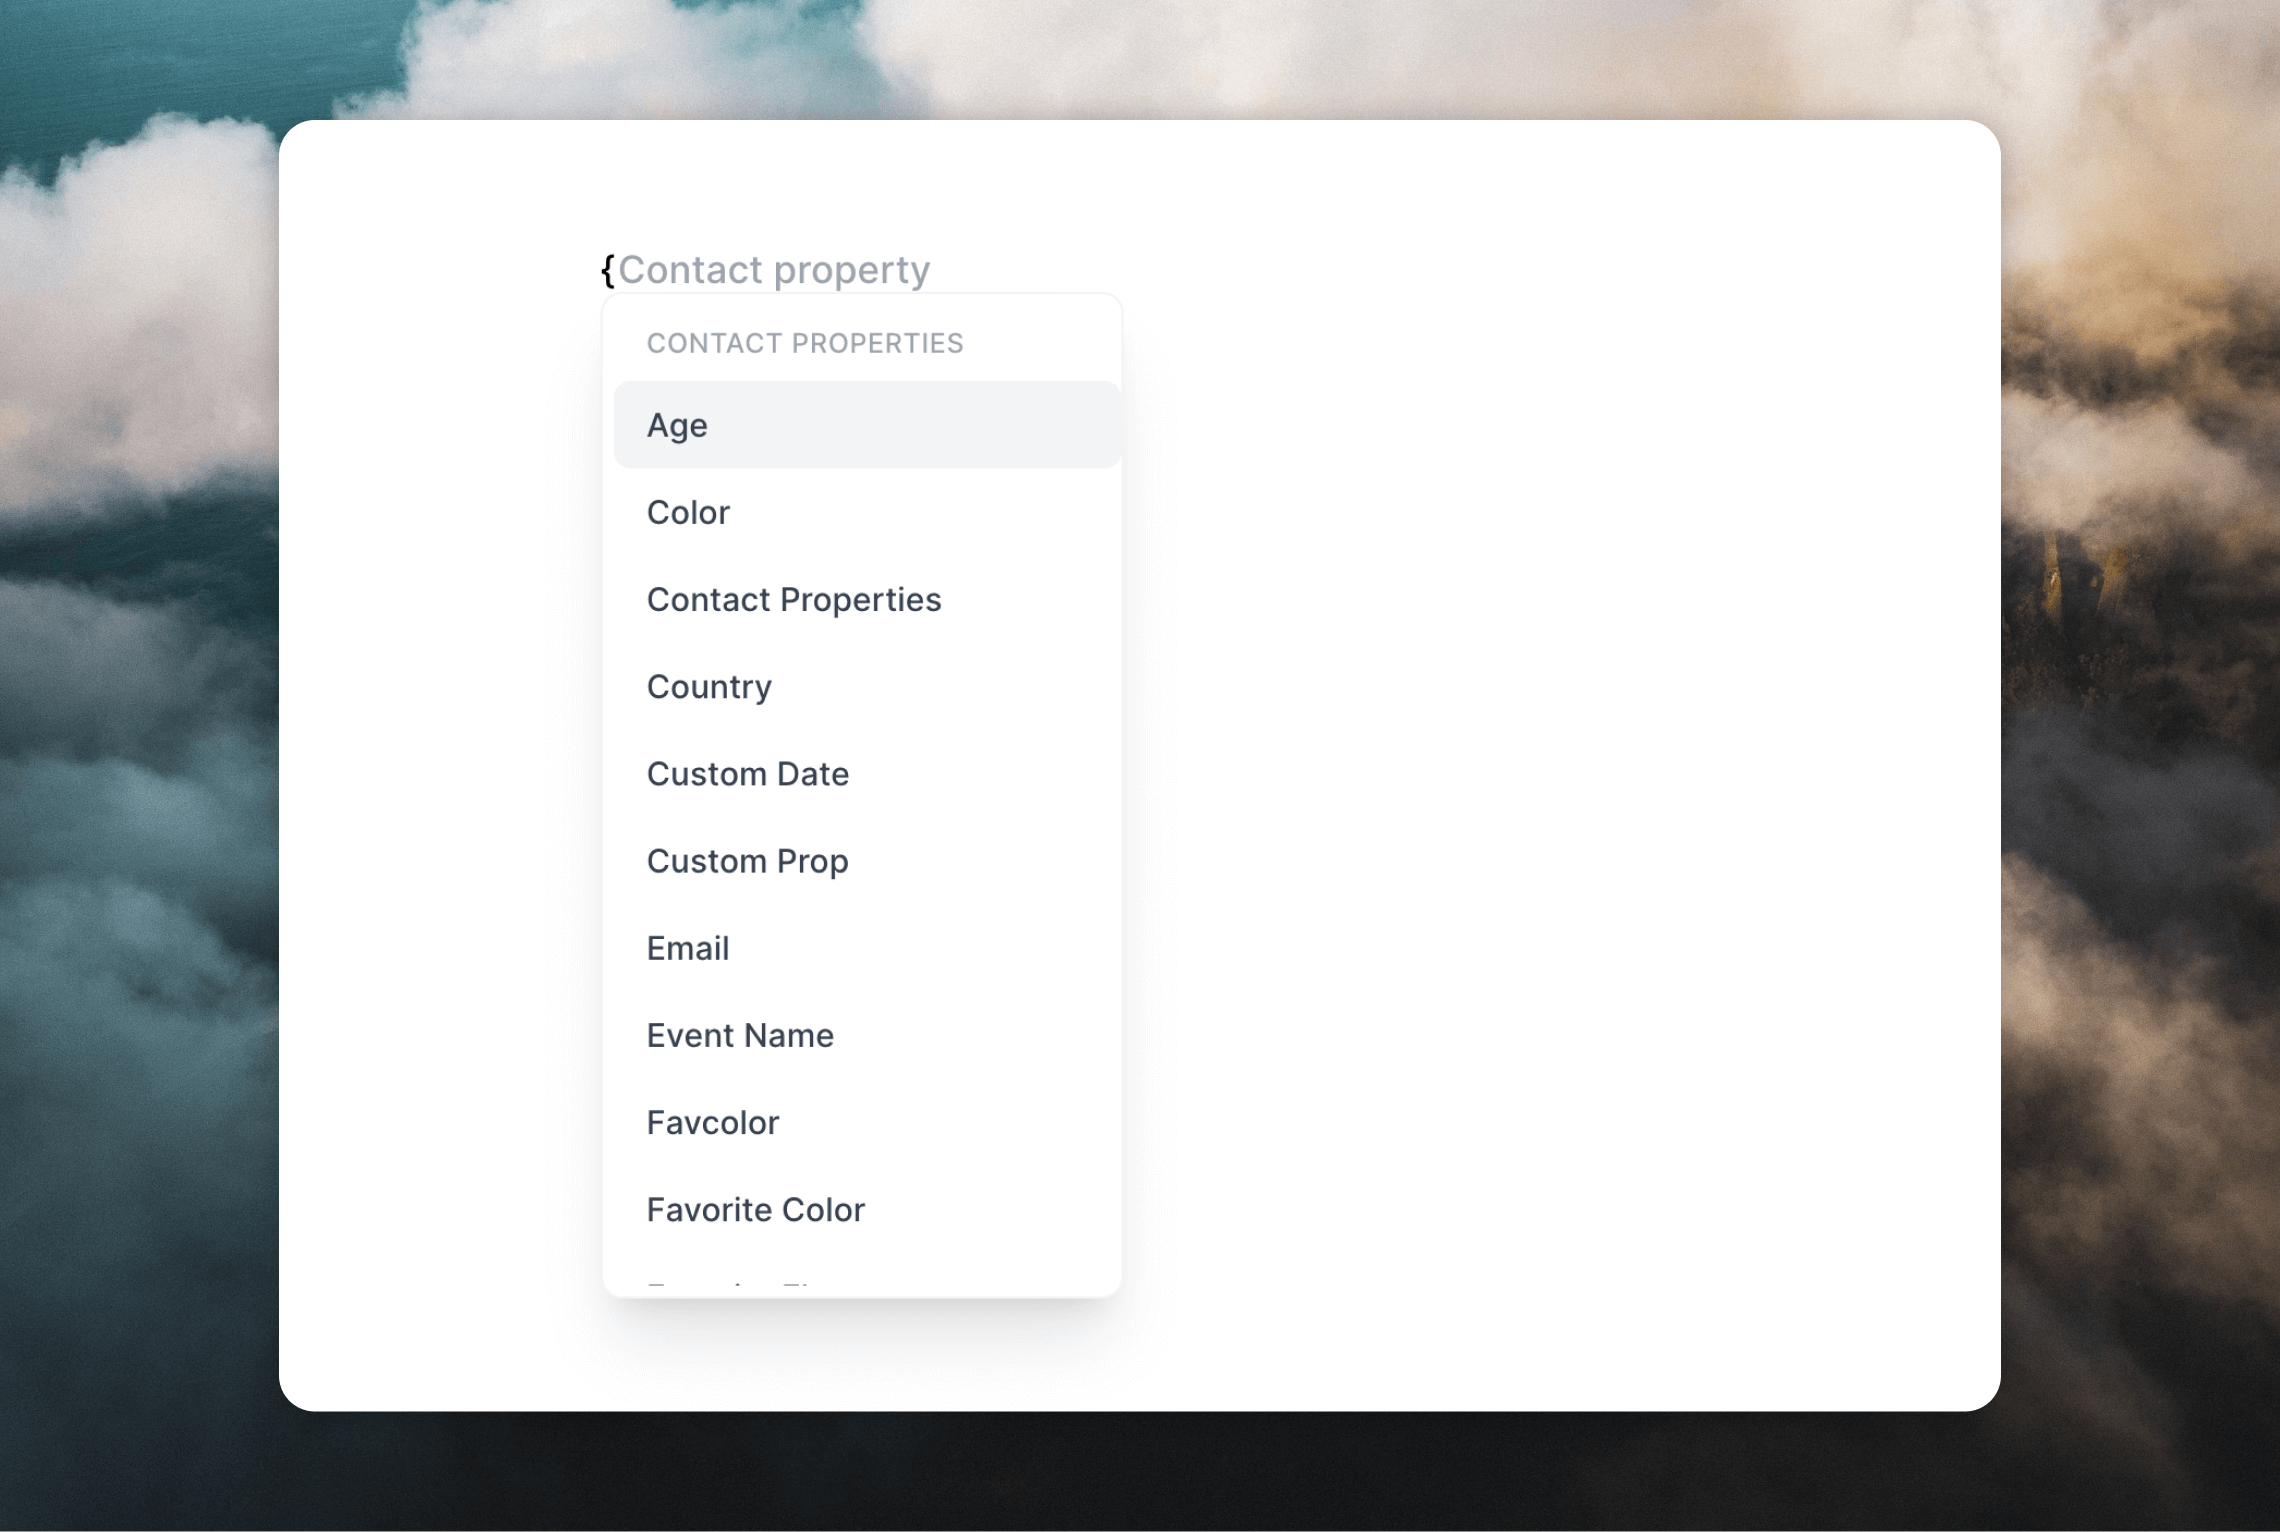
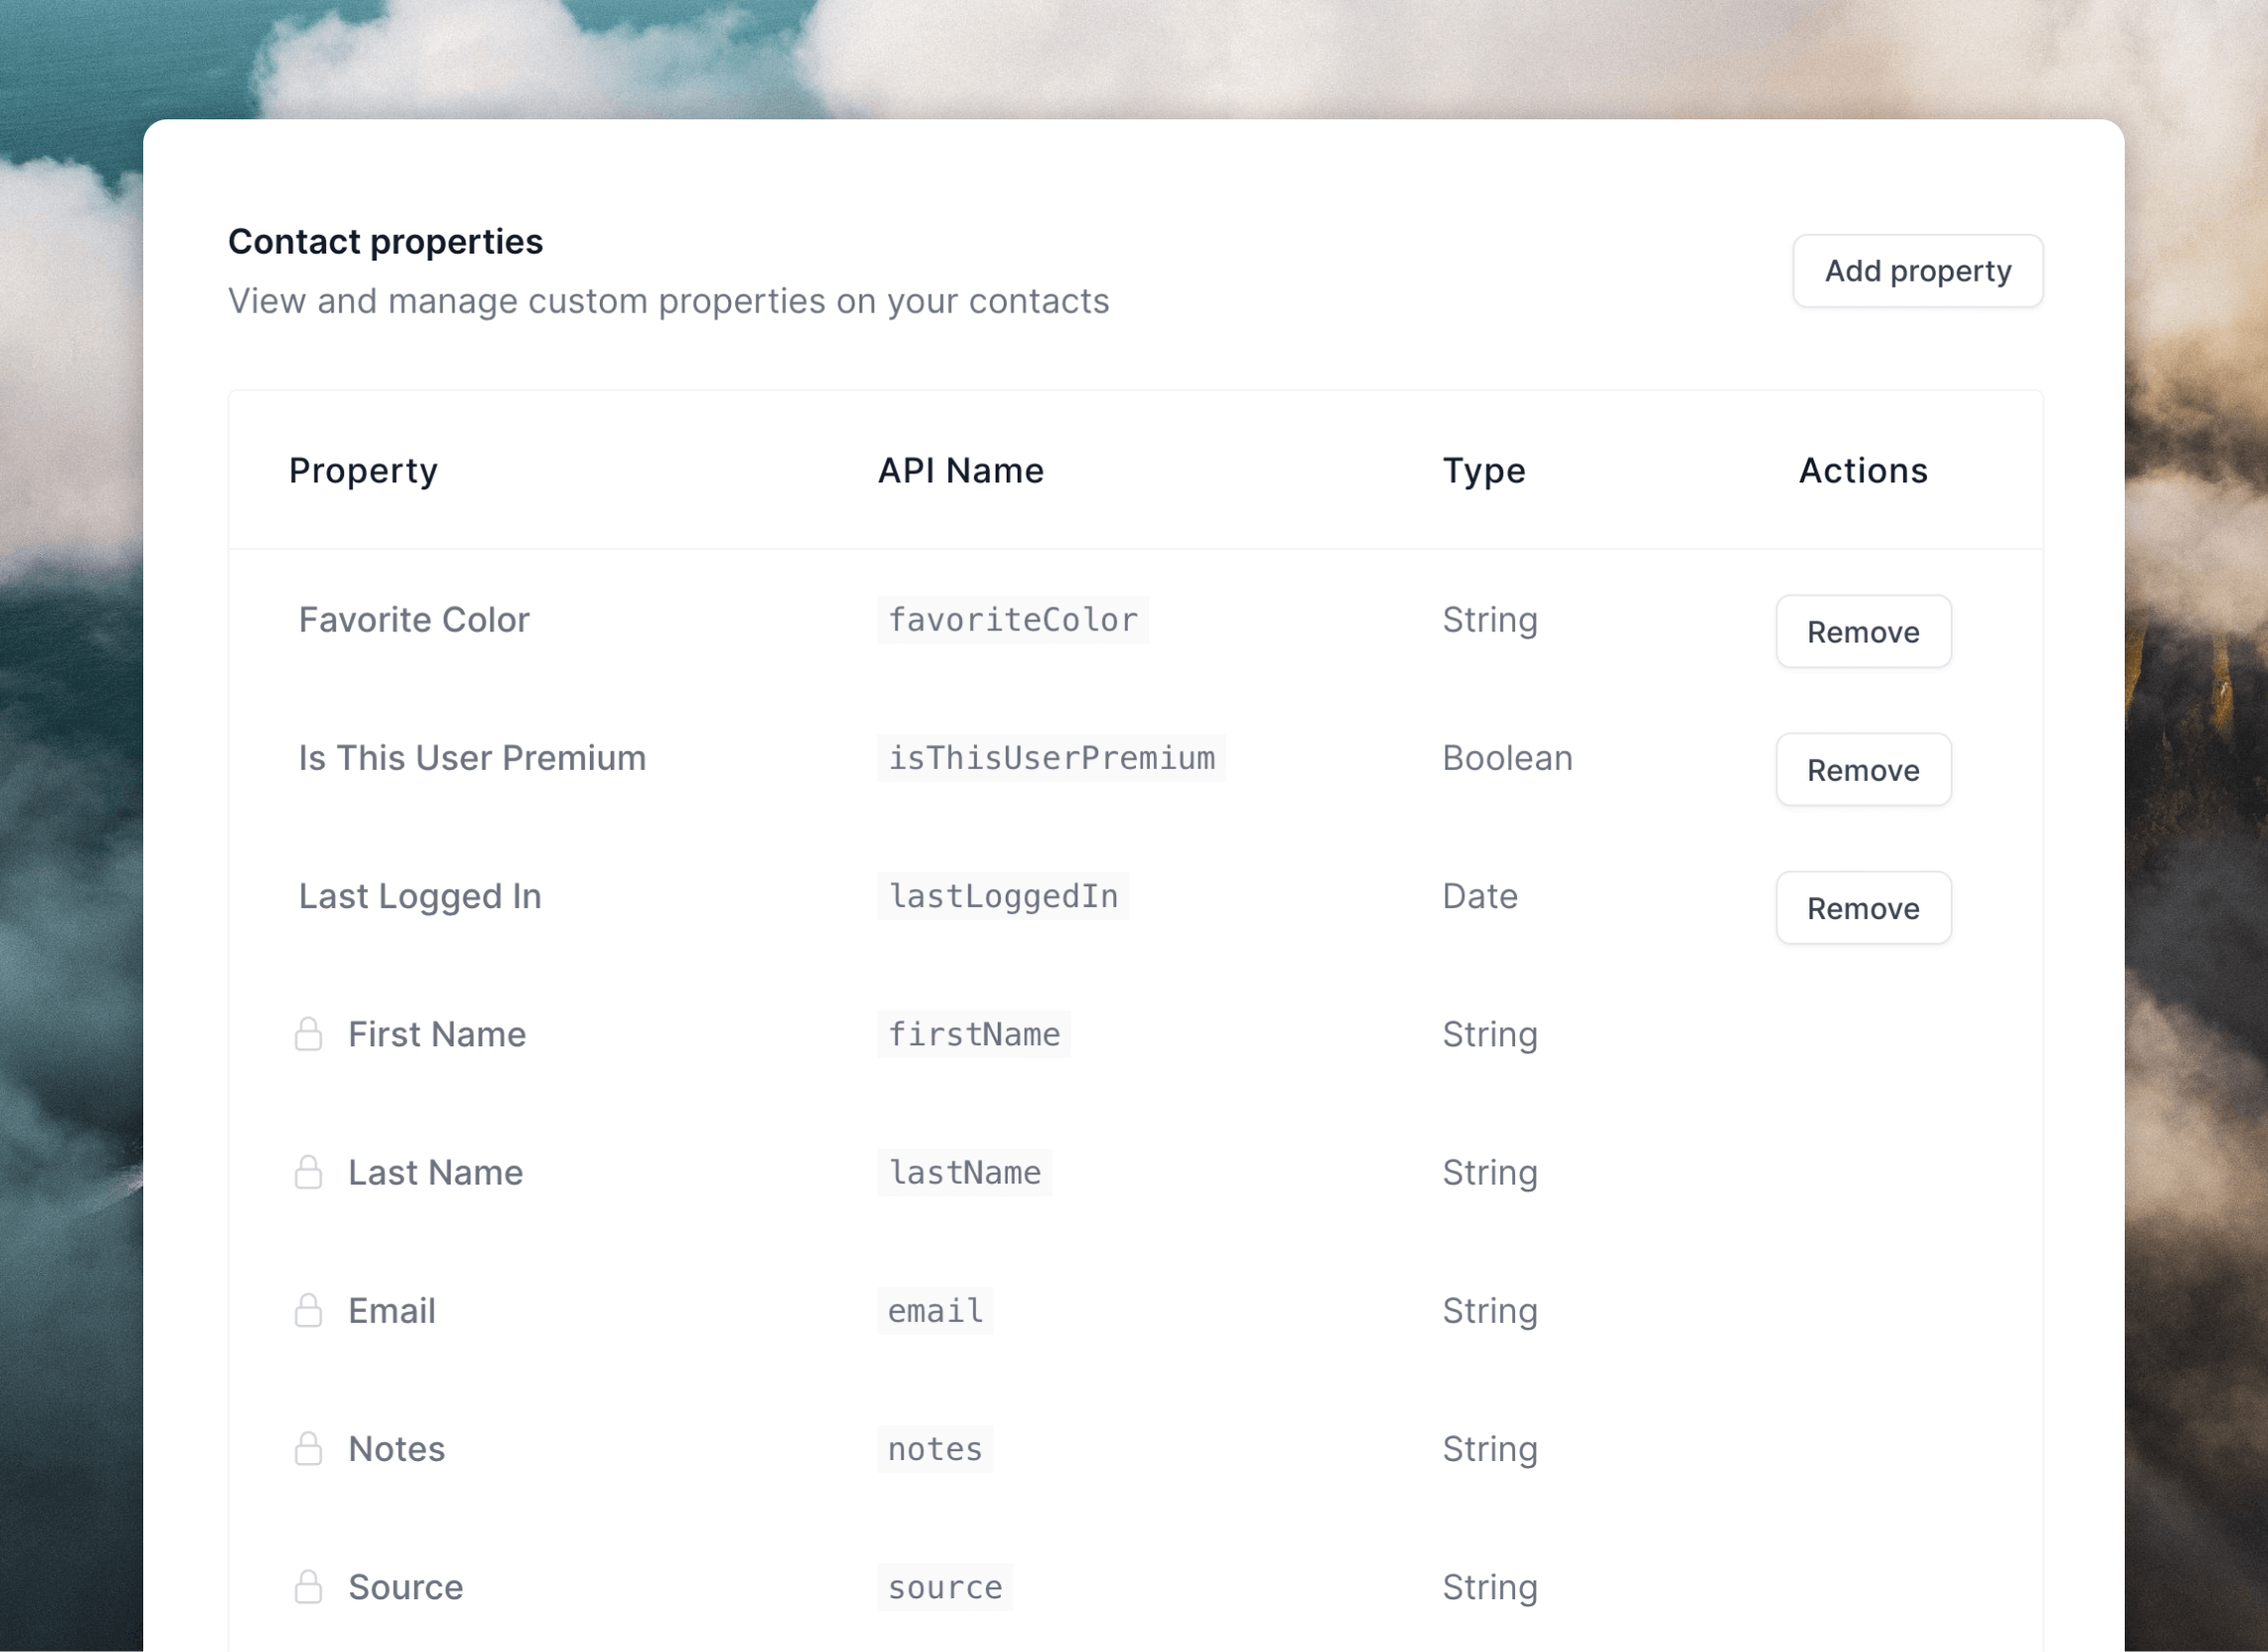
- Contact properties are pieces of data related to each contact in your audience. There are a set of default properties like name and source, but you can also add any number of custom contact properties. If you sync contact data to Loops with the API, an integration or with CSV uploads, you can include that data in your email.
- Event properties are pieces of data that can be sent along with every event (which are used to trigger workflow emails) via integrations or API calls.
- Data variables are pieces of data included in transactional emails, which are populated in the API call. You can utilize optional data variables to make your transactional emails more dynamic.
Add dynamic content to emails
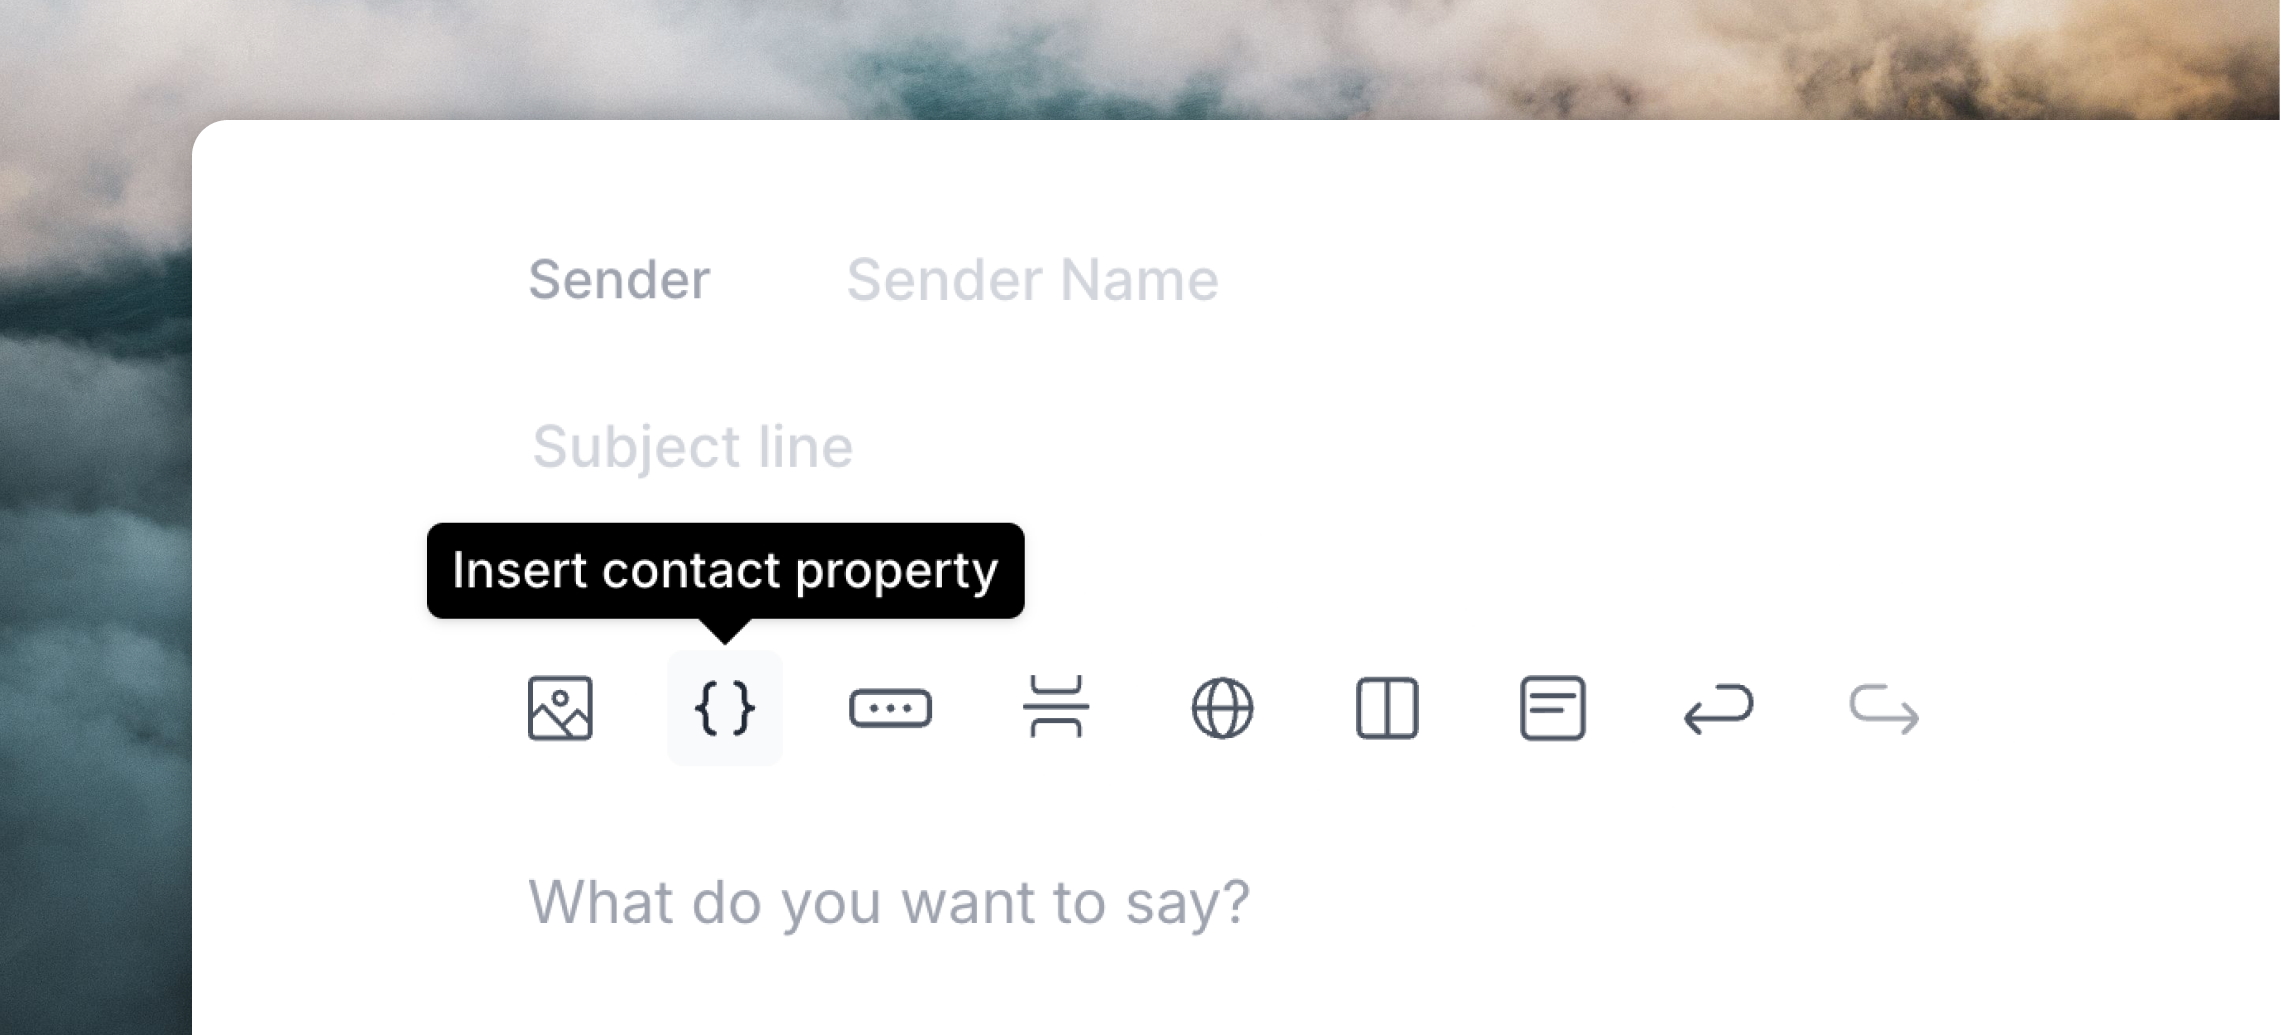
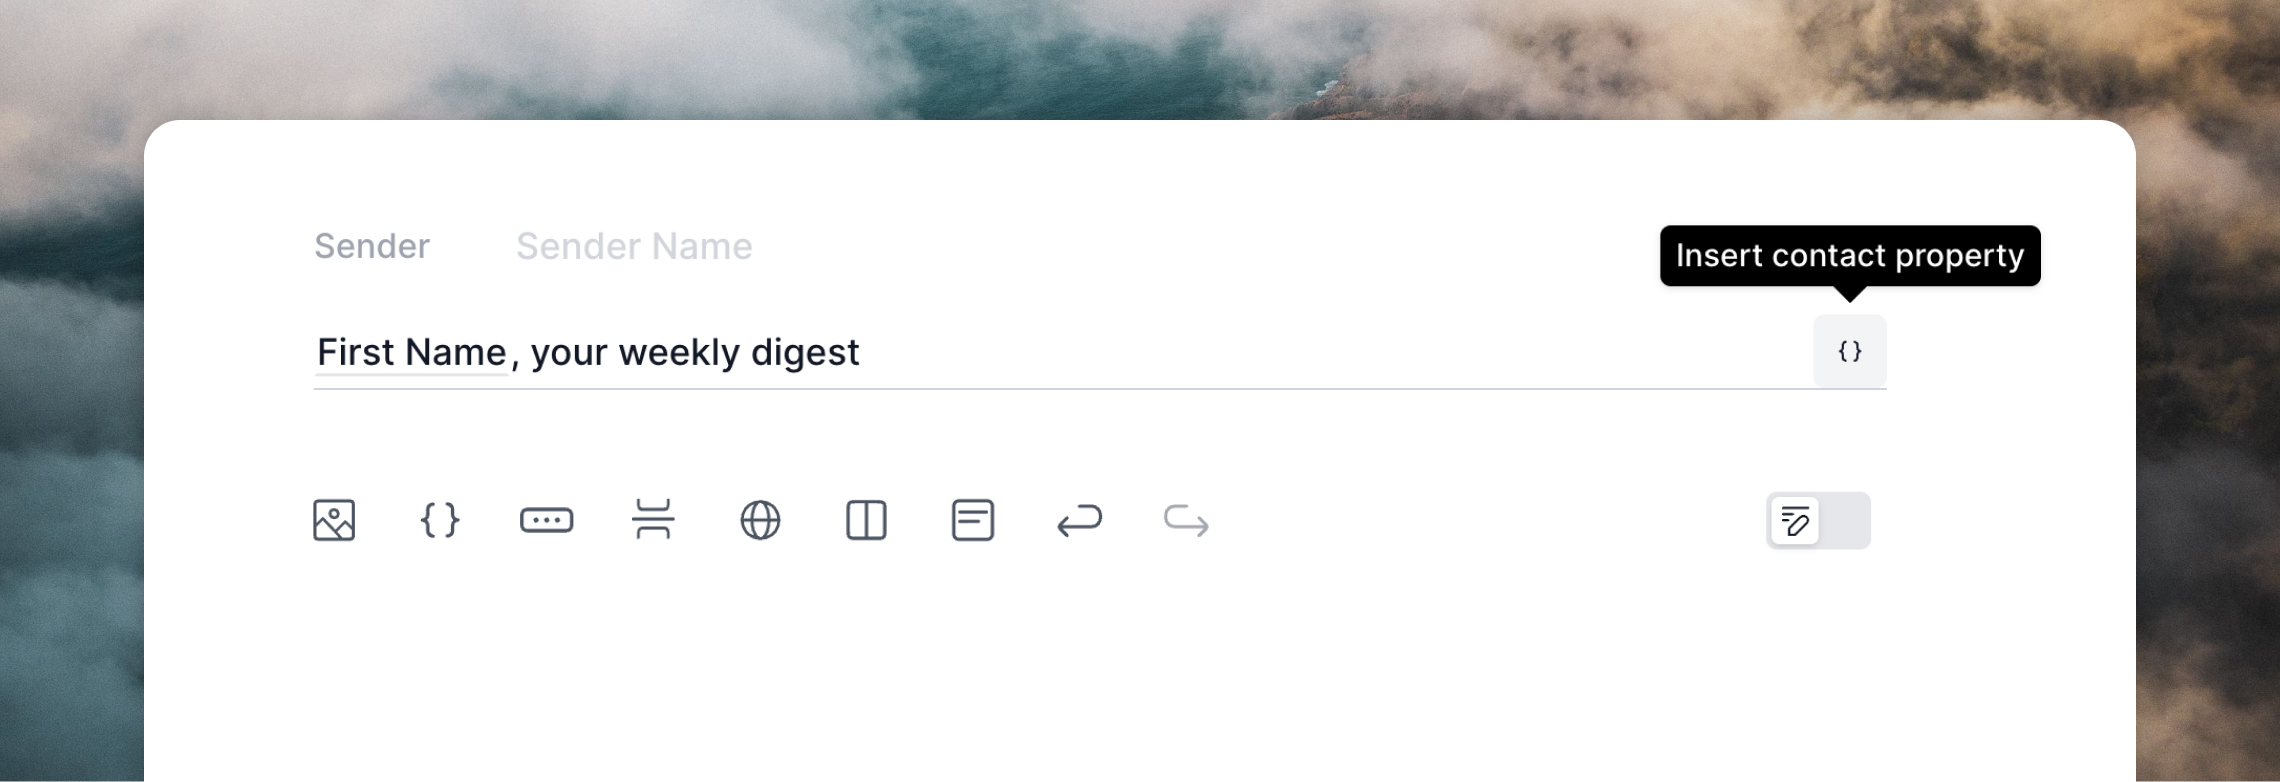
To add dynamic content to your emails, type ”{” anywhere in the editor or click the{} dynamic content icon in the email editor toolbar. Using either of these options will open the dynamic content menu, a filterable list of all available properties you can insert.
- Type
{or hit the{}icon in any editor field - Continue typing to filter results:
{firshows “firstName” - Use
↑/↓to navigate,Enterto select,Escapeto close
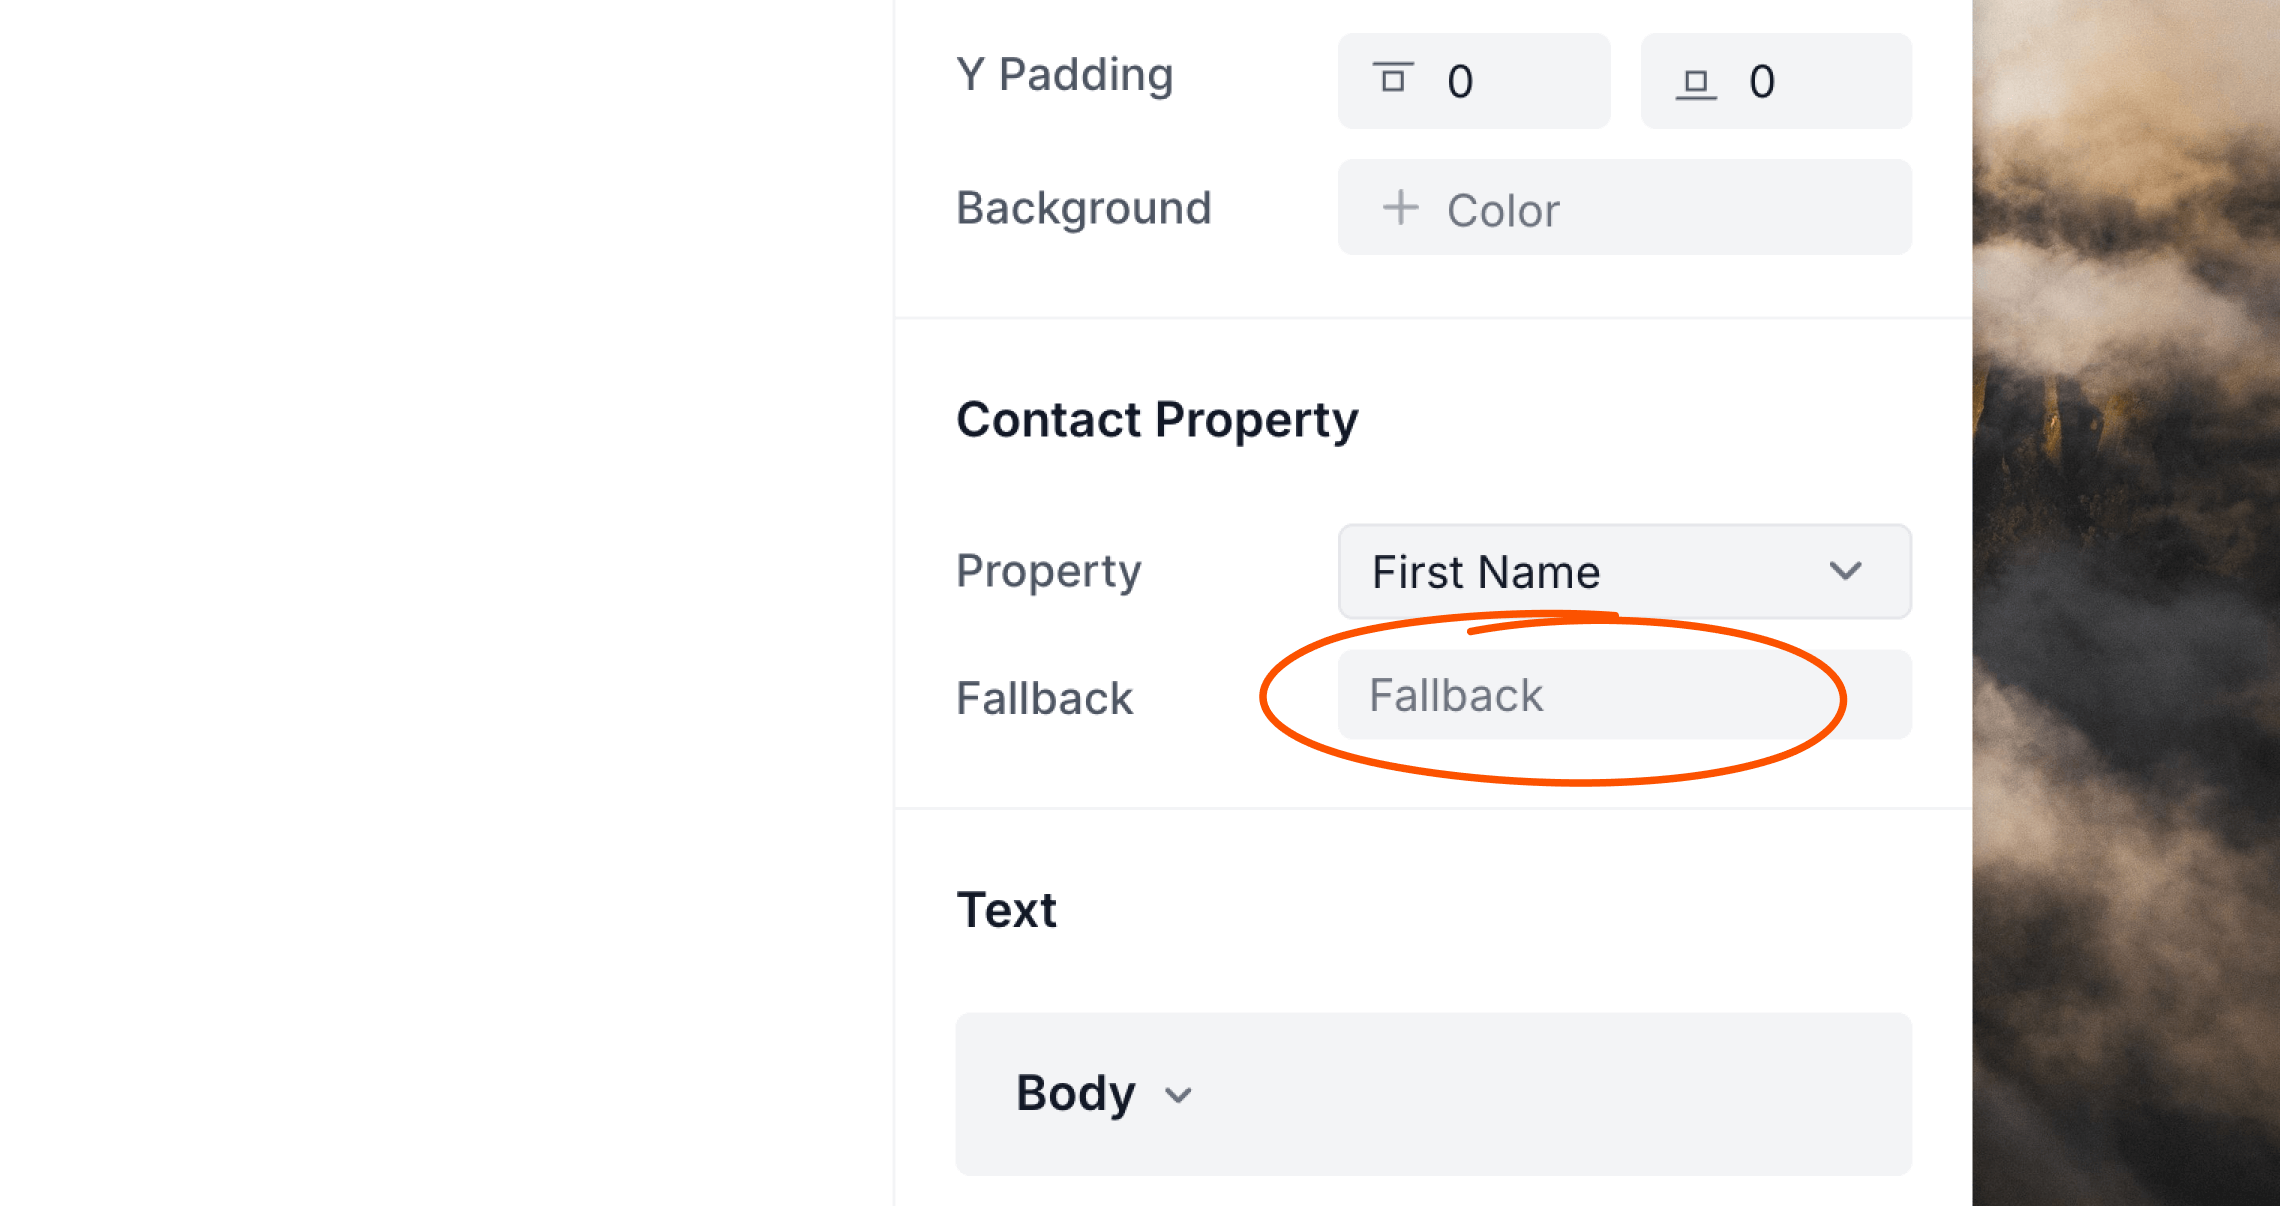
Fallback values
Fallback values are important for campaign and workflow emails. If a contact doesn’t have a value for a property, or an event property is missing, the email won’t send. When you insert a contact or event property using the dynamic content menu, you’ll be prompted to enter a fallback. This default text ensures your email still sends even when data is missing.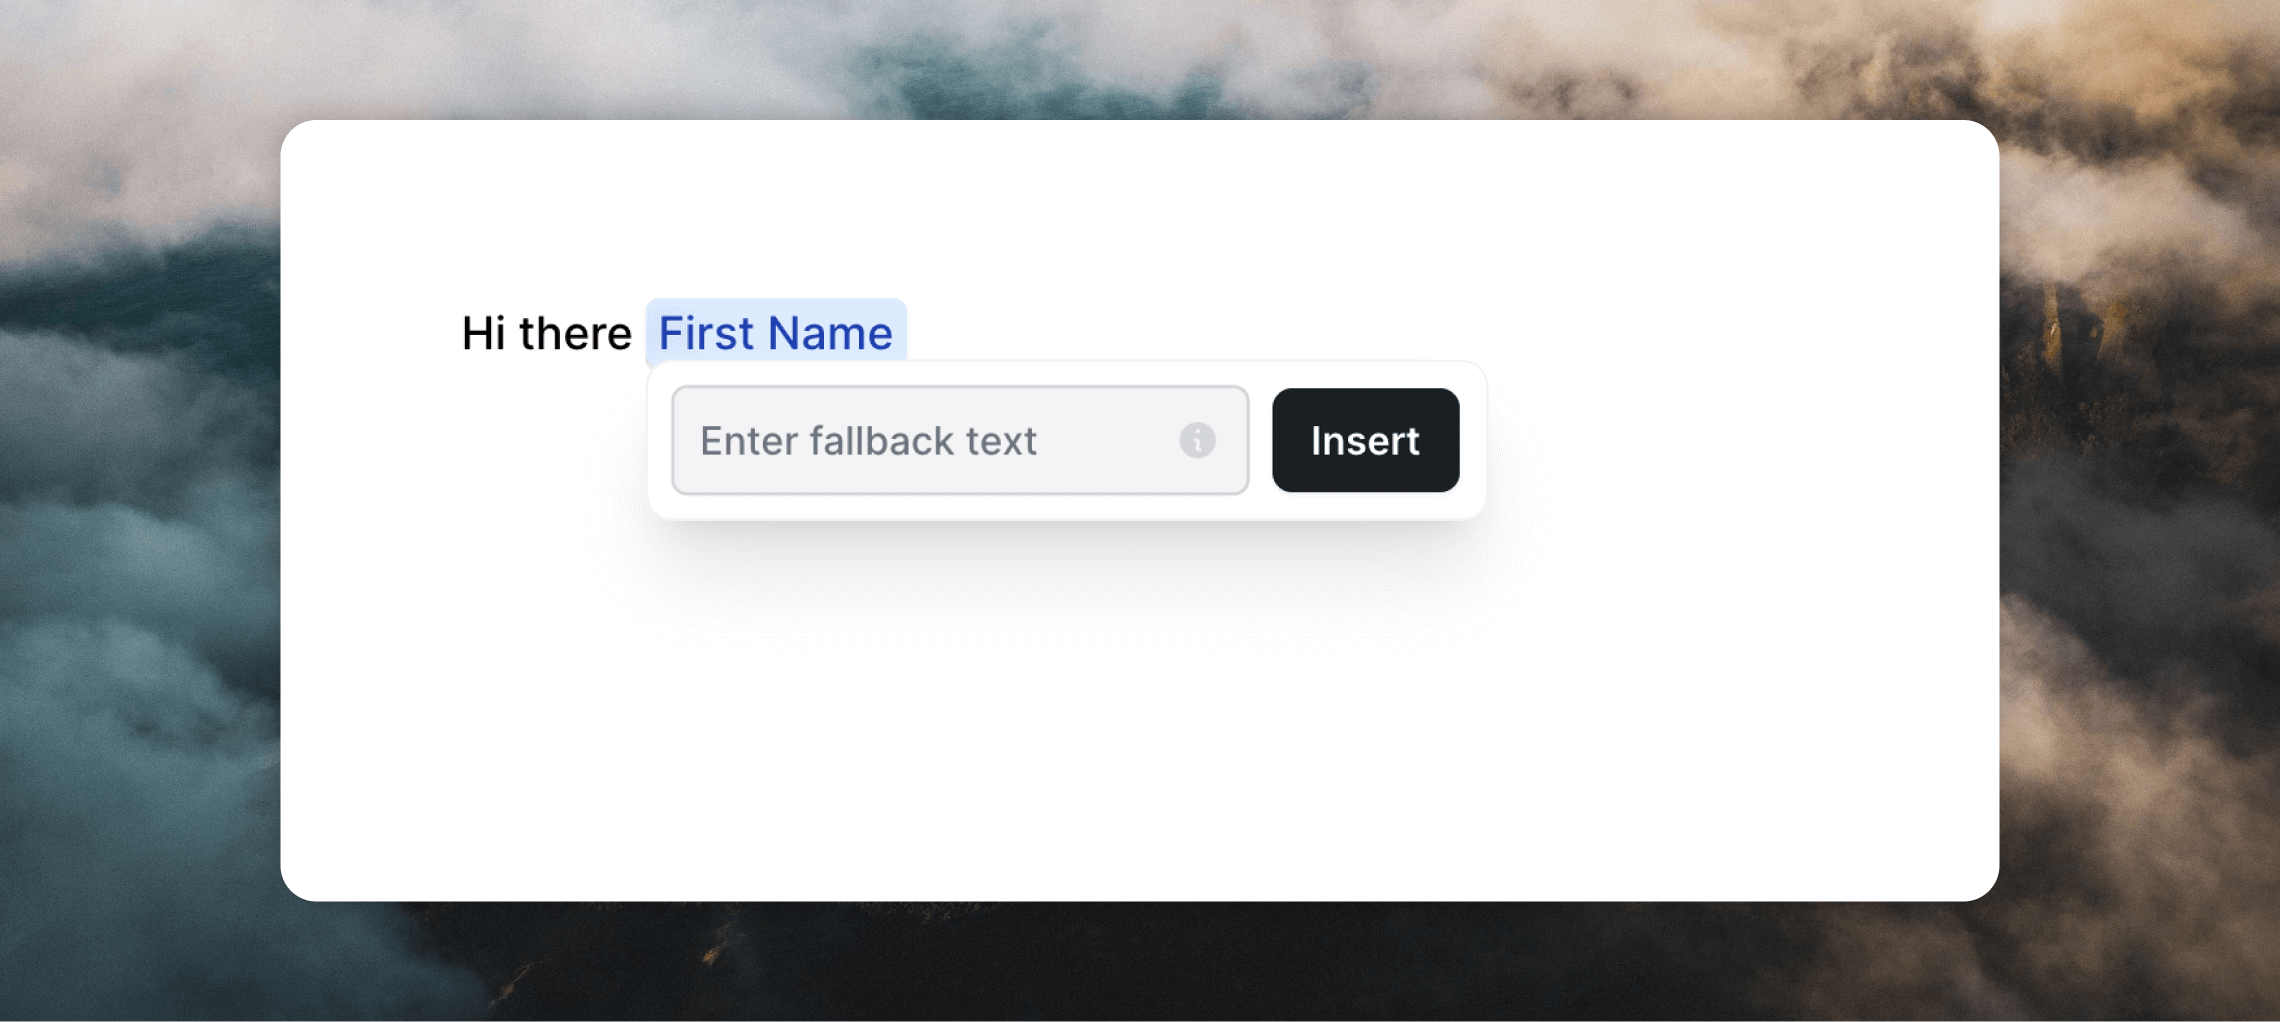
This keeps your emails feeling personalized even when specific data isn’t available.
Your fallback is saved and will auto-fill if you insert the same property again.
You can edit the fallback value later on from the editor panel.
Data variables in transactional emails
In transactional emails, dynamic tags work slightly differently: you can create new data variables in your email as you type.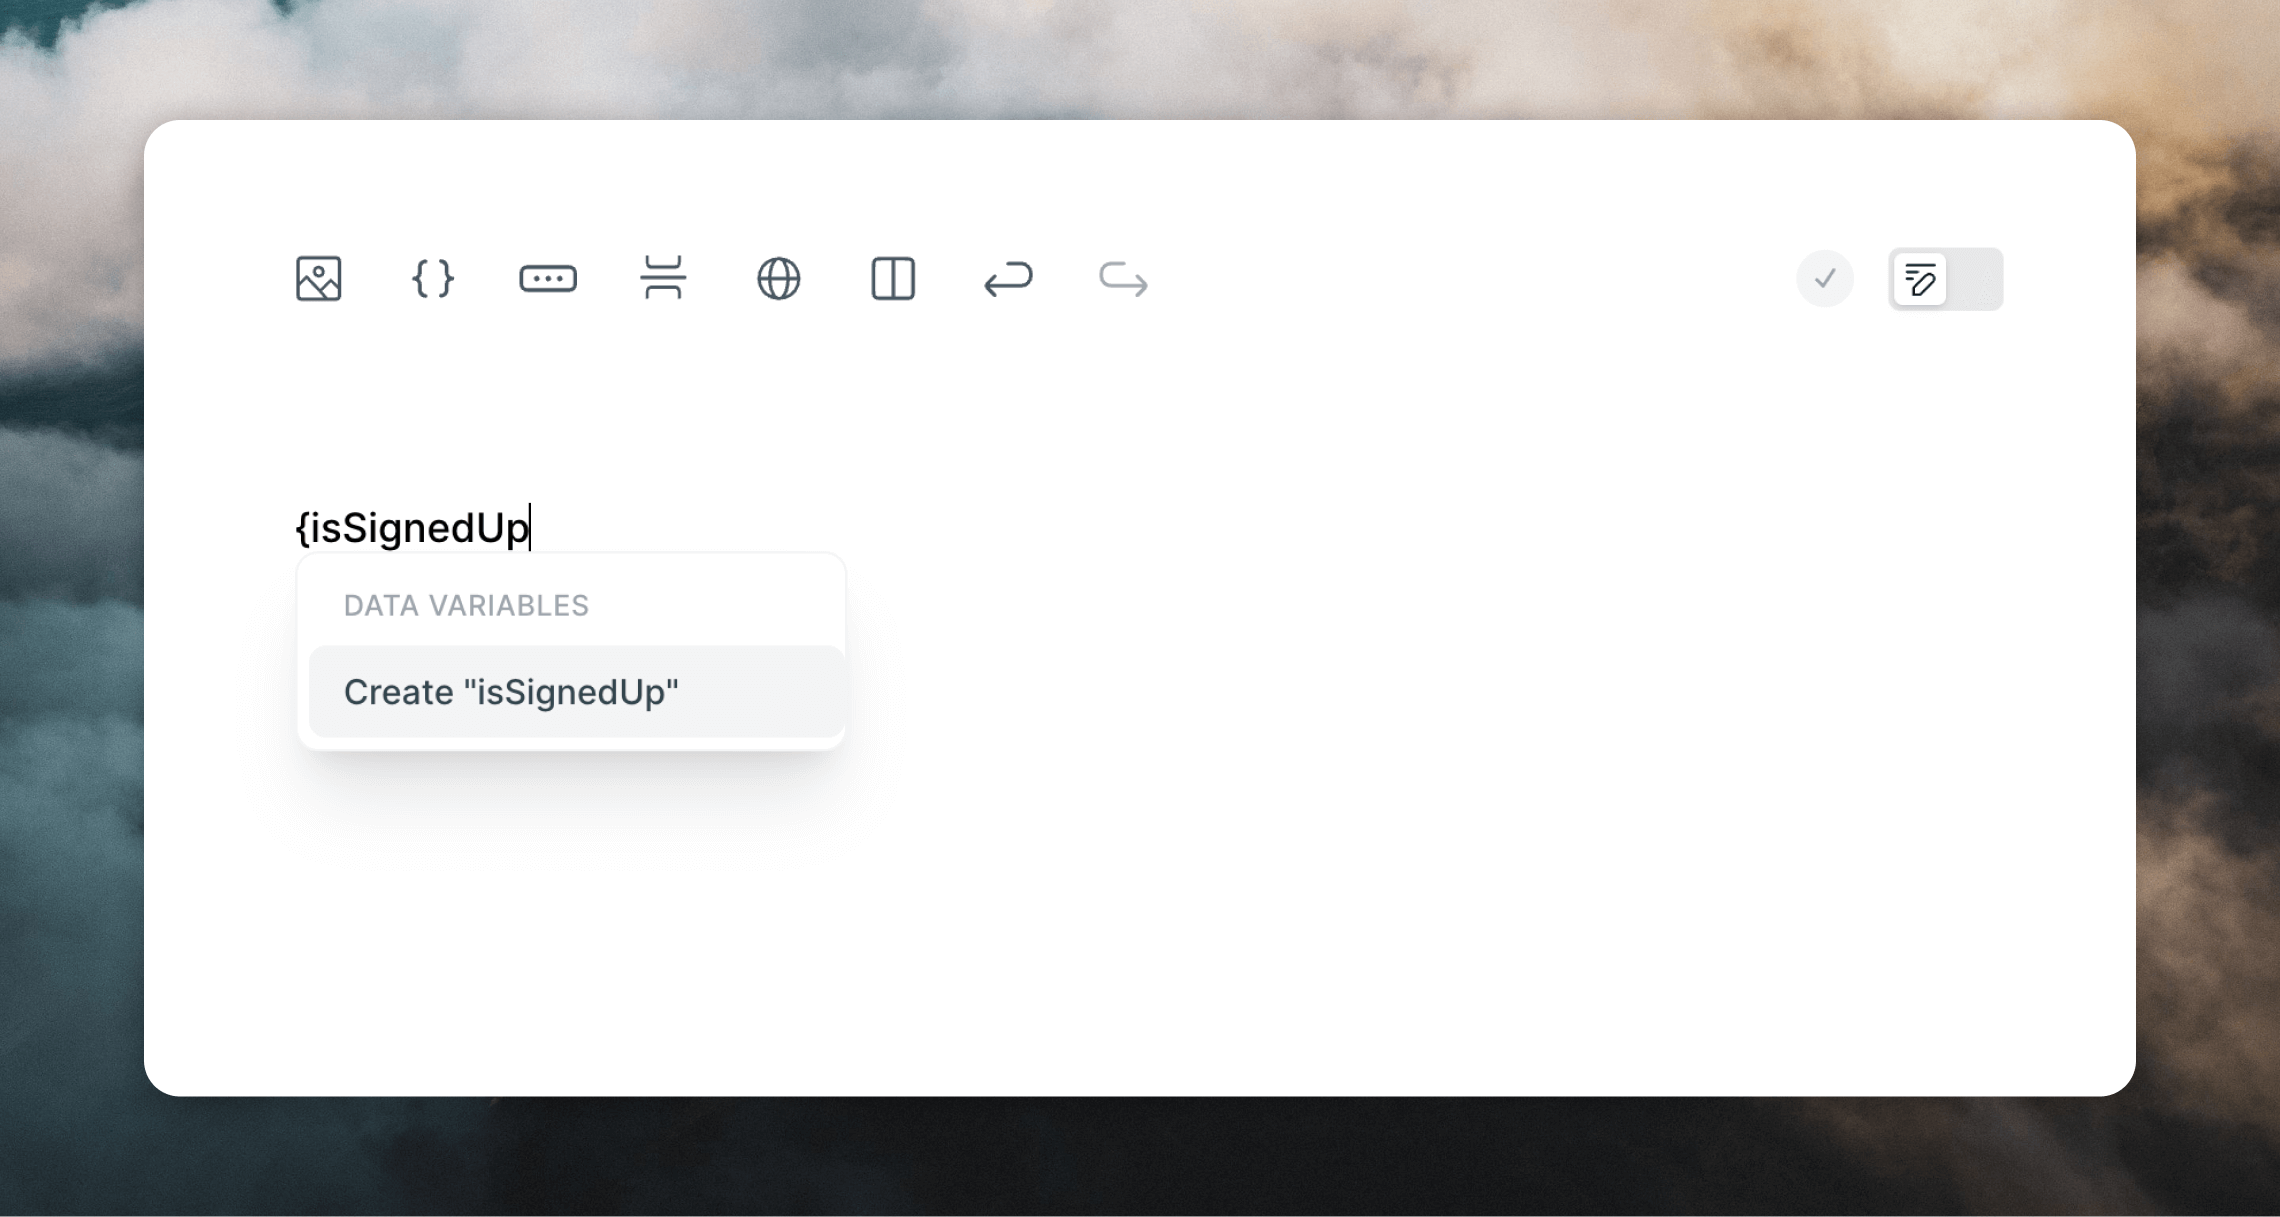
- Type
{orderTotal(using a new name that doesn’t exist). - Select Create “orderTotal” from the menu or press
Enter. - The variable is created and you can edit it from the editor panel (change the name or change to an optional variable).
Dynamic tag syntax
As well as using the dynamic content menu, you can write dynamic content “tags” directly in the email body. This is especially useful when uploading custom emails. These tags are the only way to add dynamic content in custom MJML emails, and to add dynamic content to button text in the editor.Contact properties
If you have a custom contact property namedteamName that you want to add to a campaign, you can write it surrounded by curly brackets in the email:
teamName value for each contact will be added to the email.

{firstName}, {lastName}, {email}, etc.
Event properties
To add dynamic data to workflow emails using event properties, the tag requires anEVENT_PROPERTY: prefix:
Data variables
To add data variables in transactional emails, the tag requires aDATA_VARIABLE: prefix: